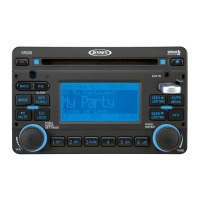
VR182
7
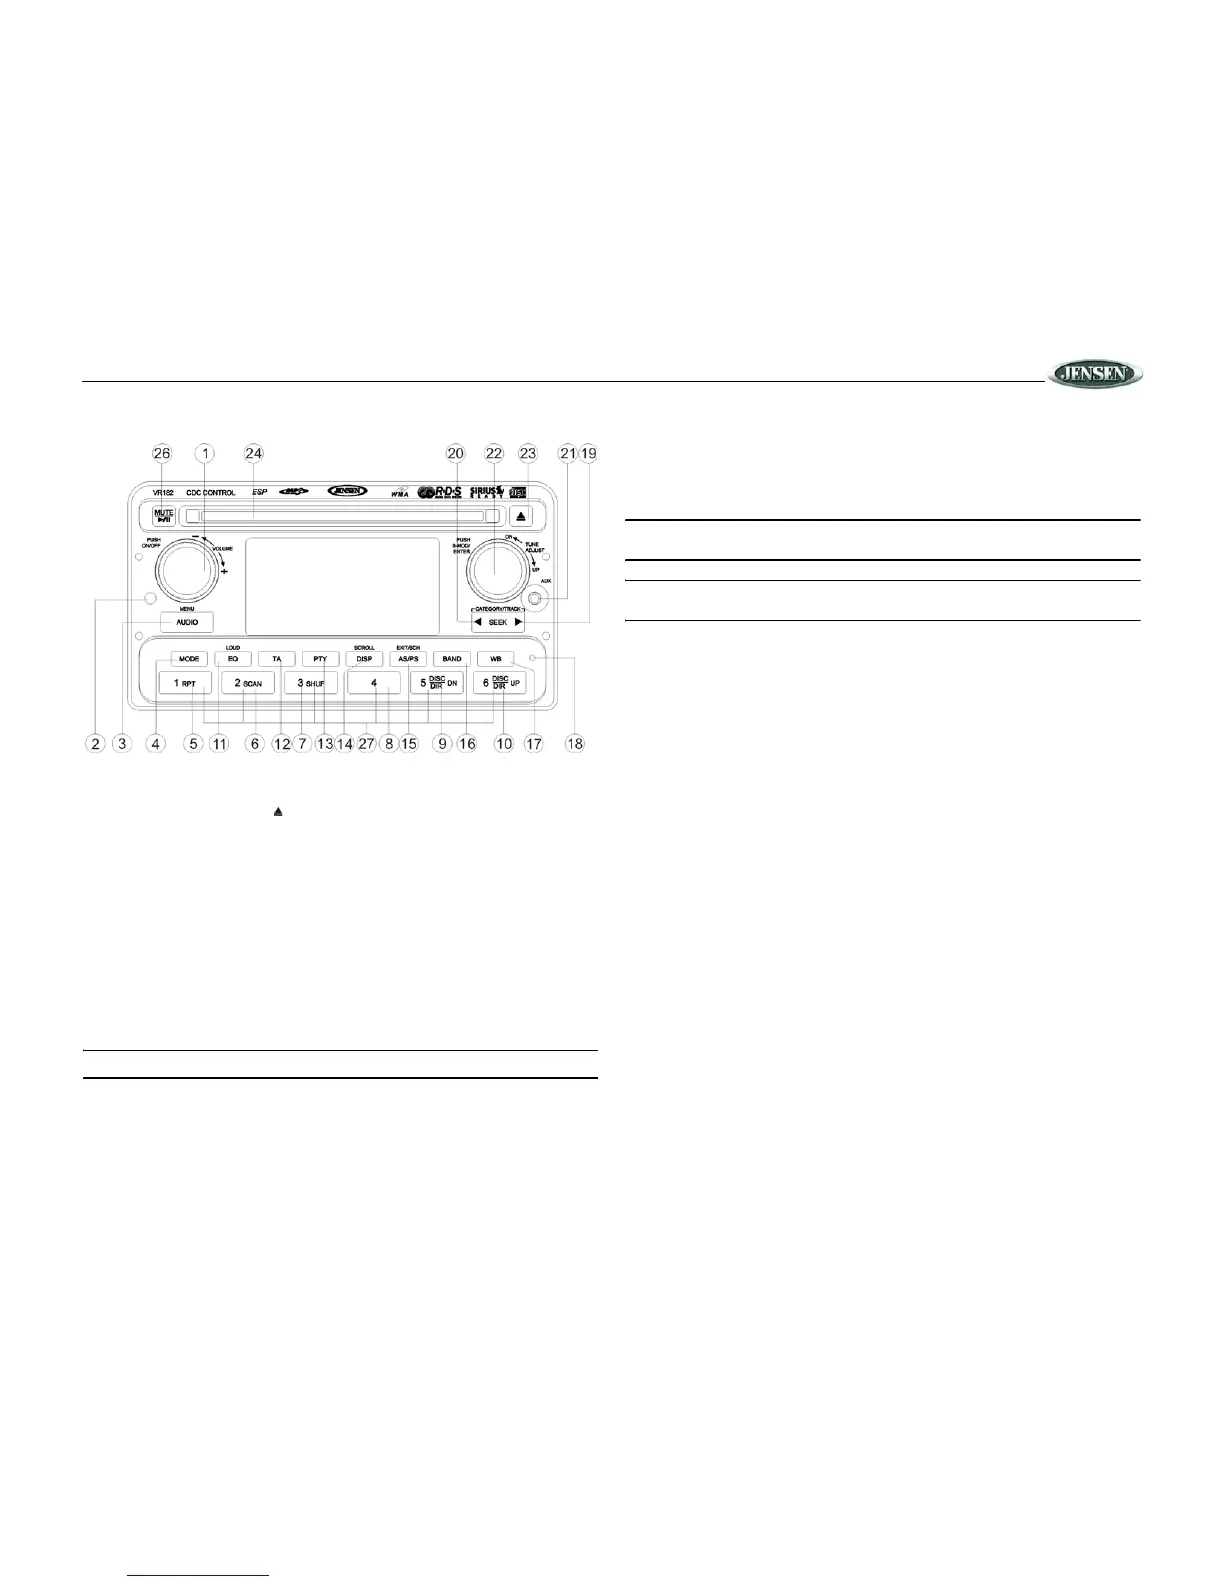
BASIC OPERATION
Power On/Off
Press any button (except the eject button (23)) to turn the unit ON. Press the VOLUME/ON/
OFF button (1) to turn the unit OFF.
Volume Control
To increase the volume, rotate the volume control (1) clockwise. The maximum level is “46”.
To decrease the volume, rotate the volume control counter clockwise.
Mute
Press the MUTE button (26) on the control panel to mute the audio output. “Mute” will appear
on the LCD display. Press MUTE again to restore the audio output to the previous level.
Mode
Press the MODE button (4) on the control panel to select a different mode of operation, as
indicated on the display panel. Available modes include TUNER, CD, SIRIUS, IPOD, CDC and
AUX IN.
NOTE: CDC, IPOD, or SIRIUS mode will be skipped if the module is not installed.
Adjusting the Clock (DISP)
The current time is displayed in the lower right hand corner of the LCD display.
To adjust the clock:
1. Press the DISP button (14) until the hour flashes on the LCD.
2. Rotate the VOLUME control (1) within 5 seconds to adjust the hours.
3. Press the DISP button again and the minutes will flash.
4. Rotate the VOLUME control within 5 seconds to adjust the minutes.
5. Press DISP again to exit time set mode. After 5 seconds, time set mode will exit
automatically.
NOTE: If the time mode is set to “12 HOUR” in the setup menu, continue turning the
VOLUME control to change between AM (A) and PM (P).
NOTE: If “P-CLOCK ON” is selected in the setup menu, the clock will be displayed in the
center of the LCD in large characters when the unit is turned off while the ACC is on.
Reset
Use a ball point pin or thin metal object to press the RESET button (18). The reset button
should be activated for the following reasons:
• initial installation of the unit when all wiring is completed
• function buttons do not operate
• error symbol on the display
To recover factory default settings, press and hold the MODE button (4) for more than 3
seconds. The LCD will display “EEP-INIT” and all settings will return to the original factory
values.
Audio Menu
Press the AUDIO/MENU button (3) on the control panel to access the Audio Menu. You can
navigate through the Audio Menu items by pressing the AUDIO/MENU button repeatedly.
Once the desired menu item appears on the display, adjust that option by turning the VOLUME
control (1) within 5 seconds. The unit will automatically exit the Audio Menu after five seconds
of inactivity. The following menu items can be adjusted.
Bass Level
Use the volume control to adjust the Bass level range from “-6” to “+6”.
Treble Level
Use the volume control to adjust the Treble level range from “-6” to “+6”.
Balance
Use the volume control to adjust the Balance between the left and right speakers from “12L”
(full left) to “12R” (full right).
Fader
Use the volume control to adjust the Fader between the rear and front speakers from “12R”
(full rear) to “12F” (full front).
 Loading...