Do you have a question about the JL Audio JX500/1 and is the answer not in the manual?
Advises users to limit exposure to high sound pressure levels to prevent hearing damage.
Covers installation applications, planning, cooling, safety considerations, and mounting precautions.
Provides space to record the amplifier's serial number for service or theft.
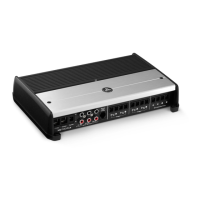
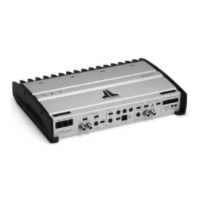
Describes the JL Audio JX monoblock subwoofer amplifiers and their intended use.
Outlines a step-by-step procedure for installing the amplifier in a vehicle.
Specifies minimum wire gauge requirements for power and ground connections based on model.
Details proper chassis grounding and essential fuse requirements for vehicle safety.
Explains how the amplifier is turned on/off via the remote turn-on lead and wire gauge.
Describes high-level (speaker) and low-level (preamp) input methods and their usage.
Explains how to adjust the input sensitivity control for maximum clean output.
Describes the 12dB/octave variable low-pass filter for subwoofer frequency control.
Explains the pass-through preamp output for multi-amplifier systems.
Details the single-band, boost-only bass equalizer control.
Describes the optional RBC-1 remote control for adjusting subwoofer volume.
Explains how to connect speakers to the amplifier's mono output.
Warns against bridging amplifiers and connecting loads below 2 ohms to avoid protection mode.
Explains the Power (Green) and Protect (Red) indicator lights and their meanings.
Advises returning the amplifier to an authorized dealer for service as there are no user-serviceable parts.
Provides a detailed nine-step procedure for setting input sensitivity using a voltmeter and test tone.
Warns against exceeding maximum sensitivity levels and re-adjusting after EQ changes.
Lists specifications for input types, ranges, and signal processing features.
Details power output, frequency response, and dimensions for JX250/1, JX500/1, and JX1000/1D models.
Refers to Appendix A for proper input sensitivity setting for maximum low-distortion output.
Guides through checking fuses, connections, and voltage for no-power or no-output problems.
Suggests checking amplifier and input connector connections if output fluctuates with bumps.
Outlines the 2-year (3-year with premium installation) warranty, coverage, and exclusions.
Provides contact details for JL Audio Customer Service and instructions for warranty returns.
Advises users to limit exposure to high sound pressure levels to prevent hearing damage.
Covers installation applications, planning, cooling, safety considerations, and mounting precautions.
Provides space to record the amplifier's serial number for service or theft.
Describes the JL Audio JX monoblock subwoofer amplifiers and their intended use.
Outlines a step-by-step procedure for installing the amplifier in a vehicle.
Specifies minimum wire gauge requirements for power and ground connections based on model.
Details proper chassis grounding and essential fuse requirements for vehicle safety.
Explains how the amplifier is turned on/off via the remote turn-on lead and wire gauge.
Describes high-level (speaker) and low-level (preamp) input methods and their usage.
Explains how to adjust the input sensitivity control for maximum clean output.
Describes the 12dB/octave variable low-pass filter for subwoofer frequency control.
Explains the pass-through preamp output for multi-amplifier systems.
Details the single-band, boost-only bass equalizer control.
Describes the optional RBC-1 remote control for adjusting subwoofer volume.
Explains how to connect speakers to the amplifier's mono output.
Warns against bridging amplifiers and connecting loads below 2 ohms to avoid protection mode.
Explains the Power (Green) and Protect (Red) indicator lights and their meanings.
Advises returning the amplifier to an authorized dealer for service as there are no user-serviceable parts.
Provides a detailed nine-step procedure for setting input sensitivity using a voltmeter and test tone.
Warns against exceeding maximum sensitivity levels and re-adjusting after EQ changes.
Lists specifications for input types, ranges, and signal processing features.
Details power output, frequency response, and dimensions for JX250/1, JX500/1, and JX1000/1D models.
Refers to Appendix A for proper input sensitivity setting for maximum low-distortion output.
Guides through checking fuses, connections, and voltage for no-power or no-output problems.
Suggests checking amplifier and input connector connections if output fluctuates with bumps.
Outlines the 2-year (3-year with premium installation) warranty, coverage, and exclusions.
Provides contact details for JL Audio Customer Service and instructions for warranty returns.
| Amplifier Class | Class D |
|---|---|
| Number of Channels | 1 |
| THD at Rated Power | < 1% |
| Damping Factor | > 200 |
| Input Sensitivity | 200 mV - 4 V |
| Crossover Type | Variable Low-Pass |
| Crossover Frequency | 50 Hz - 200 Hz |
| Rated Power (14.4V, 2 ohms) | 500 W |
| Power Output | 500 W |
| Signal-to-Noise Ratio | > 100 dB |
| S/N Ratio | >95 dB |
| Frequency Response | 10 Hz |
| Low Pass Filter | 24 dB/octave |
| Subsonic Filter | 20 Hz |
| Remote Level Control | Optional |
| Rated Power (14.4V, 4 ohms) | 300 W RMS x 1 |
| Dimensions | 12.75 x 9.5 x 2.25 in |