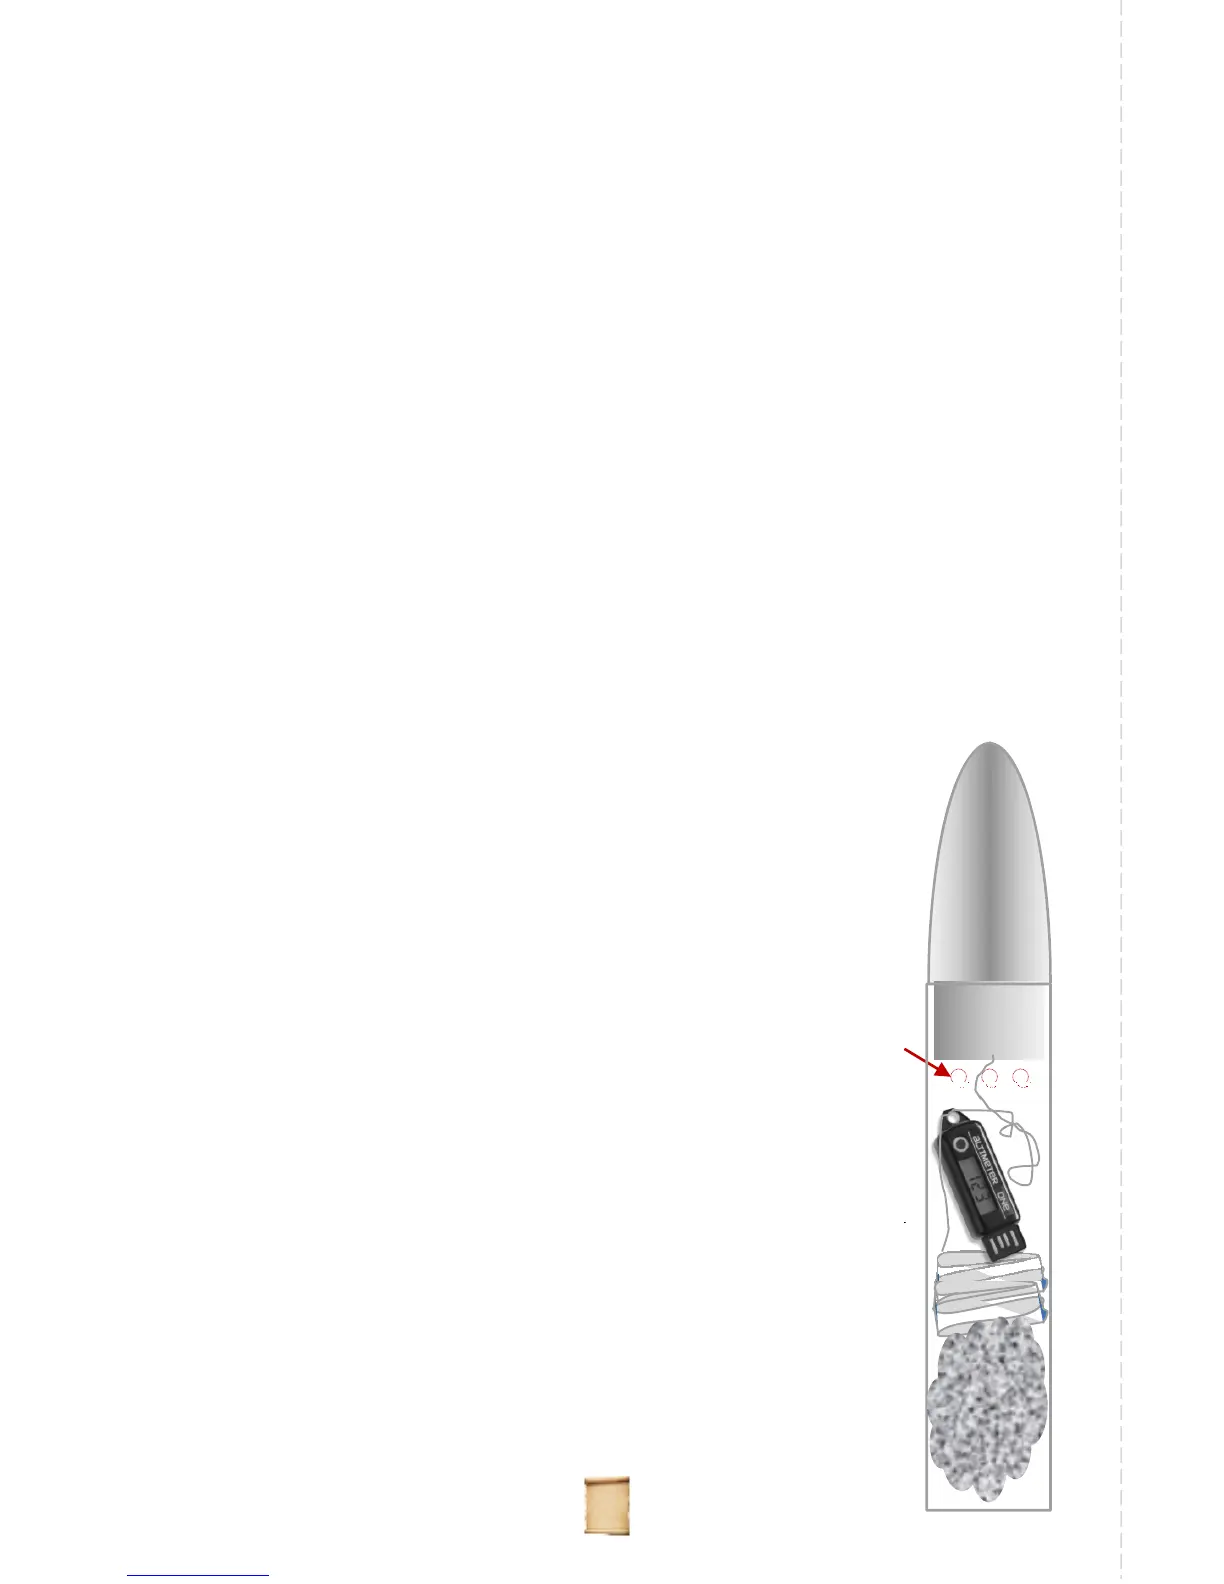
Installation Tips
Your altimeter can ride in a payload bay or in the main
fuselage of a rocket, inside a plane, or clipped to your
kite. In any case, follow these guidelines for best results.
Let It Breathe
The altimeter needs to sense outside atmospheric
pressure at all times. For rockets, we advise that you
punch at least three 1/8” diameter holes evenly spaced
around the rocket as close to the nosecone as possible,
but low enough not to be blocked by the nosecone once
it is inserted. The holes can be quite small (the diameter
of a pencil lead), but make sure that they are not
blocked when you launch.
Altimeter on Top
For rockets, placing the altimeter as close to the nose as
possible protects it from exhaust gases, allows it to be as
near as possible to your vent holes, and assists in
keeping the center of gravity of your rocket above its
center of pressure so that it remains stable in flight.
Option to Consider: Streamer Recovery
On a windy day when you’re worried that you might
lose your rocket—or when you’re worried your payload
bay or plane may come apart—consider adding a
streamer to the altimeter. It’s okay to wrap the streamer
around the body of the altimeter, since the altimeter
“breathes” through a hole near its attachment loop on
the end.
Vent holes
are important!
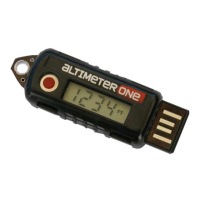
Your altimeter has an advanced Lithium Polymer battery, the same
type of battery used in the latest laptops and cell phones (only
much, much smaller).
It can be recharged in any standard USB port, including those on
computers, printers, and other devices.
Recharging Directions
Insert the altimeter into a USB port
The back will glow red or green near the plug
if inserted properly
If unit does not glow when inserted:
a. Make sure computer is turned on
b. Flip the altimeter over and try again
Red glow indicates that altimeter is charging
Green glow indicates that charging is 100% complete
Fully charging the altimeter usually takes about two hours if the
battery is completely discharged. It does not hurt the battery to
leave it in the charger, and it’s fine to “top it off ” whenever you
can.
The battery holds enough charge to power the altimeter for at
least 14 hours of continuous use.
Recharging
Glow area
is on the back
jolly logic
3
jolly logic
4
 Loading...