–
47
–
Adjustment Procedure
Results of Improper Adjustment
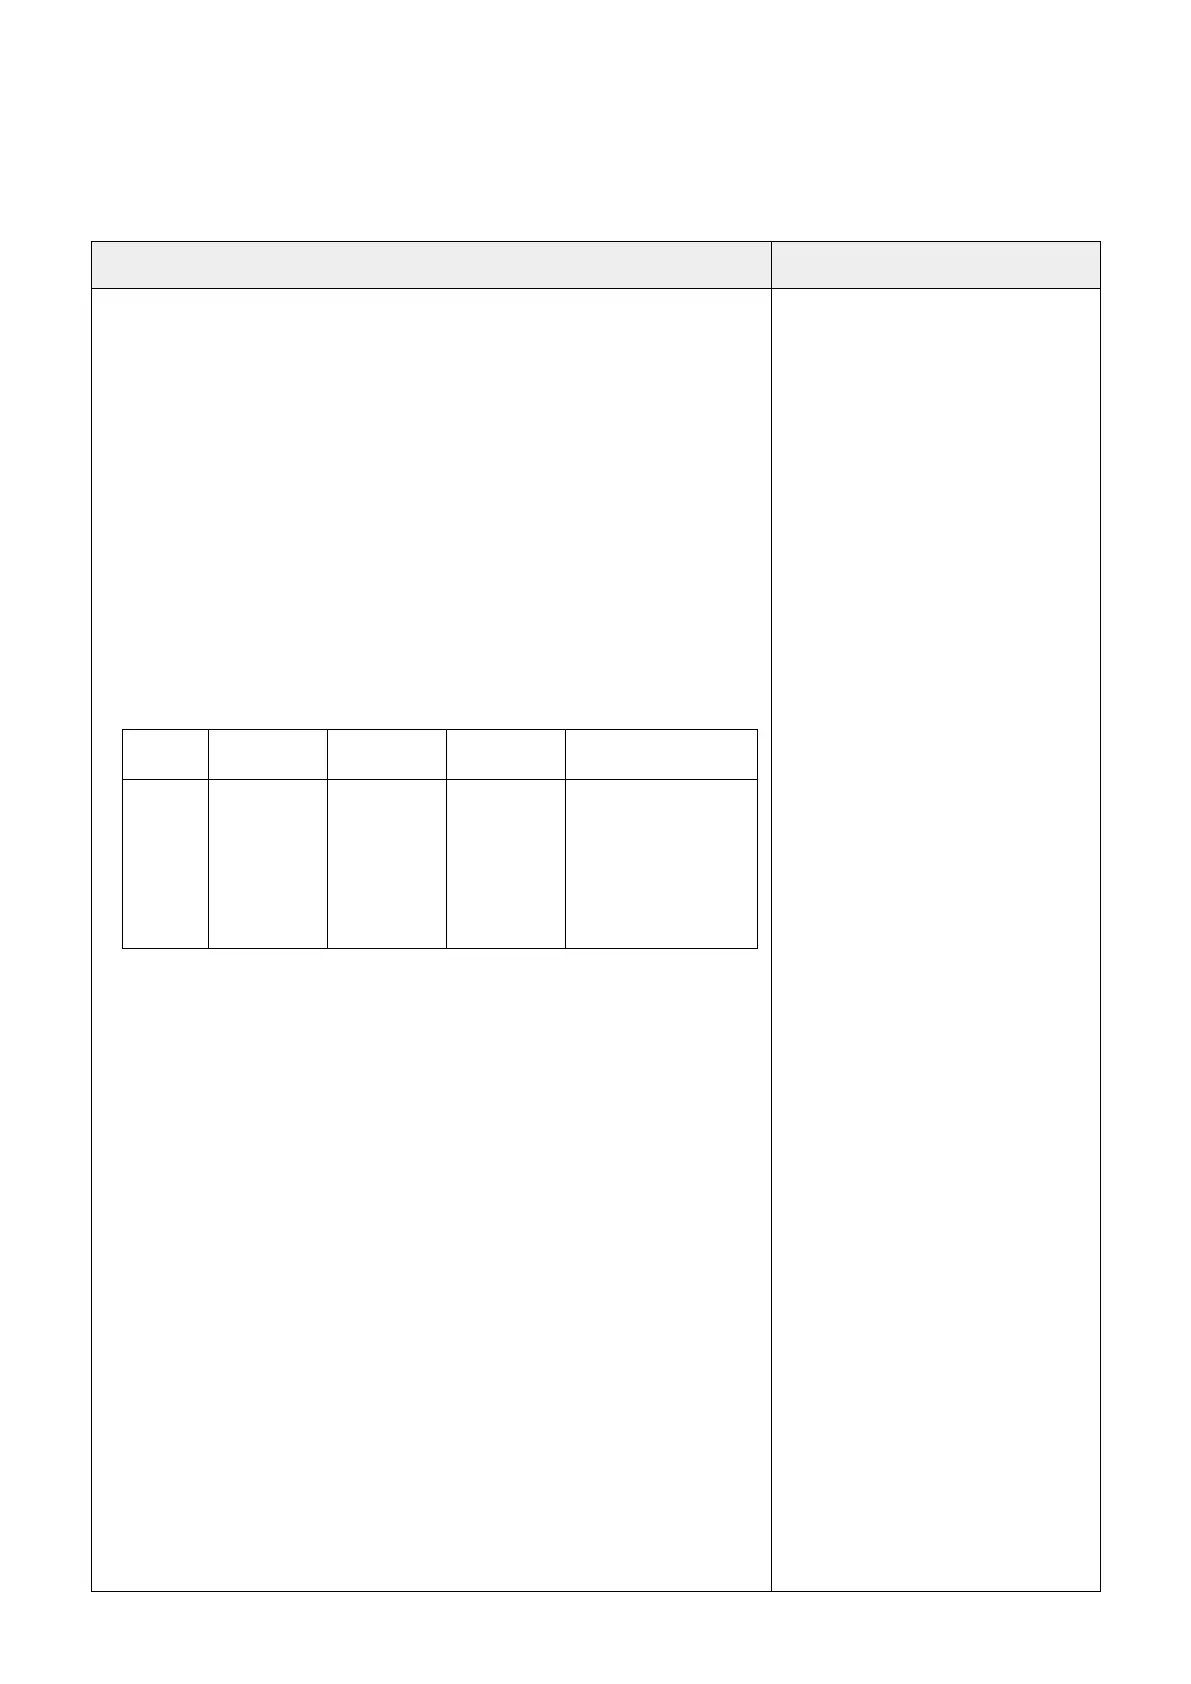
Checking items:
❶
Thread tension adj. knob
❷
Thread tension gear
❸
Release cam
❹
Roll hemming tension shaft
* Using Junior Spun thread #90 or FUJIX King Polyester Spun #90,
check that the thread tensions are the numeric values shown below.
(Scale mark on the knob "4")
* Under the conditions described above, turn release cam
❸
in the
direction of the arrow, and conrm that the values shown in the table
below are obtained.
Standard tension table
How to perform adjustment:
Thread tension dial
○
Set thread tension adjustment knob
❶
at scale mark "4" (position of
the mark on the left side).
○
Lift the thread tension gear xing claw (A). Adjust the thread tension
by moving thread tension gear
❷
with a Phillips screwdriver.
The tension is increased by turning the gear clockwise. It is decreased
by turning the gear counterclockwise.
Caution: If thread tension gear xing claw (A) is lifted excessively,
the claw can break.
Roll hemming thread tension controller
○
Adjust the height of roll hemming tension shaft
❹
, using a at-blade
screwdriver, to provide the thread tension for roll hemming.
○
If the tension is low relative to the standard tension, turn the roll
hemming tension shaft clockwise to increase the tension. The thread
tension will be decreased by turning it counterclockwise.
If the thread tension deviates from
the standard adjustment value,
sewing failures can be caused
when carrying out sewing with the
thread tension described in the
Instruction Manual.
If the thread tension is excessive-
ly high, thread breakage can be
caused.
Left-hand
needle thread
Right-hand
needle thread
Upper looper
thread
Lower looper thread
Scale
mark on
the knob
"4"
0.39±0.05N
(40±5g)
0.15±0.03N
(15±3g)
0.11±0.03N
(11±3g)
0.10±0.05N
(10±5g)
When used for roll
hemming
0.10±0.05N
(10±5g)
When used for sewing
 Loading...