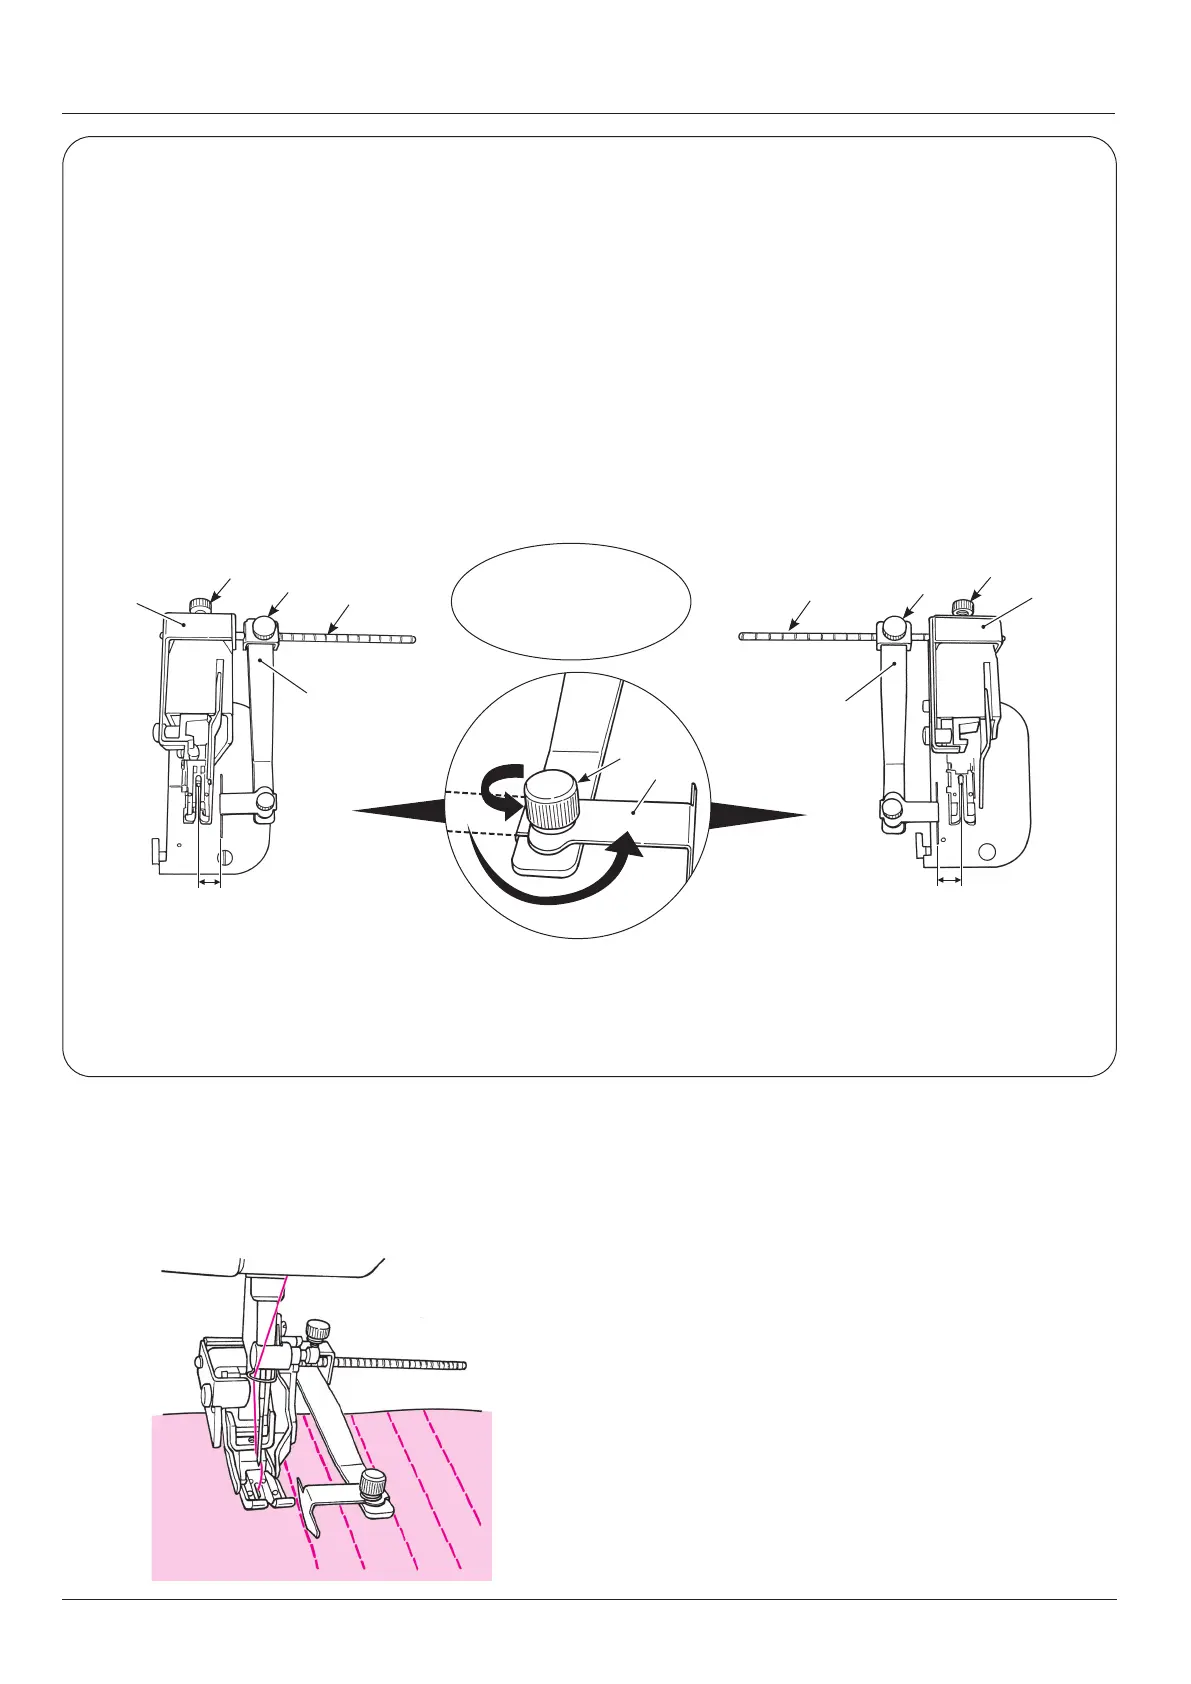
In the case of setting the guide on the
right side of needle
4
Carry our sewing using the guide as
reference.
Stitches can be sewn while keeping the regular
stitch intervals.
①
Aligning the leftmost scale mark on guide
bar
A
with the left edge of guide base
B
,
tighten setscrew
❸
.
②
Aligning guide
C
with the rst scale mark
from the right edge of guide base
B
,
tighten setscrew
❹
. The distance from
the needle position to the guide is 1 cm.
①
Aligning the rightmost scale mark on guide
bar
A
with the right edge of guide base
B
,
tighten setscrew
❸
.
②
Aligning guide
C
with the second scale
mark from the left edge of guide base
B
,
tighten setscrew
❹
.
The distance from the needle position to the
guide is 1 cm.
3
Adjusting the guide position.
Adjust the guide position referring to the needle
position and positional relation between the bar
scale and guide. Securely tighten the setscrew.
In the case of setting the guide on the
left side of needle
The interval of
scale marks on the
guide bar is 5 mm.
❸
❹
A
C
B
1 cm
B
C
A
1 cm
❸
❹
Remove setscrew
❶
. The stitch ruler can be used on both
the right and left sides by changing the mounting position of
guide section
❷
from right to left or left to right.
(Example: In the case of guiding the material so that it is kept 1 cm away from the needle position)
❶
❷
26

 Loading...