Introduction of optional parts
CAUTION:
Turn OFF the power switch when replacing the presser foot.
1
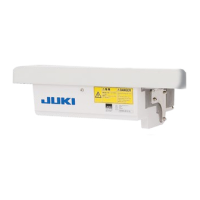
Install the compensating presser foot.
2
Fit material end to guide and sew.
It is convenient to sew material end straight.
Guide
Presser foot
Screw in the
presser foot
CAUTION:
Turn OFF the power switch when replacing the presser foot.
1
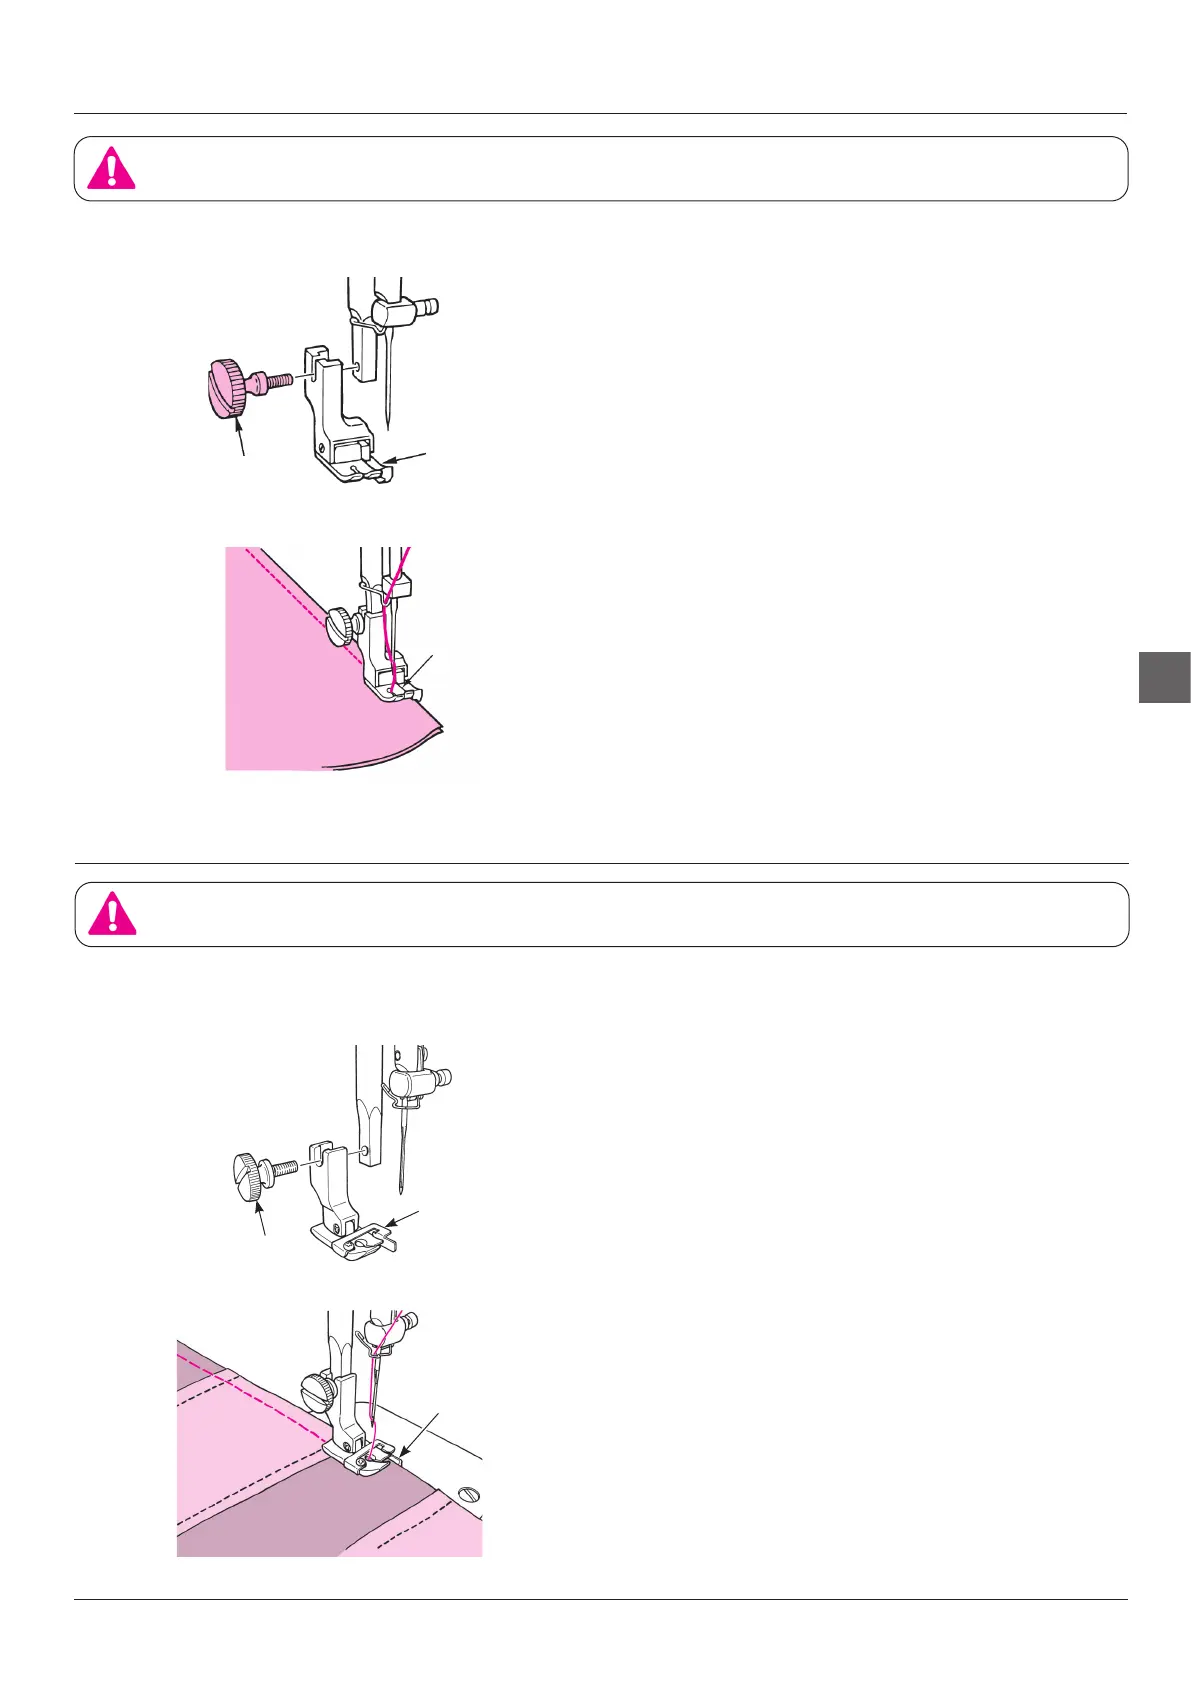
Install the 1/4” (7mm) presser foot.
Loosely attach presser foot setscrew. Then, attach
the 1/4”(7mm) presser foot and securely tighten
the setscrew.
2
Sew the material while aligning its edge
with the guide.
Stitches can be sewn at the position which is 1/4”
(7mm) away from the guide.
Guide for 1/4” (7mm) seam allowance for piecing is pro-
vided.
Guide
Presser foot
Screw in the
presser foot
■
Compensating presser foot
■
1/4” (7 mm) presser foot
31

 Loading...