28
Preparation
2
■
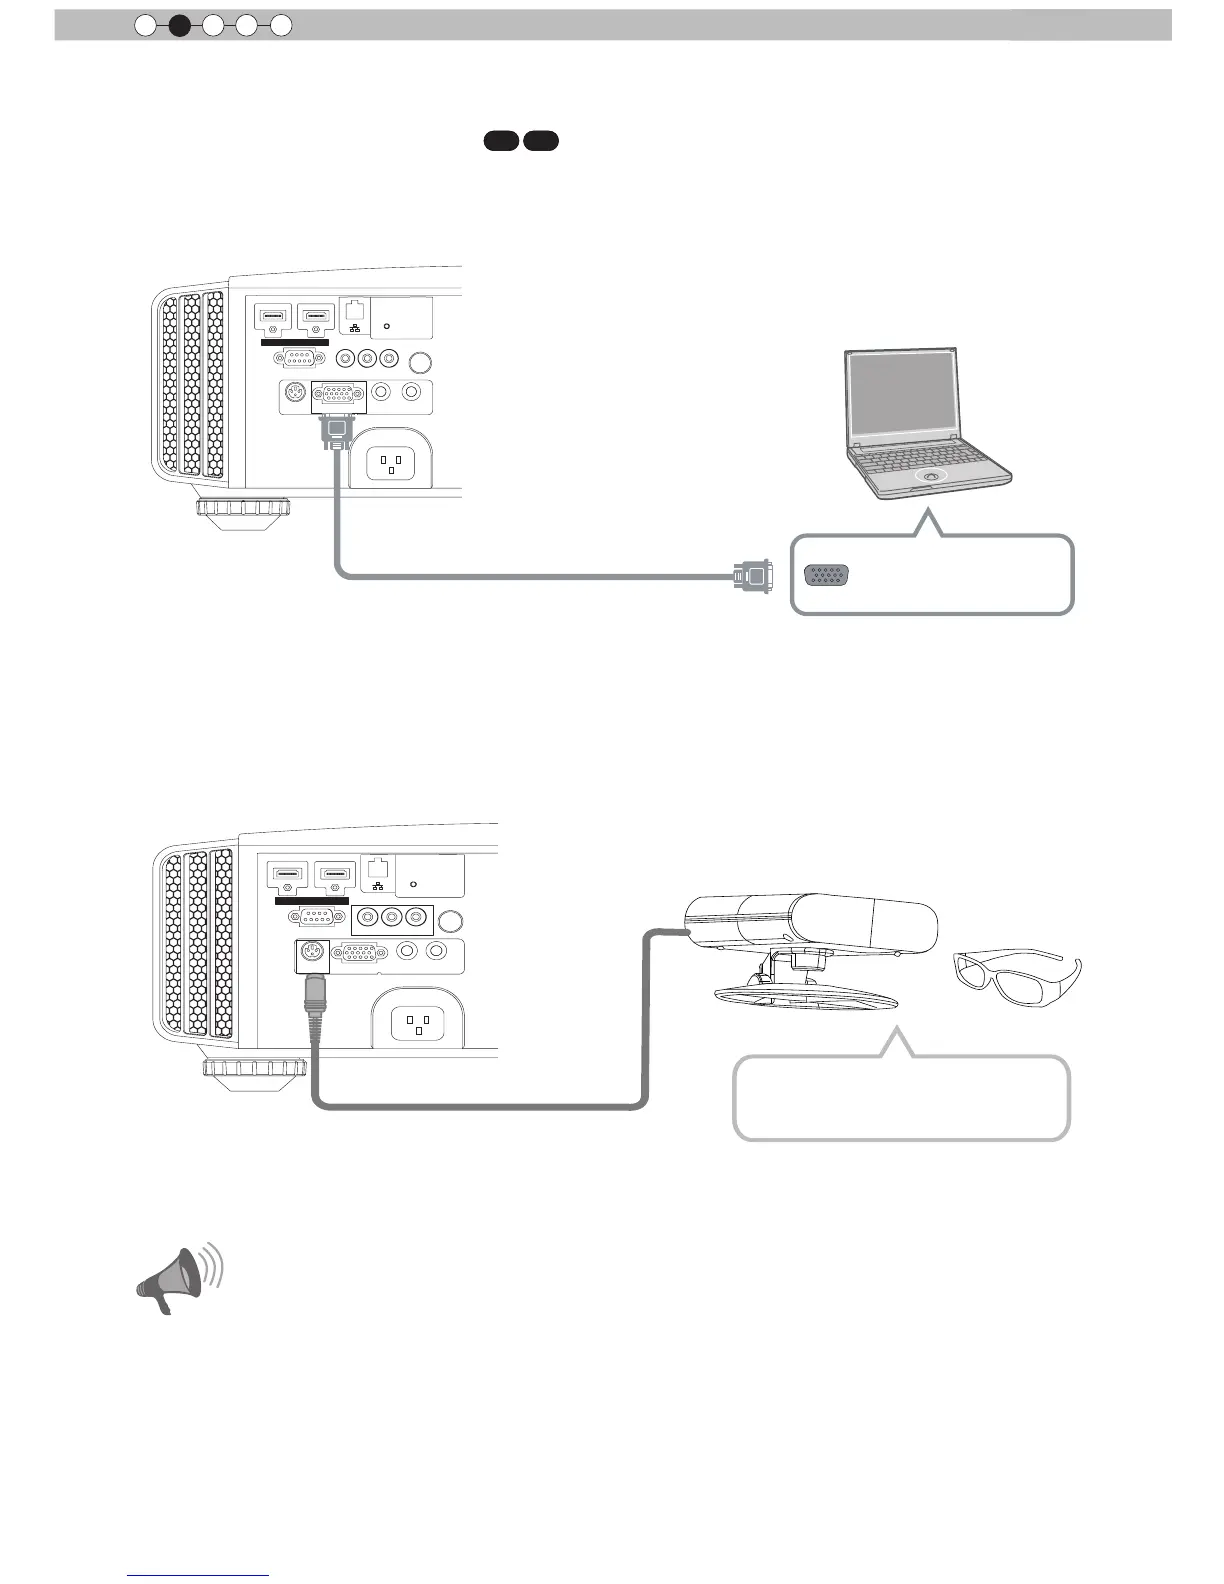
Connecting via PC Cable
X7 X9
About the connection (Continued)
1 HDMI 2
RS-232-C
3D
C
R/
P
R
C
B/
P
B
Y
SYNCHRO
PC
TRIGGER
REMOTE
CONTROL
STANDBY/ON
MENU
BACK
INPUT
OK
This unit
●
For information on supported input signals, please refer to
“
Specications
”.
(Reference page: 73)
PC cable
(
sold separately
)
To PC input terminal
VGA output terminal
Notebook PC
■
Connected by a 3D SYNCHRO terminal
1 HDMI 2
RS-232-C
3D
C
R/
P
R
C
B/
P
B
Y
SYNCHRO
PC
TRIGGER
REMOTE
CONTROL
STANDBY/ON
MENU
BACK
INPUT
OK
This unit
●
3D synchro emitter: This is a dedicated terminal for PK-EM1 (sold separately).
●
3D glasses (PK-AG1-B) is an optional device, and is not included in the 3D synchro emitter.
●
Note that converting 2D images to 3D ones using the 3D feature of this product, and playing them for
commercial purposes or for broadcasting in public places may infringe the rights of authors protected
under the copyright laws.
●
3D images may appear different depending on the ambient temperature and lamp usage. Stop using the
projector if images cannot be projected correctly.
●
Before you watch 3D video images, make sure to read "3D description of the system"
(Reference page 57 to 59).
3D synchro emitter
3D-glasses
CAUTION
 Loading...