1) Close the LCD monitor to turn off the camcorder.
The battery will take 90 minutes to full charge. The lamp will
blink indicating the battery is in the charging process. The
lamp will turn off when the battery is completely charged.
Charging the Battery Pack
2) Attach the battery pack.
Slide the battery pack down until it locks in place.
Bottom of the Camcorder
3) Connect the AC adapter.
Using Laser Touch
• How to change settings using Laser Touch
2) Slide your fi nger up
and down on the Laser
sensor.
3) Touch the OK button.
• Using on-screen buttons
[A] To select an on-screen
button appearing on
the left side, touch the
portion of the sensor
next to the on-screen
button.
[B] To select an on-screen button appearing at the bottom of
the screen. Press the buttons underneath them.
• How to playback your videos using Laser Touch.
1) Press the MENU button.
1) Press the SELECT PLAY/
REC button to display
thumbnails on the screen.
2) Highlight thumbnail using
laser sensor and press OK.
1) Load the supplied CD-ROM into the
computers CD/DVD drive. The set
up screen should appear to guide
you through the process. If not,
double click the CD-ROM icon (in
My Computer).
2) Click Easy Installation
to start.
3) Now click yes to start
InstallShield Wizard.
4) Choose your desired
language.
5) Click yes to start software
installation.
6) Click Finish.
Recording Your Memories
Preparation: • Insert an SD card.
• Open lens cover.
• Open the LCD monitor to turn on the
Camcorder.
4
The movie camcorder icon
represents recording video.
The camera icon represents
recording stills.
1) Slide the mode switch to select (video or still image) mode.
2) Press the SELECT PLAY/REC button to set on recording
mode.
3) Press the START/STOP button to start or stop recording.
• To take digital still images, fi rst slide the mode switch to
Still Image mode.
4) Press the SNAPSHOT button to take pictures.
• To view the video or image you just recorded select
During the preview you can delete the video or image by
selecting
How to Install
7) Connect the USB Cable to both
PC and Everio Camcorder.
Video features to set in menu are:
Quality (4 recording modes Ultra
Fine, Fine, Normal & Eco.), Zoom,
DIS, 16:9 recording.
Digital Still feature to set is:
Quality (Fine and Standard).
Select an item from the menu list on the menu screen.
Easy Start up Guide
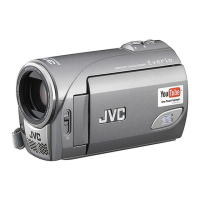
This easy start up guide is designed to navigate you
to using your new Everio quickly. Please refer to the
owner’s manual for a detailed listing of features.
For our online tutorials please visit:
http://camcorder.jvc.com/tutorials.jsp
BATT.
DC Jack
AC Adapter
To AC Outlet
(110V to 240V)
Charge lamp
SD
PLAY/REC
SELECT
USB Port
To AC Outlet
AC Adapter
USB Cable
DC Jack
USB Jack
MENU
IMAGE QUALITY
GAIN UP
SHUTTER MODE
BASIC SETTINGS
~!
Ÿ
MENU
IMAGE QUALITY
GAIN UP
SHUTTER MODE
BASIC SETTINGS
M8S3_EasyStartup_EN_B6_4.indd 1M8S3_EasyStartup_EN_B6_4.indd 1 7/16/2008 12:52:56 PM7/16/2008 12:52:56 PM



 Loading...