EN
33
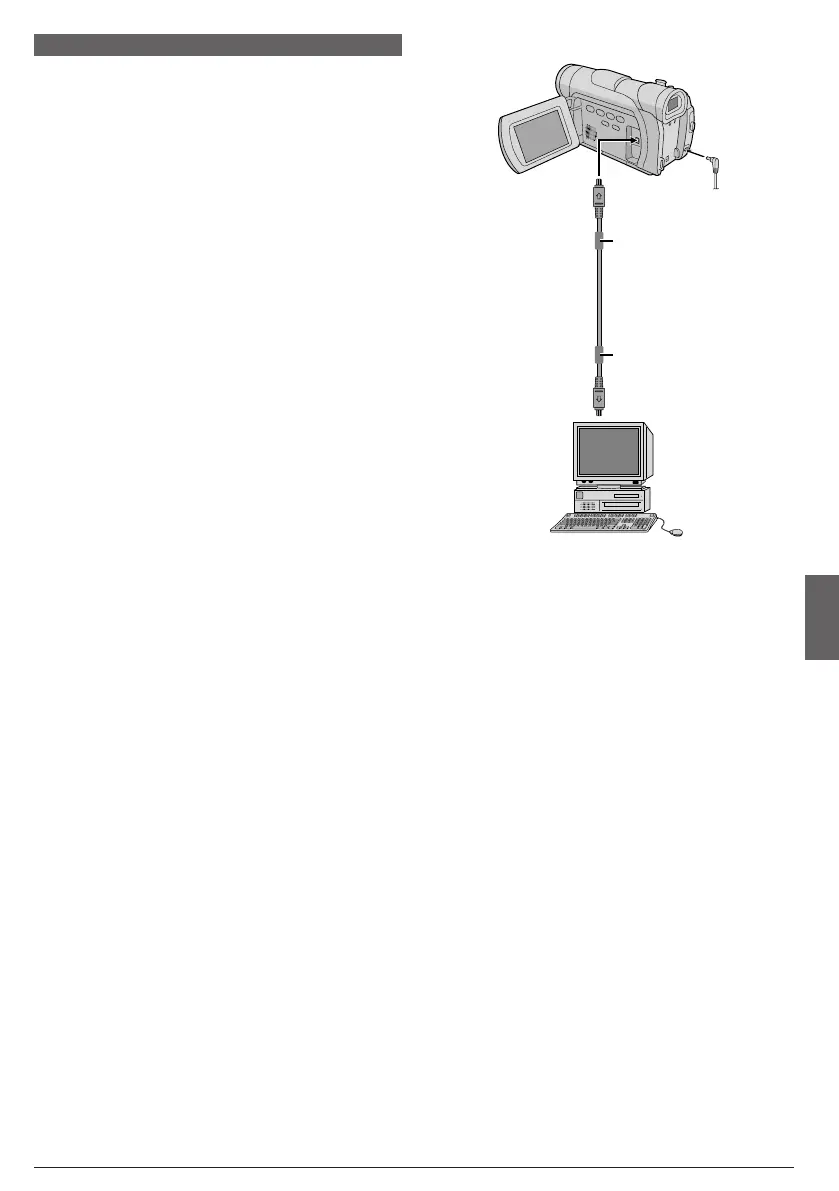
SYSTEM CONNECTIONS
To DV !
DV cable
(optional)
To DV
connector
PC with DV
connector
Core filter
Core filter
Connection To A Personal Computer
It is possible to transfer video to a PC with a DV
connector by using provided software, software
equipped with the PC or commercially available
software.
1 Make sure the camcorder and PC are turned off.
2 Connect the camcorder to your PC using the
appropriate cable as shown in the illustration.
3 Turn the camcorder’s Power Switch y to “PLAY”
while pressing down the Lock Button t located on the
switch and turn on the PC.
• Refer to the instruction manual of the software on how
to transfer video to the PC.
4 When finished, turn off the PC first, then the
camcorder.
NOTES:
● Refer to “SOFTWARE INSTALLATION AND DV
CONNECTION GUIDE” for the installation of the bundled
software.
● It is recommended to use the AC Adapter as the
power supply instead of the battery pack (
墌 pg. 7).
● The date/time information cannot be captured into the
PC.
● Use the provided software PIXELA ImageMixer to
capture video in real-time.
● Refer to the instruction manuals of the PC and Software.
● When using a DV cable, be sure to use the optional
JVC VC-VDV206U or VC-VDV204U DV cable depend-
ing on the type of DV connector (4 or 6 pins) on the
PC.
● The system may not work properly depending on the PC
or capture board you are using.
GR-D31/21EK 28-33 02.12.19, 9:15 PM33
 Loading...