EN31
Set to “ ”.
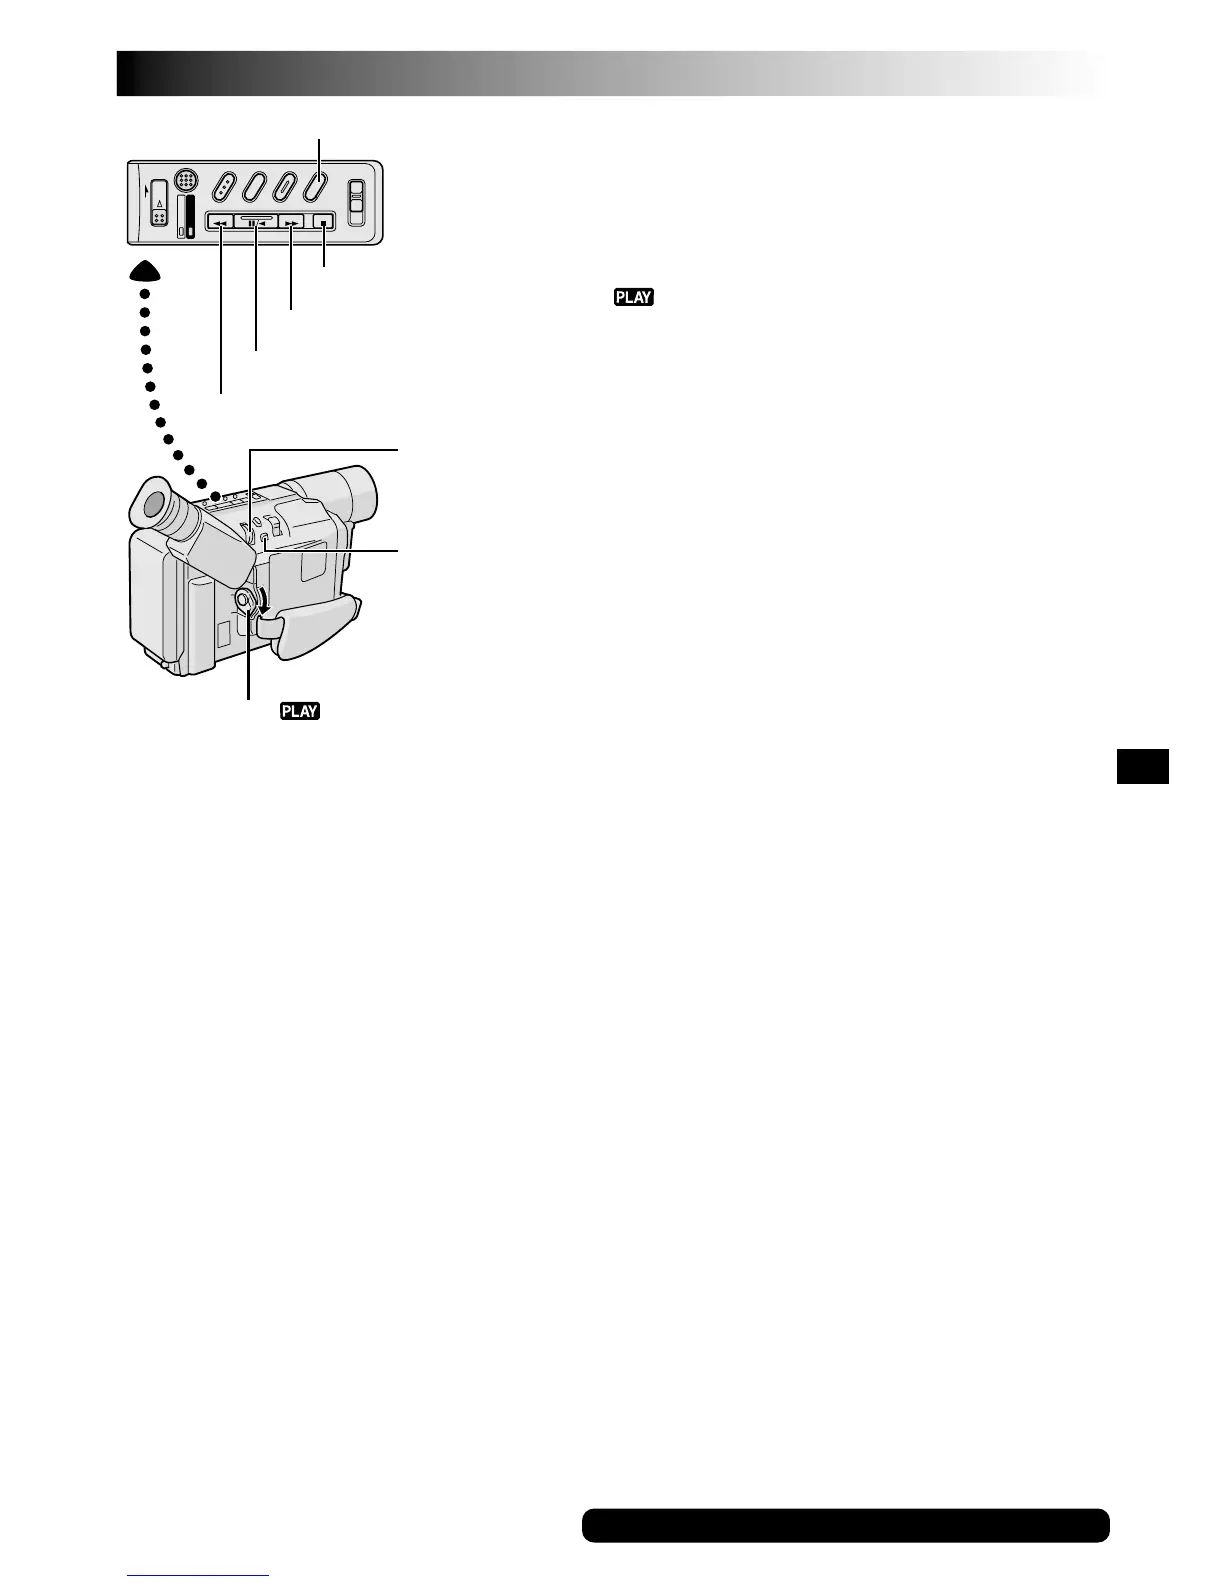
TBC Button
PLAYBACK
Features
COUNTER R/M Button
Rewind (
2
) Button
Fast-Forward (
3
) Button
Play/Pause (
4
/6) Button
Stop (5) Button
Tracking: Eliminates noise bars that appear on-screen
during playback. Factory-preset is Auto Tracking.
To activate Manual Tracking:
1) Press TRACKING for approx. 2 seconds. “MT” appears.
2) Rotate TRACKING so that the noise bars disappear.
●
To return to Auto Tracking, press TRACKING for approx.
2 seconds or set the Power Switch to “OFF” and then
” ” again. “AT” blinks. When Auto Tracking finishes,
the indication disappears.
●
When noise bars appear during playback, the
camcorder enters the Auto Tracking mode and “AT” is
displayed.
●
Manual Tracking may not work with tapes recorded on
other VCRs or camcorders.
TBC (Time Base Corrector): Removes jitter from
fluctuating video signals to deliver a stable picture even
with old tapes. Factory-preset: TBC is engaged.
To activate/release the TBC mode, press TBC during
playback for more than 1 second. When the TBC mode is
activated, “TBC” is displayed.
Counter Memory Function: Makes it easier to
locate a specific tape segment.
1) Press COUNTER R/M and hold for more than 1 second.
The counter resets to “0:00:00”.
2) Press COUNTER R/M for less than 1 second.
“M” appears.
3) After recording or playback, press 5, then
2
. The tape
automatically stops at or close to 0:00:00.
4) Press
4
/6 to start playback.
●
The counter memory functions in the Fast-Forward and
Rewind modes.
●
To disable the Counter Memory Function, press
COUNTER R/M for less than 1 second so that “M”
disappears.
Playback Special Effects (CLASSIC FILM,
MONOTONE, SEPIA, STROBE and VIDEO
ECHO, 墌 pg. 21): Allows you to add creative
effects to the playback image.
1) Activate the TBC mode and Auto Tracking.
2) Press DIGIFECT repeatedly until the desired mode’s
name and indication appear. They are displayed for
approx. 2 seconds, then the name disappears so that
only the indication remains. The mode is activated.
3) To cancel the effect, select “OFF” in step 2.
●
Playback Special Effects do not work during shuttle
search.
●
The selected effect mode cannot be changed during still
playback.
TRACKING
Wheel
For other notes, 墌 pg. 44
 Loading...