2
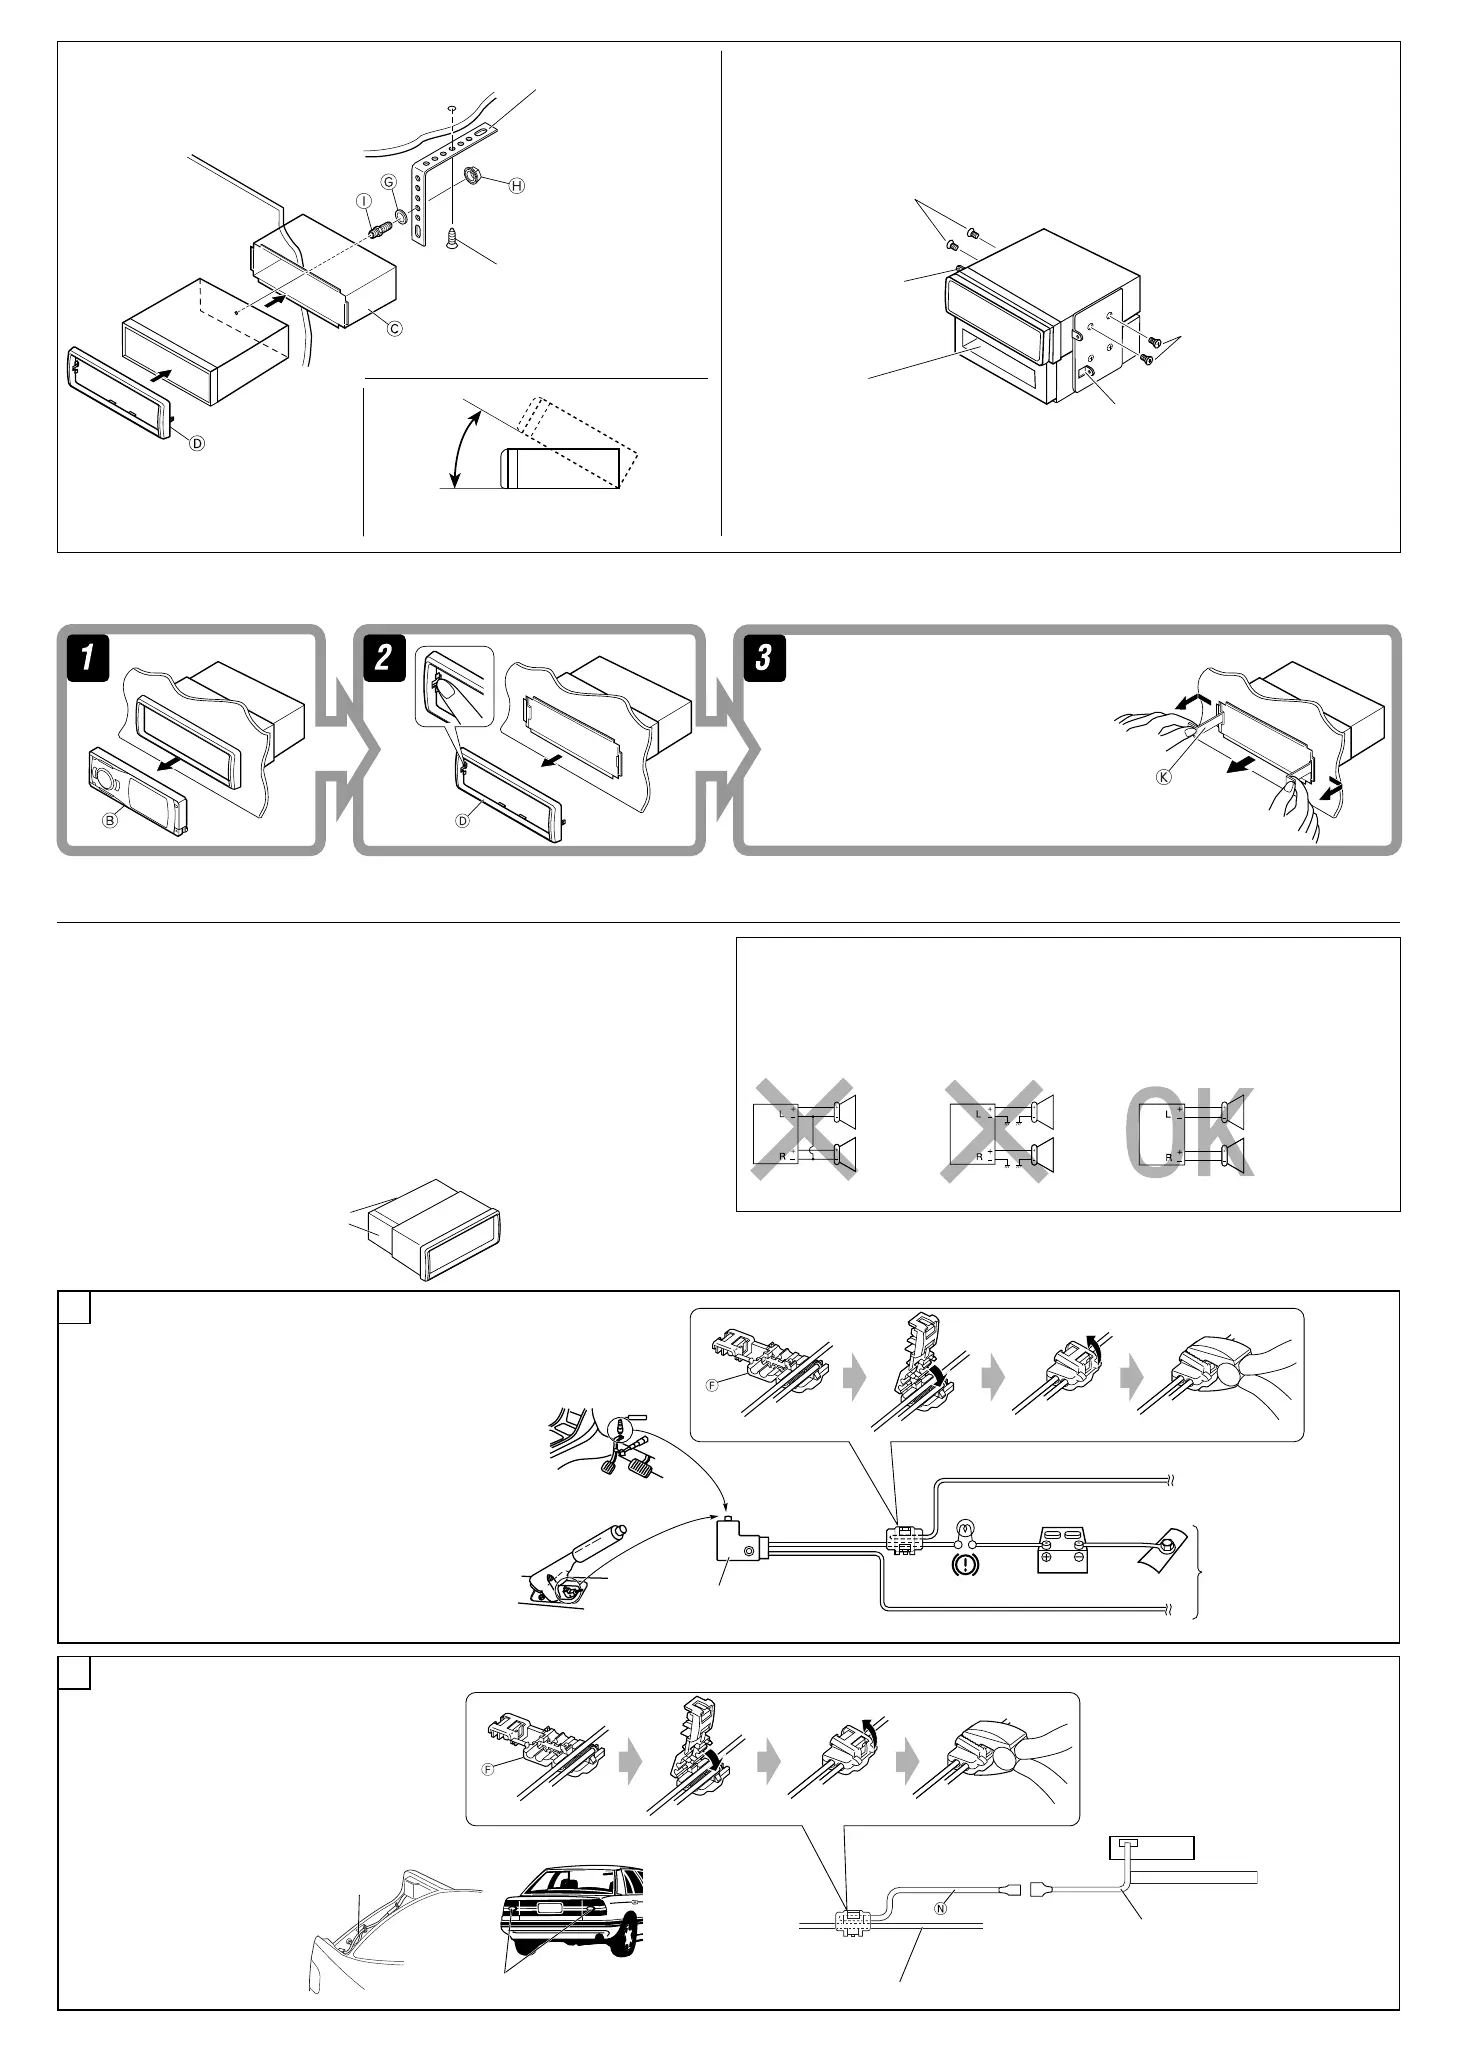
When using the optional stay When installing the unit without using the sleeve
In a Toyota car for example, first remove the car radio and install the unit in its place.
Screw (option)
Stay (option)
Fire wall
Dashboard
Bracket *
2
*
2
Not included for this unit.
Flat type screws—M5 x 8 mm *
2
Bracket *
2
Install the unit at an angle of less than 30˚.
Note: When installing the unit on the mounting bracket, make sure to use the 8 mm-long
screws. If longer screws are used, they could damage the unit.
Removing the unit
Before removing the unit, release the rear section.
Insert the two handles, then pull them as
illustrated so that the unit can be removed.
To prevent short circuits, we recommend that you disconnect the battery’s negative terminal and make all
electrical connections before installing the unit.
• Be sure to ground this unit to the car’s chassis again after installation.
Notes:
• Replace the fuse with one of the specified rating. If the fuse blows frequently, consult your JVC car audio
dealer.
• It is recommended to connect to the speakers with maximum power of more than 50 W (both at
the rear and at the front, with an impedance of 4 Ω to 8 Ω). If the maximum power is less than 50
W, change “Amplifier Gain” setting to prevent the speakers from being damaged (see page 40 of the
INSTRUCTIONS).
• To prevent short-circuit, cover the terminals of the UNUSED leads with insulating tape.
• The heat sink becomes very hot after use. Be careful not to touch it when removing this unit.
Heat sink
PRECAUTIONS on power supply and speaker connections:
• DO NOT connect the speaker leads of the power cord to the car battery; otherwise, the
unit will be seriously damaged.
• BEFORE connecting the speaker leads of the power cord to the speakers, check the speaker wiring in
your car.
Connecting the parking brake lead
Parking brake lead (light green)
To metallic body or chassis
of the car
Parking brake switch (inside the car)
Parking brake
Pocket
Flat type screws—M5 x 8 mm *
2
A
Connect the parking brake lead to the parking brake system built in the car.
REVERSE GEAR SIGNAL
KD-AVX11
Connecting the REVERSE GEAR SIGNAL lead (for rear view camera)
Locate the reverse lamp lead in the trunk.
To reverse lamp
Reverse lamp lead
Reverse lamp lead
To car battery
Purple with white stripe
Reverse lamps
B
ELECTRICAL CONNECTIONS
Install-1_KD-AVX11[A].indd 2Install-1_KD-AVX11[A].indd 2 07.1.8 11:56:13 AM07.1.8 11:56:13 AM
 Loading...