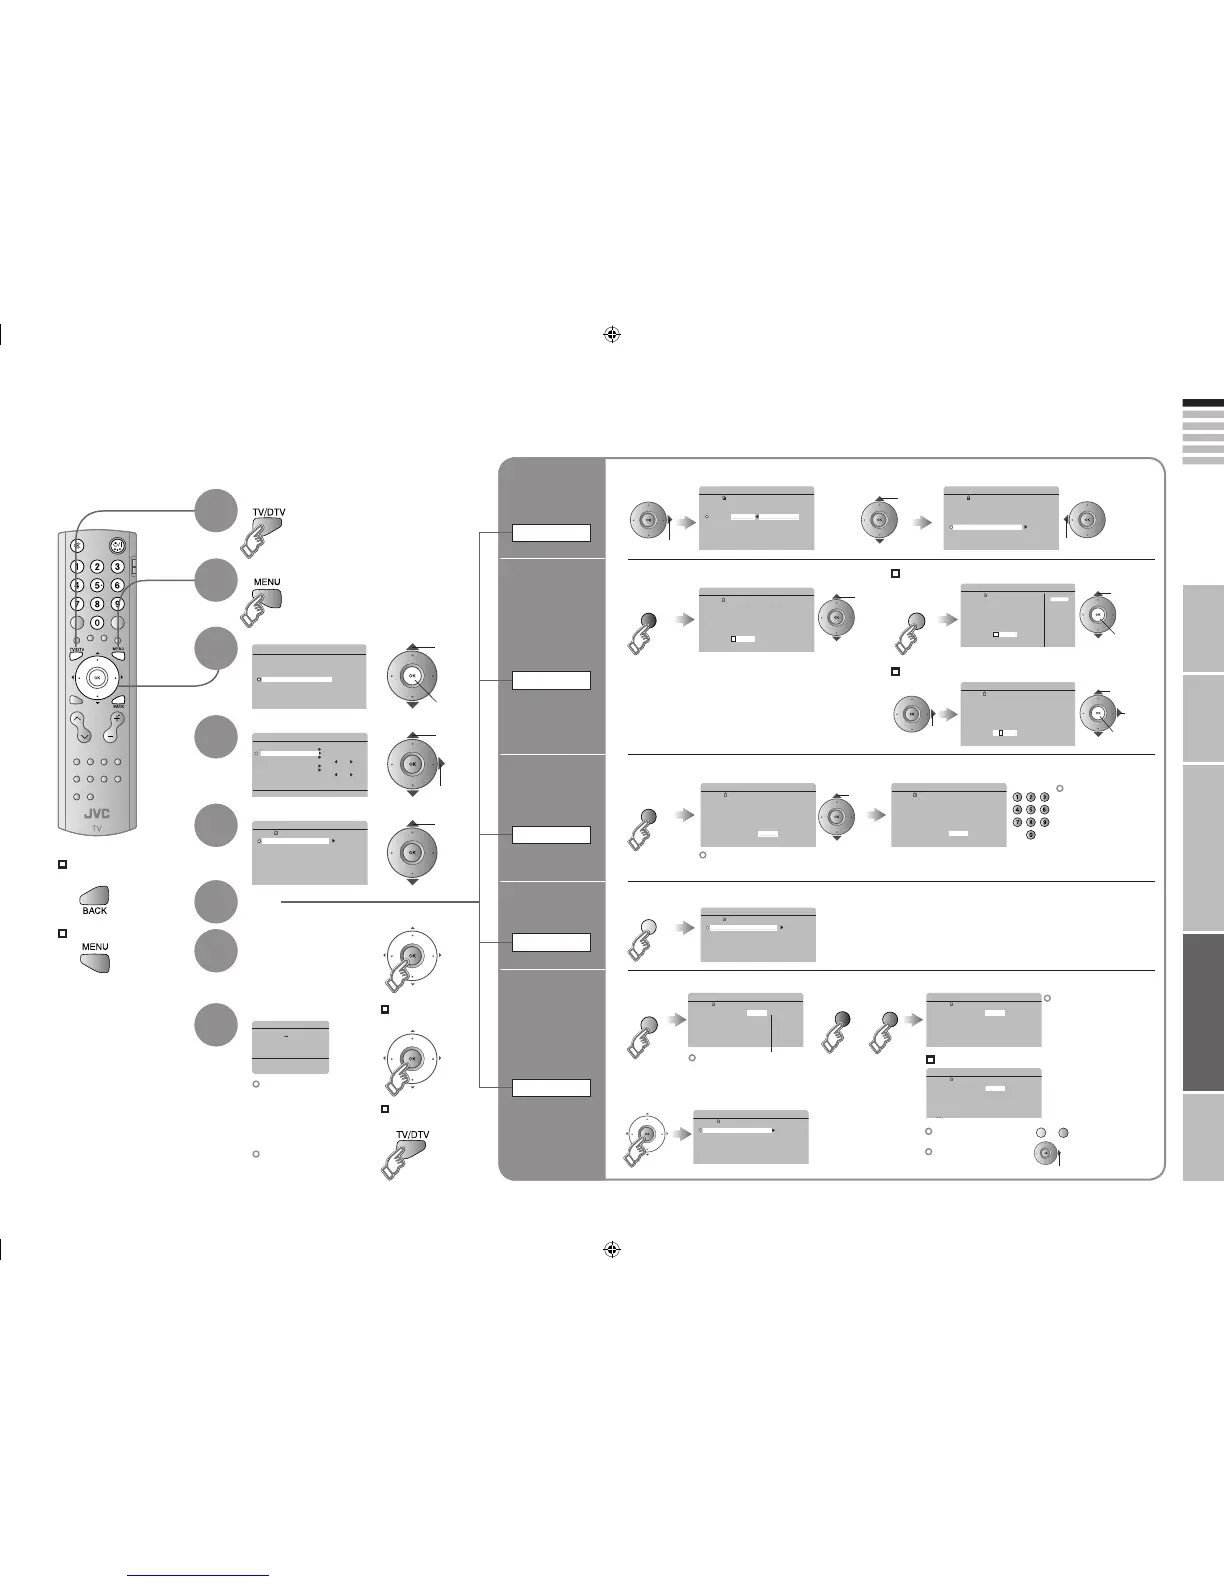
Display the menu
Select “SET UP”
Select “EDIT/MANUAL”
Confirm settings
Finish
When coming from “Initial settings” (P. 13), skip to @.
Select a row
Edit
Editing analogue channels
Edit the channels registered with “AUTO PROGRAM” in “Initial settings” (P. 13).
To the previous
screen
Exit
8
7
6
5
4
3
2
If “FEATURE NOT
AVAILABLE” appears :
Is a “T-V LINK”
compatible device
connected to “EXT-2”?
Is the device turned on?
“T-V LINK” (P. 11)
When not using
“T-V LINK”
When using
“T-V LINK”
select
1 select
2 next
1 select
2 next
1
Switch to analogue channels
Move a
channel’s
position
MOVE
Edit a
channel
name
ID
Insert a
channel
INSERT
Delete a
channel
DELETE
Register a
new channel
MANUAL
move out move in
select
enter
the first
character
next
column
From high
frequencies
or
/
select a system
When selecting a preset name from the “ID LIST”
When manually naming a channel
Receives the
broadcast signal.
If necessary, press 3
to change the broadcasting system.
“Receivable broadcast systems
(Analogue channels)” (P. 54)
Auto-search begins,
and the nearest
frequency is imported.
Repeat the previous
steps until the
desired channel is
displayed
From low
frequencies
“CH/CC” List (P. 53)
1 Begin 2 Select a destination 3 Finish
1 Begin 2 Enter a channel name
2 Select a “CH/CC” 3 Enter a number
2
Beginning channel search
1 Begin
3 Set
Adjust
Picture fine tuning
Sound fine tuning
1 select
2 set
1 enter
2
next
column
3 set
1 Begin
1 Delete
(red)
(red)
select
(blue)
(green)
(yellow)
(blue)
(green)
(yellow)
(blue)
 Loading...