19
PC connection
Follow these steps: On your PC monitor choose a resolution of 1920 × 1080 at 60Hz and save this
configuration. Shut down your PC and connect the shut off LCD TV.
Use a screensaver to avoid burning-in of static picture content.
Selected Items
Setup hint
PC Setup
Auto Adjust “H Position”, “V Position”, “Phase” and “Clock” are adjusted automatically as per the
input PC video signal.
When PC-input mode was selected and a PC-signal was input, Auto Adjust will be
performed automatically.
•
H Position To adjust the horizontal placing of the image.
V Position To adjust the vertical placing of the image.
Phase Eliminates the horizontal (Phase) interfering lines.
Clock Eliminates the vertical (Clock) interfering lines.
Select PC input
Switch on the LCD-TV.
Select the PC mode (see page 9).
Note:
If no signal or a signal with a non-
supported resolution is connected, No
Signal is displayed.
As this LCD-TV is not a PC monitor
correct display cannot be guaranteed for
every PC / graphics card.
When the signal 1280x1024 on 4:3 is
input, the black bar or line will appear on
the screen. This is to display the image to
dot by dot.
•
•
•
Example: Adjust the “H Position”.
1
During PC mode press MENU.
Auto Adjust
H Position
V Position
Phase
Clock
0
0
0
0
PC Setup
Picture
Sound
PC Setup
Feature
Channel
2
Select “PC Setup” > “H Position”, then press ENTER. Press
or to adjust “H Position”.
3
Press RETURN several times to return to the normal
screen.
Supported PC resolutions
resolution fps (Hz)
640x480 60
800x600 60
1024x768 60
1280x720 60
1280x768 60
1360x768 60
1280x1024 60
1440x900 60
1920x1080 60
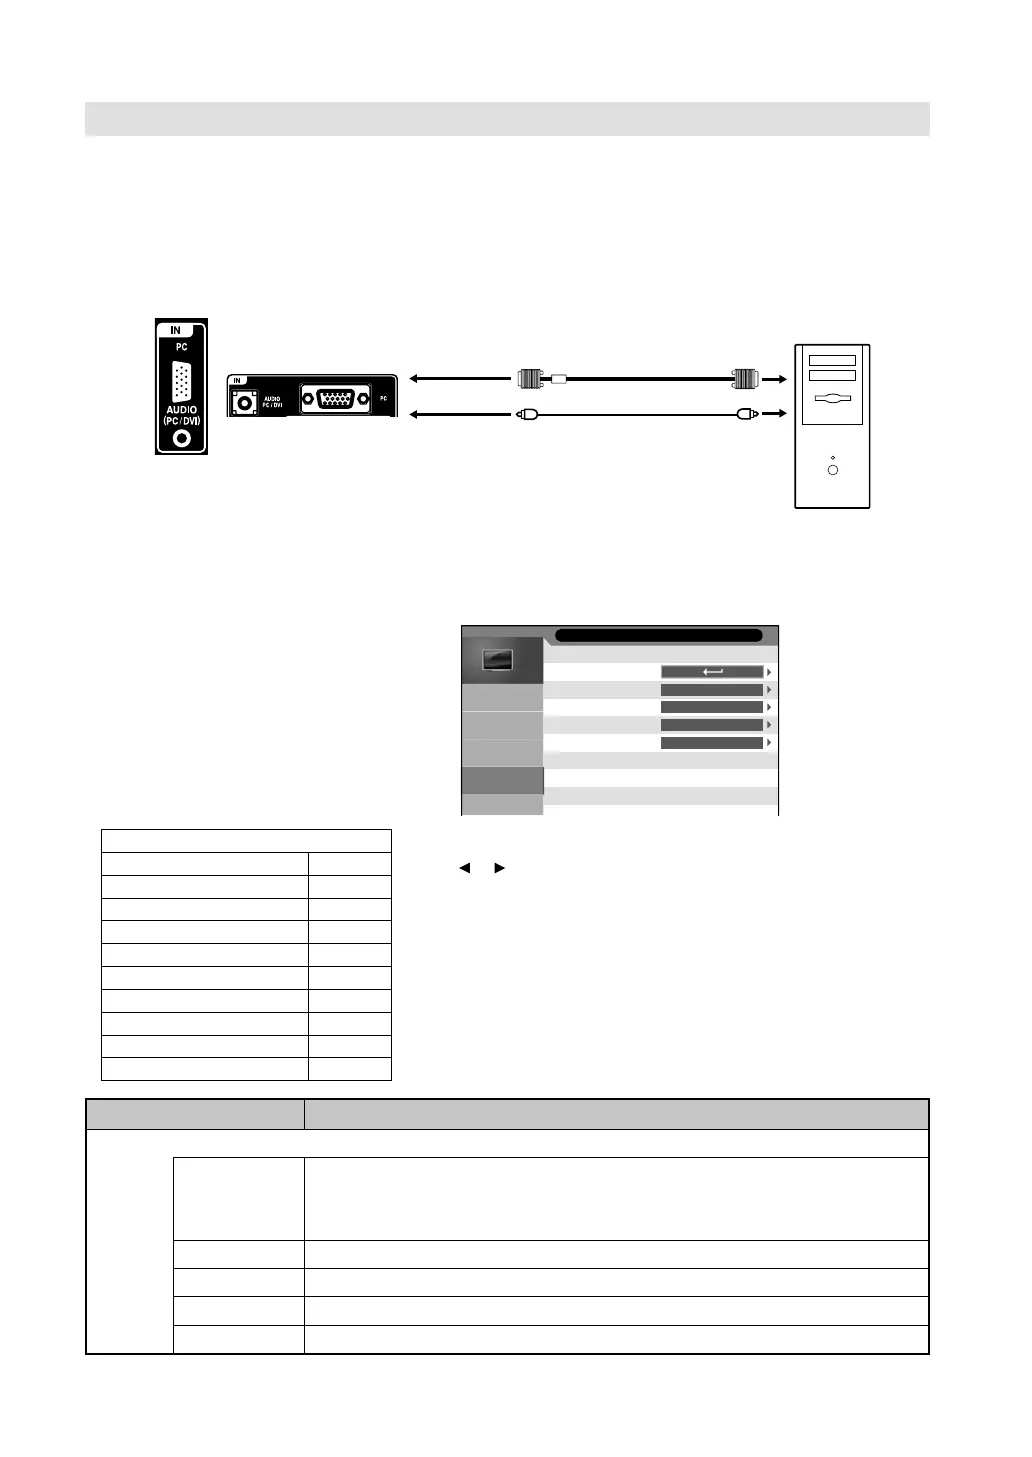
Use a PC-VGA cable (not supplied) to connect the LCD-Monitor to your PC. Make the connections carefully
so as not to break or bend the contacts inside the plug.
VGA Cable (not supplied)
Audio cable (not supplied)
TV (Rear view)
To AUDIO PC/DVI input
PC
To PC input
LT-24G20
LT-42G20
3FC0601A_EN.indd 193FC0601A_EN.indd 19 2/15/11 4:50:21 PM2/15/11 4:50:21 PM
 Loading...