Setting
the
Clock
Set the built-in clock before using the Timer.
• You can set the clock when the unit is turned on or on standby
1
2
~
~
88
+
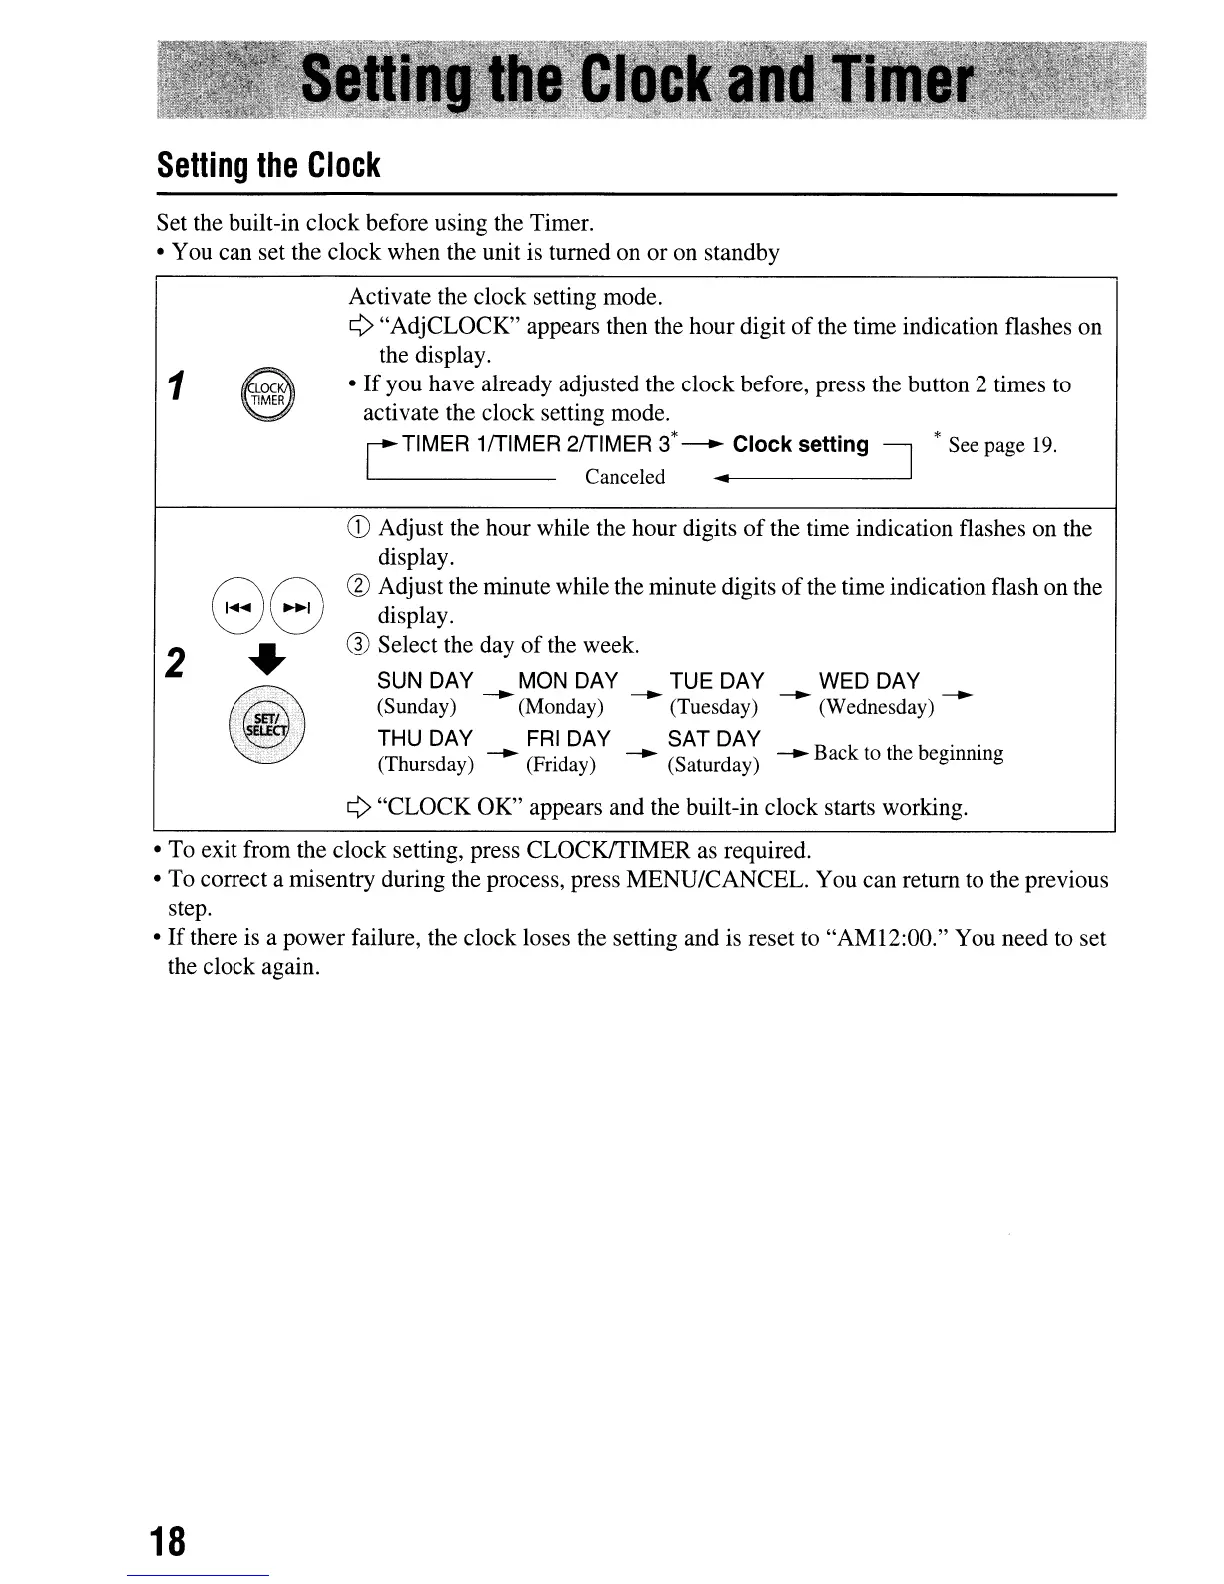
Activate the clock setting mode.
¢ "AdjCLOCK" appears then the hour digit
of
the time indication flashes on
the display.
•
If
you have already adjusted the clock before, press the button 2 times
to
activate the clock setting mode.
[
TIMER 1fTIMER 2fTIMER
3*
---.
Clock setting
~
* See page
19.
- Canceled
.....
I---------.J-
CD
Adjust the hour while the hour digits
of
the time indication flashes on the
display.
(l) Adjust the minute while the minute digits
of
the time indication flash on the
display.
® Select the day
of
the week.
SUN DAY MON DAY TUE DAY WED DAY
----.. ----..
----.. ----..
(Sunday) (Monday) (Tuesday) (Wednesday)
THU DAY
FRI
DAY SAT DAY B k h b . .
(Thursday)
----..
(Friday)
----..
(Saturday)
----..
ac to t e egmmng
¢ "CLOCK OK" appears and the built-in clock starts working.
• To exit from the clock setting, press CLOCKffIMER as required.
• To correct a misentry during the process, press MENU/CANCEL. You can return to the previous
step.
•
If
there is a power failure, the clock loses the setting and is reset to "AM12:00." You need to set
the clock again.
18
 Loading...