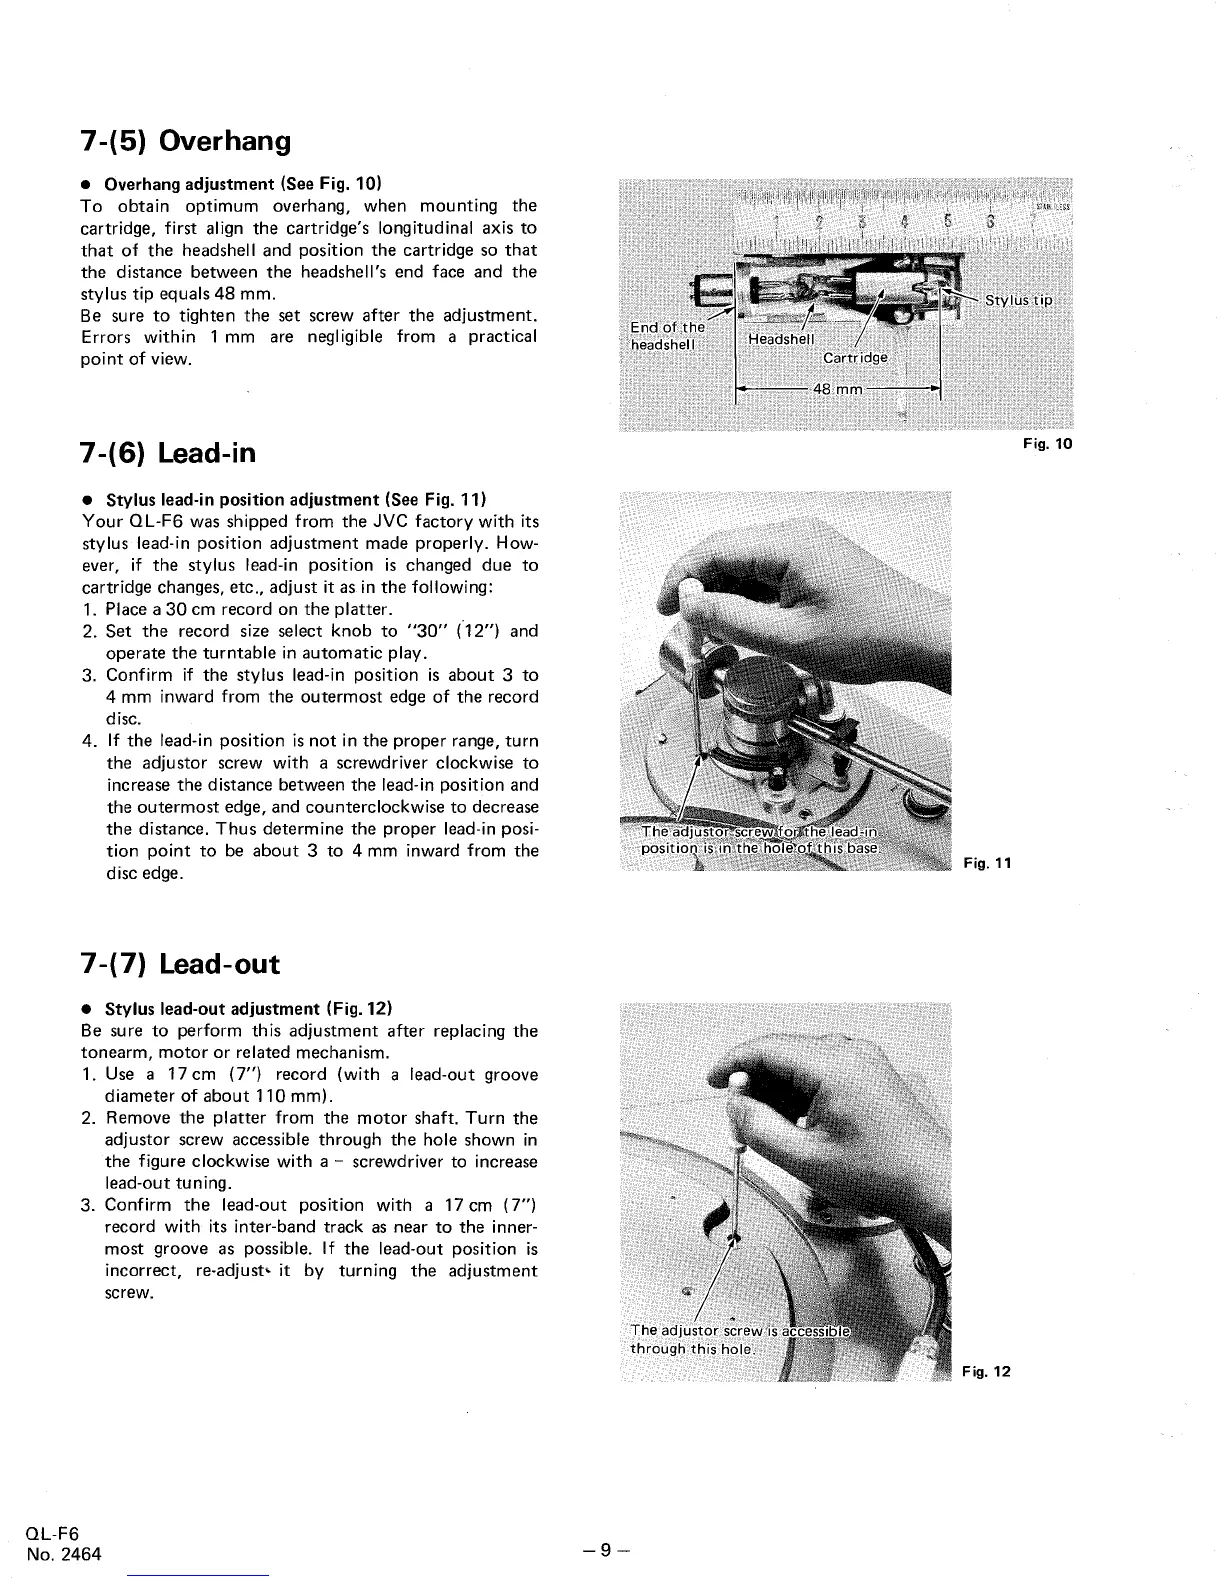
7-(5) Overhang
. Overhang
adjustment (See Fig. 10)
To
obtain optimum overhang, when mounting the
cartridge
, first align the cartridge s longitudinal axis to
that of the headshell and position the
cartridge so that
the distance between the headshell'
s end face and the
stylus tip equals 48 mm.
Be sure to tighten the set
screw after the adjustment.
Errors within 1
mm are negl
igible from a practical
point of view.
7 -( 6) lead-
Stylus lead-
in position adjustment (See Fig. 11)
Your QL-
F6 was shipped from the JVC factory with its
stylus lead-
in position adjustment made properly. How-
ever
, if the stylus lead-
in position is changed due to
cartridge changes
, etc., adjust it as in the following:
1. Place a 30 cm record on the platter.
2. Set the record
size select knob to "
30" (12"
) and
operate the turntable in automatic play.
3. Confirm if the
stylus lead- in position is about 3 to
4 mm inward from the outermost edge of the record
disc.
4. If the lead.
in position is not in the proper range
, turn
the adjustor screw with a
screwdriver clockwise to
increase the distance between the lead-
in position and
the outermost edge
, and counterclockwise to decrease
the distance. Thus determ
ine the proper lead- in posi-
tion point to be about 3 to 4
mm inward from the
disc edge.
7-(7) lead-out
Stylus lead-out adjustment (Fig. 12)
Be sure to perform this adjustment after replacing the
tonearm, motor or related mechanism.
1. Use a 17 cm (7") record (with a lead-out groove
diameter of about 110 mm).
2. Remove the platter from the motor shaft. Turn the
adjustor screw accessible through the hole shown in
the figure clockwise with a - screwdriver to increase
lead-out tuning.
3. Confirm the
lead-out position with a
17 cm (7")
record with its inter-band track as near to the inner-
most groove as
possible. If the lead-out position is
incorrect, re-adjust, it by
turning the adjustment
screw.
QL-
No. 2464
Fig. 10
Fig. 11
Fig. 12
 Loading...