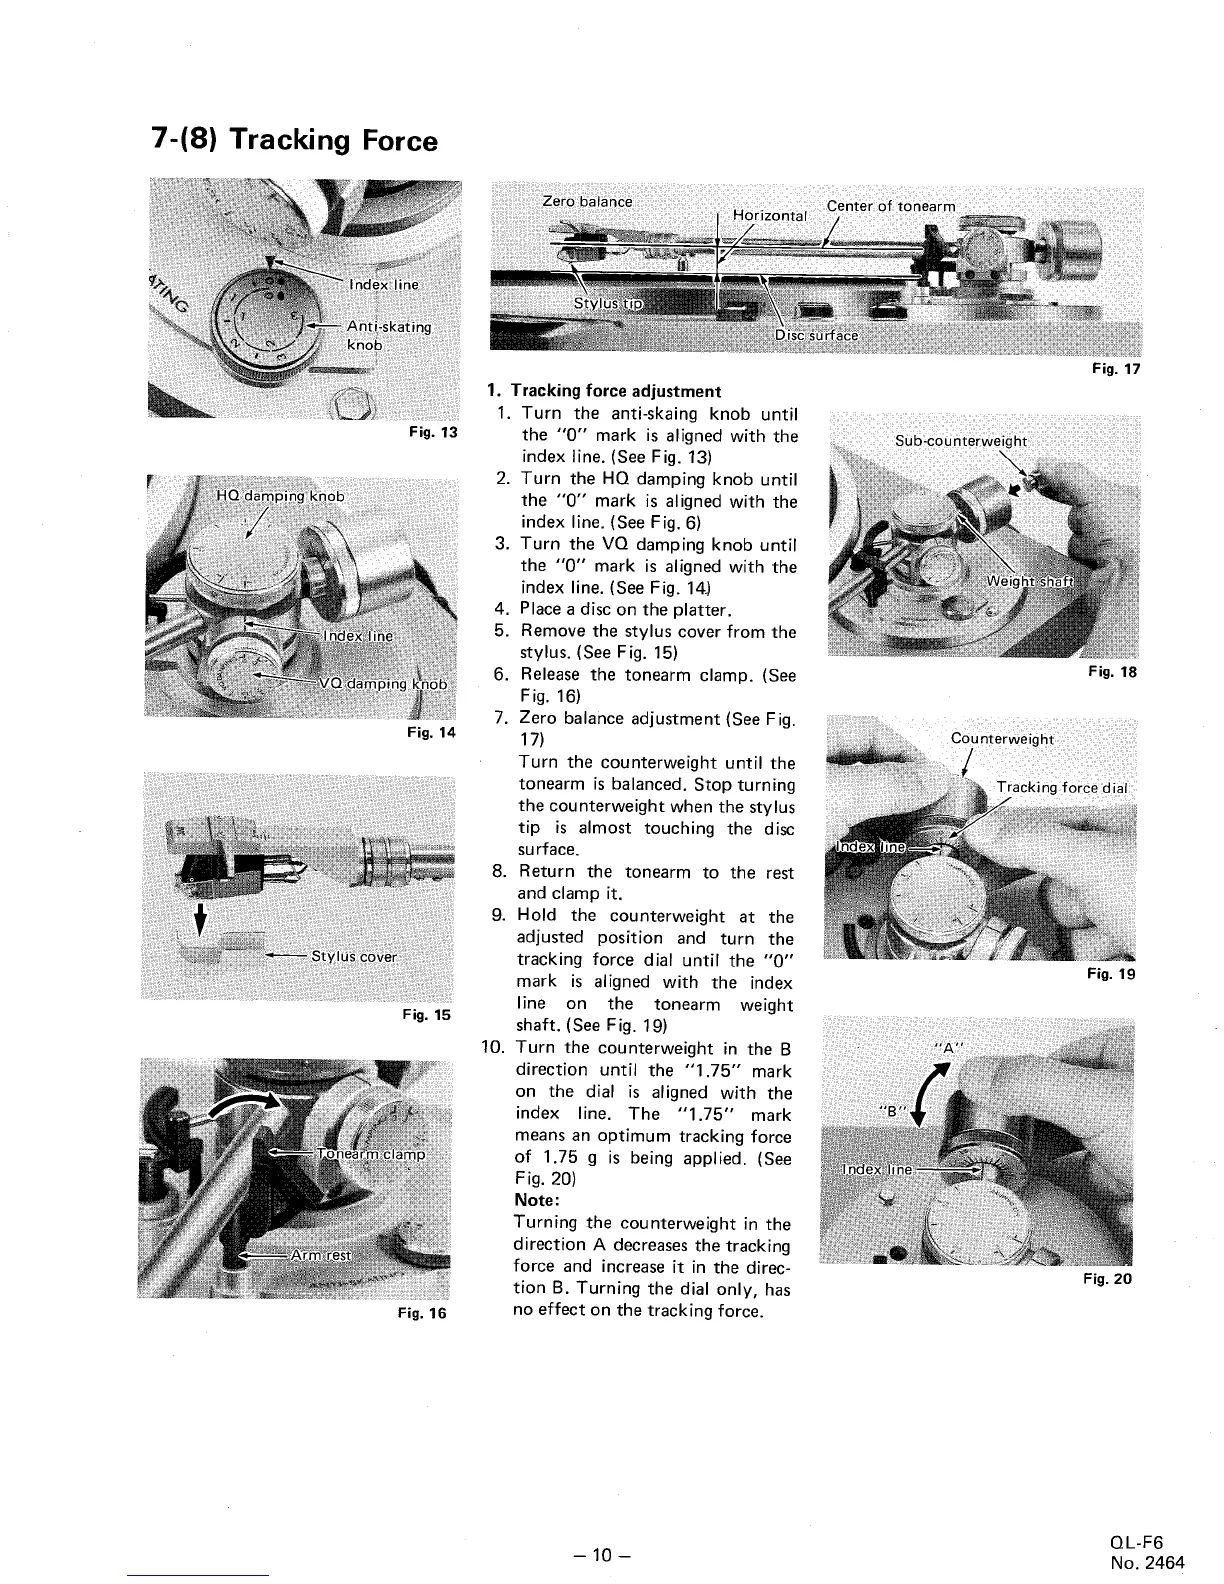
7-(8) Tracking Force
Fig. 13
Fig. 14
Fig. 15
Fig. 16
1. Tracking force adjustment
1. Turn the
anti-skaing knob until
the "
0" mark is
aligned with the
index line. (See Fig. 13)
2. Turn the HQ
damping knob until
the "
0" mark is al igned with the
index line. (See Fig. 6)
3. Turn the VQ
damping knob until
the "
0" mark is aligned with the
index line. (See Fig. 14J
4. Place a disc on the platter.
5. Remove the
stylus cover from the
stylus. (See Fig. 15)
6. Release the tonearm clamp. (See
Fig. 16)
7. Zero balance adjustment (See
Fig.
17)
Turn the counterweight until the
tonearm is balanced. Stop turning
the counterweight when the stylus
tip is almost touching the
disc
surface.
8. Return the tonearm to the
rest
and clamp it.
9. Hold the
counterweight at the
adjusted position and turn the
tracking force dial until the "
mark is
aligned with the index
line on
the
tonearm
weight
shaft. (See Fig. 19)
10. Turn the counterweight
in the B
direction until the "
75" mark
on the
dial is aligned with the
index
line. The "
75" mark
means an optimum tracking force
of 1. 75 g is
being applied. (See
Fig. 20)
Note:
Turning the counterweight in the
direction A decreases the tracking
force and
increase it in the direc-
tion B. Turning the dial only, has
no effect on the tracking force.
10 -
Fig. 17
Fig. 18
Fig. 19
Fig. 20
QL-
No. 2464
 Loading...