9
1
0
f
f
1
6
6
7
8
c
c
c
c
c
c
c
c
g
g
g
g
4
5
c
c
c
c
c
c
c
c
g
g
g
g
g
g
g
g
3
1
9
1
0
a
a
a
a
b
b
b
c
c
c
c
c
c
c
c
c
c
c
c
g
g
g
g
h
h
h
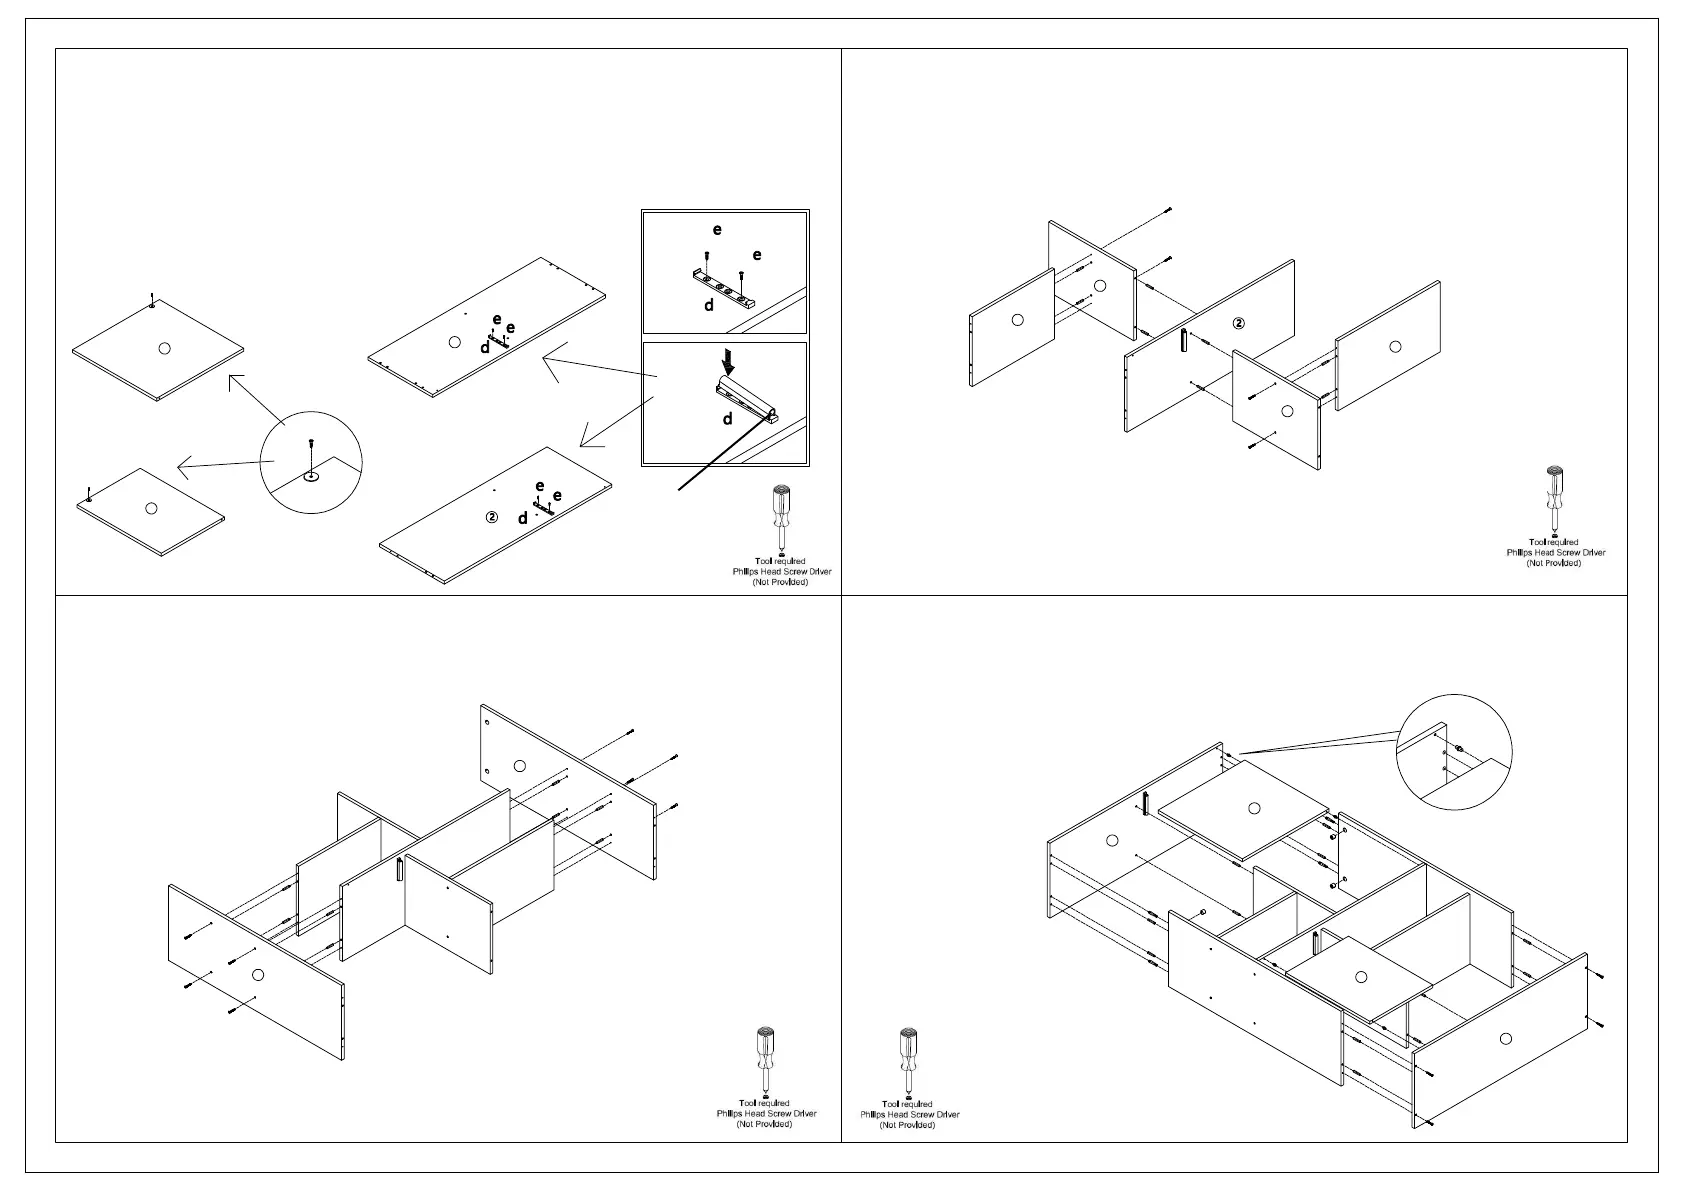
Step 1:
Attach pad f onto board 9&10 with screw f (as per below diagram).
Attach one of part d onto board 1&2 with screw e (as per below diagram),then
attach another part d onto the previous part d, please make sure the side with
magnet on the cylinder-part d should be faced to youself. See below diagram
with detials).
side with magnet
Step 2:
Put part c into the corresponding position on board 7&8 and attach board 7&8
onto board 6 with screw part g. Put part c into the corresponding position on
board 6 and attach board 6 onto board 2.(as per below diagram)
Step 3:
Put part c into the corresponding position on board 4&5 and attach board 4&5
onto board 2&7&8 with screw part g.
Step 4:
Fix the screws part a&b onto board 4&5&6 and put part c into the corresponding
position(as per below diagram).
Attach board 1&3 onto bard4&5&6 from previou steps and attach the doors board 9&10
onto board 1&2&3 together with part h (see below detail diagram)
to learn how to fix the part h).
Then fix the round screws part b with
a screwdriver.
At last fix the screws part g onto
board 3 and tighten.
Ensure all parts align.
h
h
 Loading...