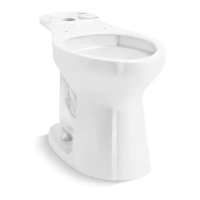
Installation Guide
Guide d’installation
Guía de instalación
7/8"
3
Install the washers and nuts as
shown. Do not overtighten!
Installer les rondelles et les écrous
tel qu'indiqué. Ne pas trop serrer!
Instale las arandelas y las tuercas
como se ilustra. ¡No apriete
demasiado!
2
Apply weight evenly. Do not move
after placement! Watertight seal
may be broken!
Appliquer du poids de manière
égale. Ne pas bouger après la
mise en place! Le joint
d'étanchéité pourrait se casser!
Aplique peso de manera uniforme.
¡No mueva después de colocar!
¡Se podría romper el sello
hermético!
1
Install T-bolts and a new wax ring.
Installer les boulons en T et un
anneau de cire neuf.
Instale los pernos en T y un anillo
de cera nuevo.
WARNING: Risk of property or
product damage.
Do not use in-tank cleaners. Products
containing chlorine (calcium hypochlorite)
can damage fittings in the tank. This can
cause leakage and property damage.
ADVERTISSEMENT: Risque de
dommages matériel ou
d'endommagement du produit.
Ne pas utiliser de nettoyants pour
l'intérieur du réservoir. Les produits
contenant du chlore (hypochlorite de
calcium) peuvent endommager les
raccords dans le réservoir. Cela peut
créer des fuites et des dommages
matériels.
ADVERTENCIA: Riesgo de daños
al producto o a la propiedad.
No utilice productos para limpiar que se
colocan dentro del tanque. Los productos
que contienen cloro (hipoclorito de calcio)
pueden dañar las piezas en el tanque.
Esto puede causar fugas y daños a la
propiedad.
Record your model number.
Noter le numéro de modèle.
Anote el número de modelo.
8
Flexible Supply: Connect the
hose. Do not overtighten!
Éléments d'arrivée flexibles :
Raccorder le tuyau. Ne pas trop
serrer!
Suministro flexible: Conecte la
manguera. ¡No apriete
demasiado!
7
Adjust bolt tightness to level the
tank.
Ajuster le serrage des boulons
pour mettre le réservoir de
niveau.
Ajuste el apriete de los pernos
hasta nivelar el tanque.
6
Tighten the bolts evenly. Do not
overtighten!
Serrer les boulons de manière
uniforme. Ne pas trop serrer!
Serrer les boulons de manière
égale. ¡No apriete demasiado!
5
Install the gasket onto the bowl.
Installer le joint de la cuvette.
Instale el empaque en la taza.
4
If needed, cut the T-bolts before
installing the caps.
Si nécessaire, couper les boulons
en T avant d'installer les
capuchons.
Si es necesario recorte los pernos
en T antes de instalar los
tapapernos.
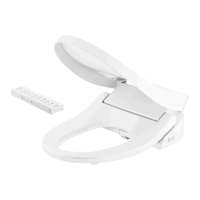
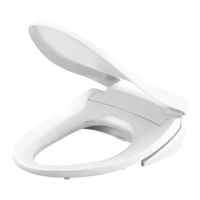
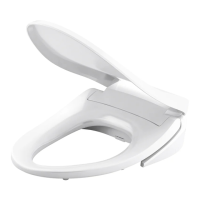
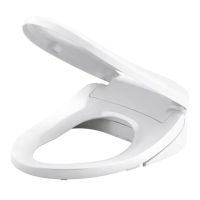
11
Install the seat following the seat
instructions.
Installer le siège conformément
aux instructions du fabricant.
Instale el asiento de acuerdo a
las instrucciones para el asiento.
Waterline
Ligne d'eau
Línea de agua
10
If needed, adjust the water level.
Si nécessaire, ajuster le niveau
d'eau.
Si es necesario, ajuste el nivel
de agua.
9
Turn on the water supply. Check
for leaks.
Ouvrir l'arrivée d'eau. Rechercher
des fuites.
Abra el suministro de agua.
Verifique que no haya fugas.
Do not use a cone
supply.
Ne pas utiliser
unearrivée conique.
No utilice un
suministro de cono.
Rigid Supply: Use the provided
rubber washer and coupling nut. Do
not overtighten!
Éléments d'arrivée rigides : Utiliser
la rondelle en caoutchouc et l'écrou
de serrage fournis. Ne pas trop
serrer!
Suministro rígido: Utilice la
arandela de goma y la tuerca de
acoplamiento que se incluyen. ¡No
apriete demasiado!
1430968-2-A