EasyManuals Logo
Home>Kyocera>Printer>ECOSYS P4035dn

Kyocera ECOSYS P4035dn User Manual

Kyocera ECOSYS P4035dn
272 pages
To Next Page IconTo Next Page
To Previous Page IconTo Previous Page
Page #126 background imageLoading...
Page #126 background image
2P7/2R0/3PN
1-5-29
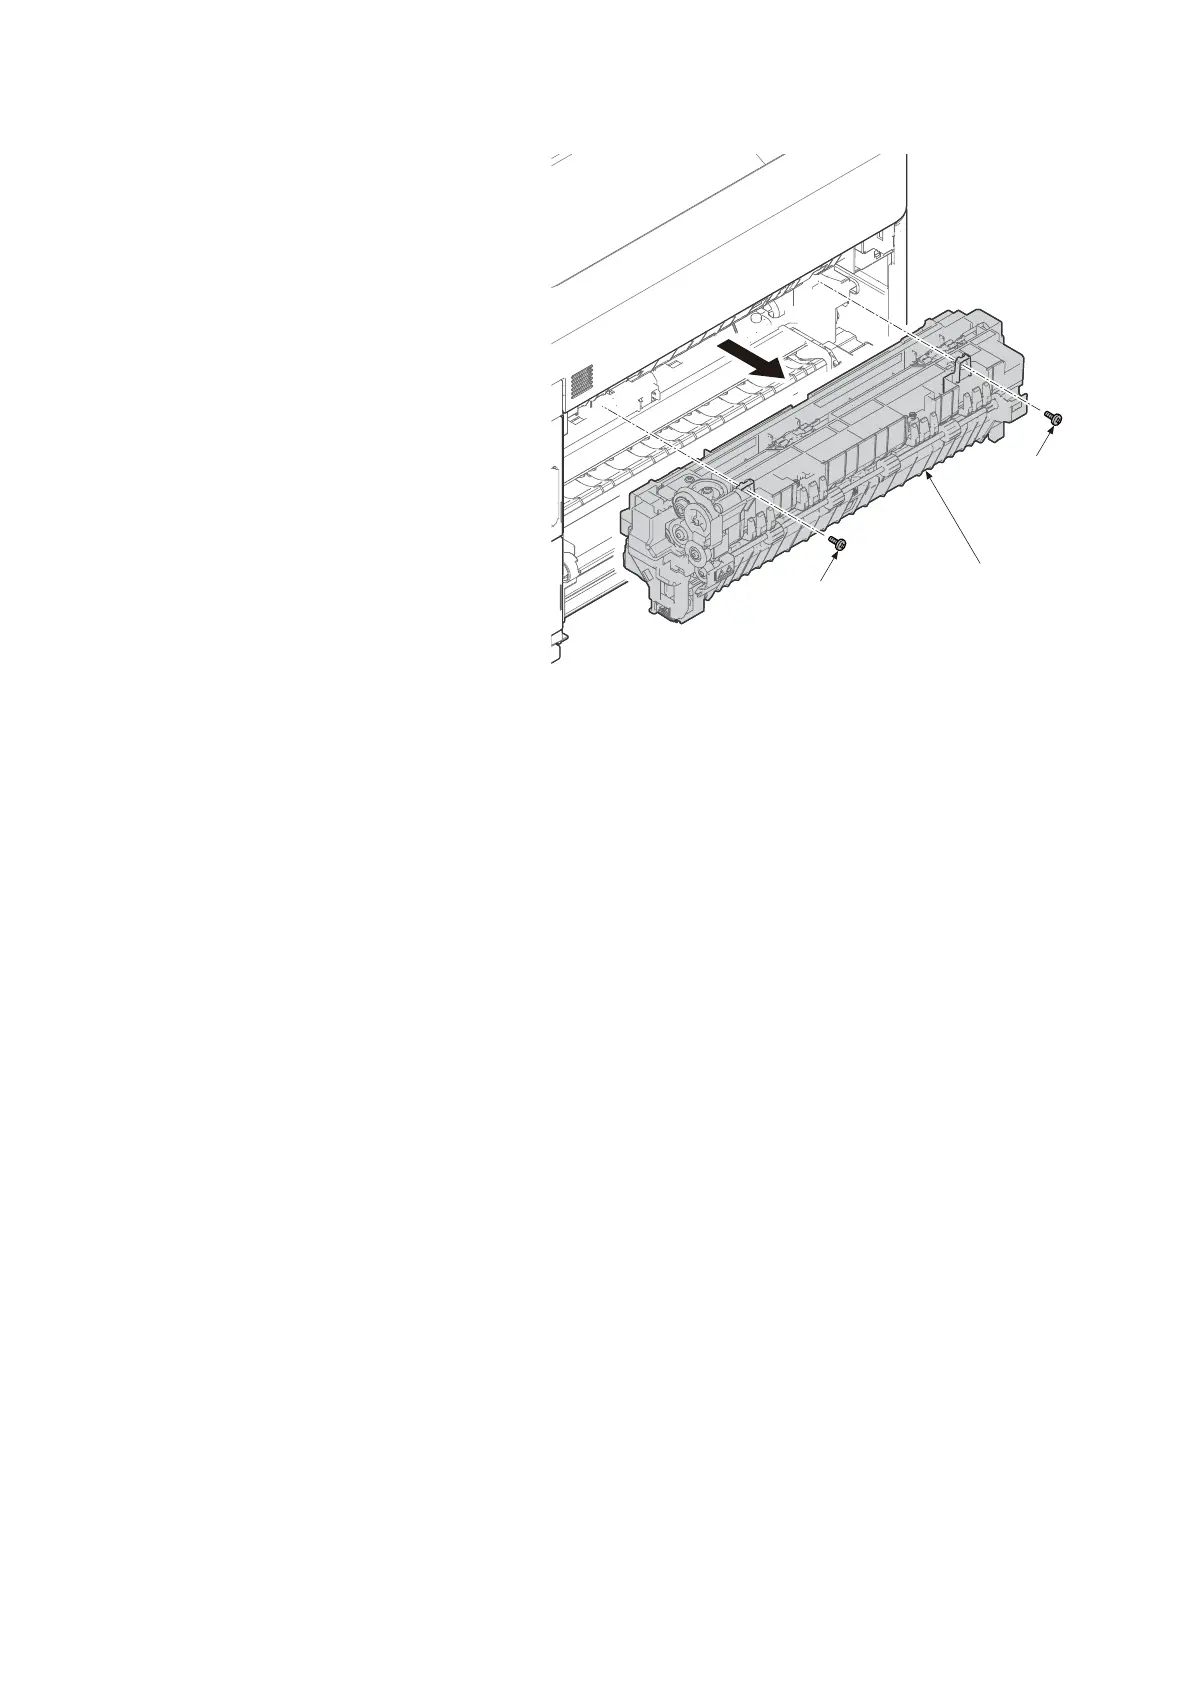
9. Remove two screws and then remove
the fuser unit forward.
10. Check or replace the fuser unit and refit
all the removed parts.
*: When refitting the fuser unit, perform the
following procedures.
(1)Turn on the power switch while opening the
rear cover after removing the fuser unit.
(2)Turn off the power switch after 5-second or
more progress.
(release state of fixing pressure)
(3)Refit the fuser unit.
Figure 1-5-52
Fuser unit
Screw
Screw

Table of Contents

Questions and Answers:

Question and Answer IconNeed help?

Do you have a question about the Kyocera ECOSYS P4035dn and is the answer not in the manual?

Kyocera ECOSYS P4035dn Specifications

General IconGeneral
BrandKyocera
ModelECOSYS P4035dn
CategoryPrinter
LanguageEnglish

Related product manuals