We thank you for choosing an LAE controller. Before proceeding to the installation, please read this instructions sheet carefully; only in this way you will
obtain maximum performance and safety.
1. INSTALLATION
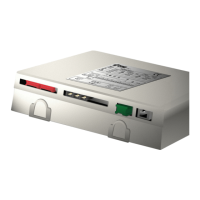
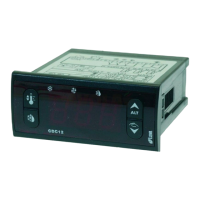
1.1 The SSD90 must be secured to the panel by means of screws or rivets to be inserted into the appropriate slots. Protection is IP30, therefore please
locate the unit in a position ensuring that no liquid infiltrates and damages the board.
1.2 Probes, power supply and outputs must be connected strictly according to the indications appearing on the board; the cables can pass through the
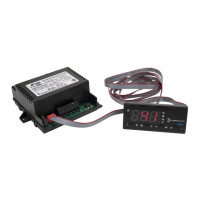
hole on the unit side. For supply voltage and maximum switchable loads, please read the label on the enclosure. The flat cable of the remote unit must
be connected making sure that the mechanical polarity is respected, finally secure the flat cable firmly by means of the suitable cable tie.
1.3 The SMD12RU remote unit is secured to the panel by means of the two springs at its box sides. The unit is mounted on the panel through a 29x71
mm opening, exert a moderate pressure so as to get the SMD12RU to adhere to the panel perfectly.
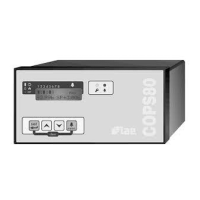
Differently, as to the SMD34RU model, remove the two side screws and open the enclosure. Mount the front of the remote unit through a 31x185 mm
opening on the panel and then match it to the rear cover. Then finally close the box by means of the screws.
1.4 Probe T1 measures the air temperature and is used for the thermostat function. It must be located inside the room in a place that well reflects the
temperature of the preserved product. Probe T2 measures the evaporator temperature and must be secured to it in the place where the maximum frost
growth occurs.
1.5 The unit works with an ambient temperature between –10°..+50°C and 15%..80% of relative humidity. To reduce the effects of electro-magnetic
interference, place the probe and signal cables as away as possible from power lines.
CAUTION: where delicate or valuable products have to be maintained under strict conditions, we suggest you use a second unit for limit and alarm
purpose.
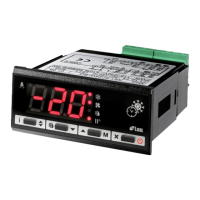
2. OPERATING LEVELS
For three seconds from the power-up the display illuminates a dash (self-check phase). The following indications depend on the operating status of the
controller and from the menu level activated by the operator.
On TABLE 1 you can find status, levels and relevant indications.
2.1 S
TANDBY
. Setting the parameter OFF to YES enables the button that allows to put the SSD90 on standby, that is excluding output control and
the buttons with the exception of the light command (manually or door controlled). With OFF=NO, the button is inhibited.
A permanent indication on display indicates that the outputs are off.
2.2 N
ORMAL
. During normal operation the display shows the room temperature or, if the controller is being performing defrost and the parameter DDY
is greater than 0, the indication . In this latter case, the indication will remain beyond defrost end for the time programmed with DDY.
2.3 A
LARM
. An anomaly is reported on display through the flashing of an abbreviation indicating its cause: / high/low alarm temperature in
the room; opened door; periodic condenser cleaning; / failure of probe T1/T2.
2.4 I
NFO MENU
. By pressing button you enter the information menu. In this menu it’s possible to start a manual defrost, display the instantaneous T1