In Fig. 7-41, click “ERASE FAULT DATA”, a dialog box as
indicated Fig. 7-43 will pop up. Click [Yes] to erase trouble
codes and a message “Erase Succeed” will appear; click [No] to
exit.
C. Erase fault code•
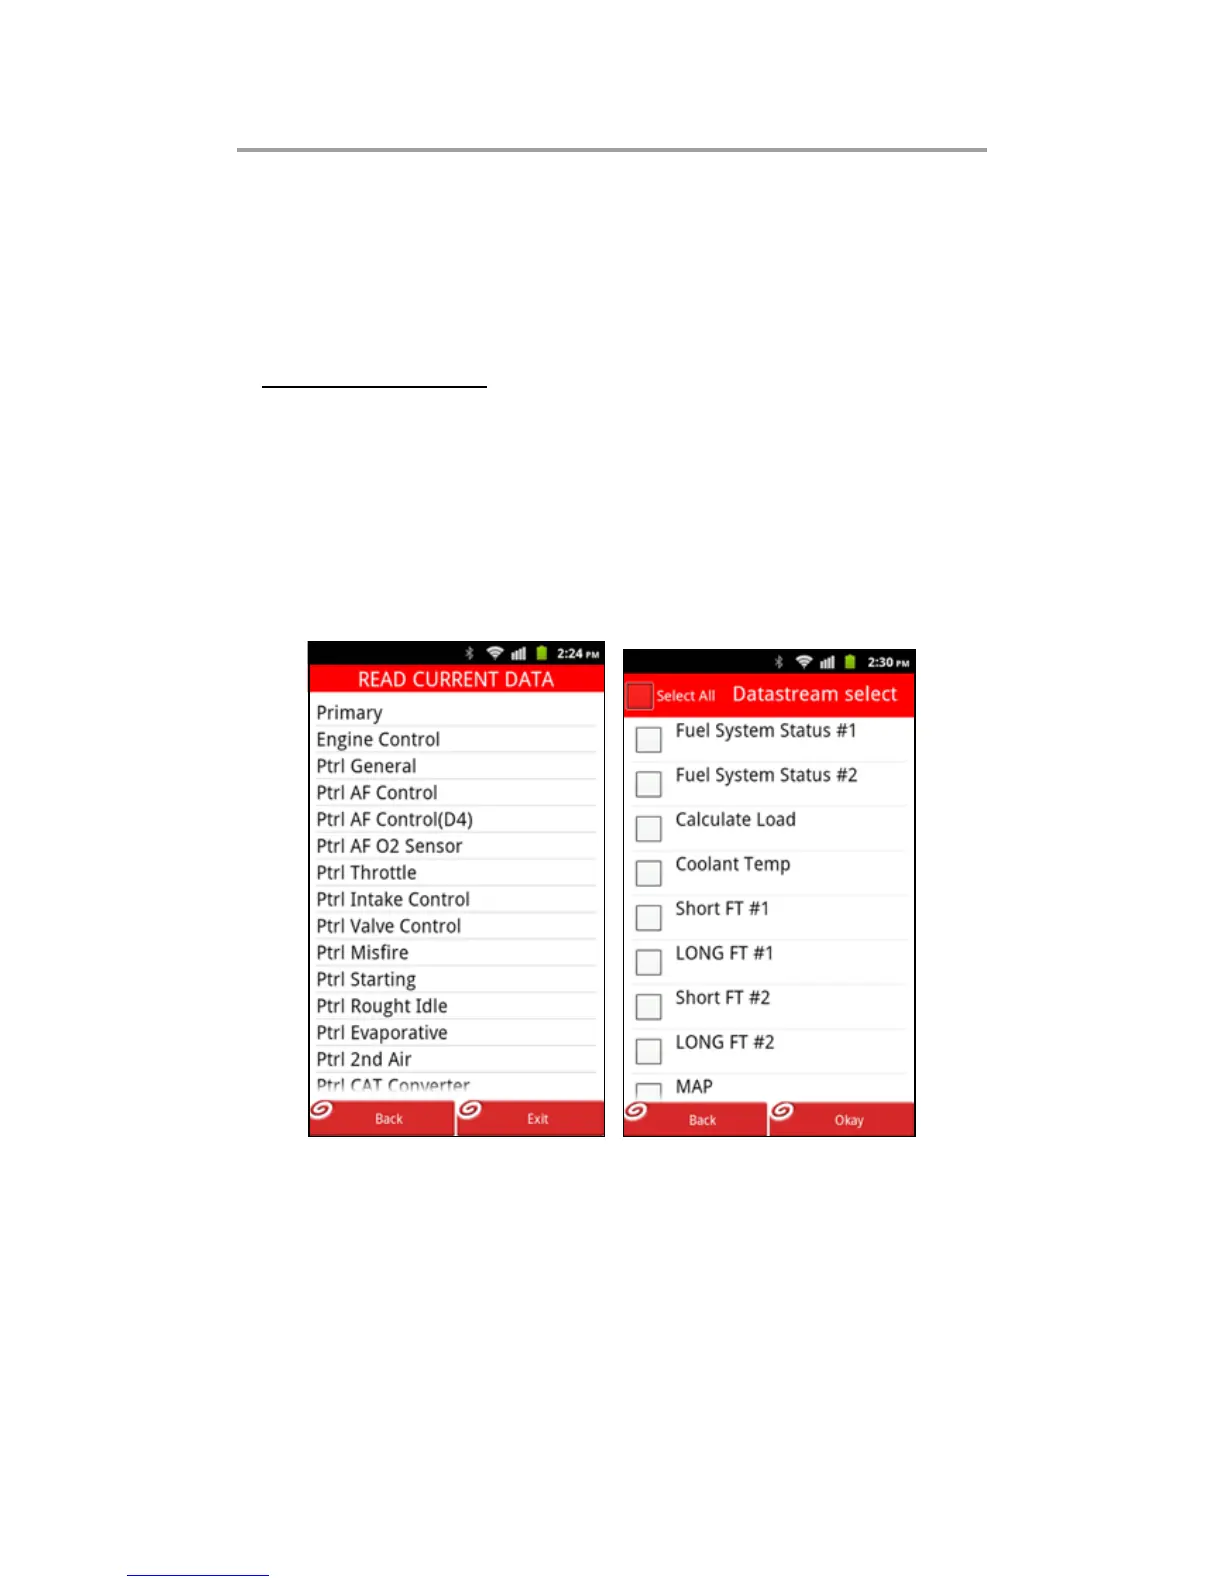
In Fig. 7-41, click “READ CURRENT DATA”, the system will
enter data item selection interface. See Fig. 7-44. Click the
desired one, a screen similar to Fig. 7-45 will be shown. Click
the box before the item to select it. To select all items, just
check the box before “Select All”. (To deselect it, uncheck the
box.)
Fig. 7-44 Fig. 7-45
After choosing, click “Ok” to enter a screen as indicated in Fig.
7-46.
To view it in graph mode, click “Graph”, the screen will display
as Fig. 7-47. To view the next/previous datastream, click
“Next”/“Previous”.
 Loading...