2
3
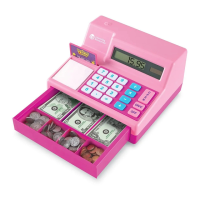
ON/C – This button is used to turn ON the cash register. Press and
hold to clear line items and transactions from the LCD DISPLAY.
OFF – This button will shut down the Teaching Cash Register at the
end of play. There is also an automatic shut-off after five minutes of
non-use, to conserve battery life.
RESET – Press this button if the Teaching Cash Register begins to
behave erratically. Use the tip of a paperclip or pen to depress the
button. If this doesn’t solve the problem, please refer to the USE AND
CARE section of this manual.
NUMBER KEYS – These are the main buttons that your child will use
during play and learning activities.
FUNCTION KEYS – These keys are used to add or subtract items or
amounts of money, to multiply amounts when buying several of one
item, or to divide if an item is “2 for 1” and you only want one item.
ENTER KEY – Press this key to accept an entry.
LEARNING ACTIVITIES KEYS – Press any one of these keys to begin
a learning activity.
COINS – Press this button to display the total of the coins
in the COIN BANK.
COIN QUIZ – Play this fun game to learn the different coins
and their values.
+ ADD – This game features three levels of addition activities.
- SUB – This game features three levels of subtraction activities.
MONEY MATCH – Play this game by listening to the amount
and entering it with the number keys.
OPEN – This button opens the drawer on the Teaching Cash Register.
PAY $ - Press this button after “ringing up” all your purchases to
select how you want to pay.
COINS slot – A coin can be inserted into the slot at any time to hear it
identified. See how much the coin is worth on the LCD DISPLAY.
COIN BANK – Lift this door to release all the coins and continue play.
SCALE CALIBRATION WHEEL – This wheel is located on the back of
the register. Turn the dial until the guideline on the scale aligns with
the first line on the graph. NOTE: This is a pretend scale and is not
accurate.
GETTING STARTED
You will need:
3 C batteries
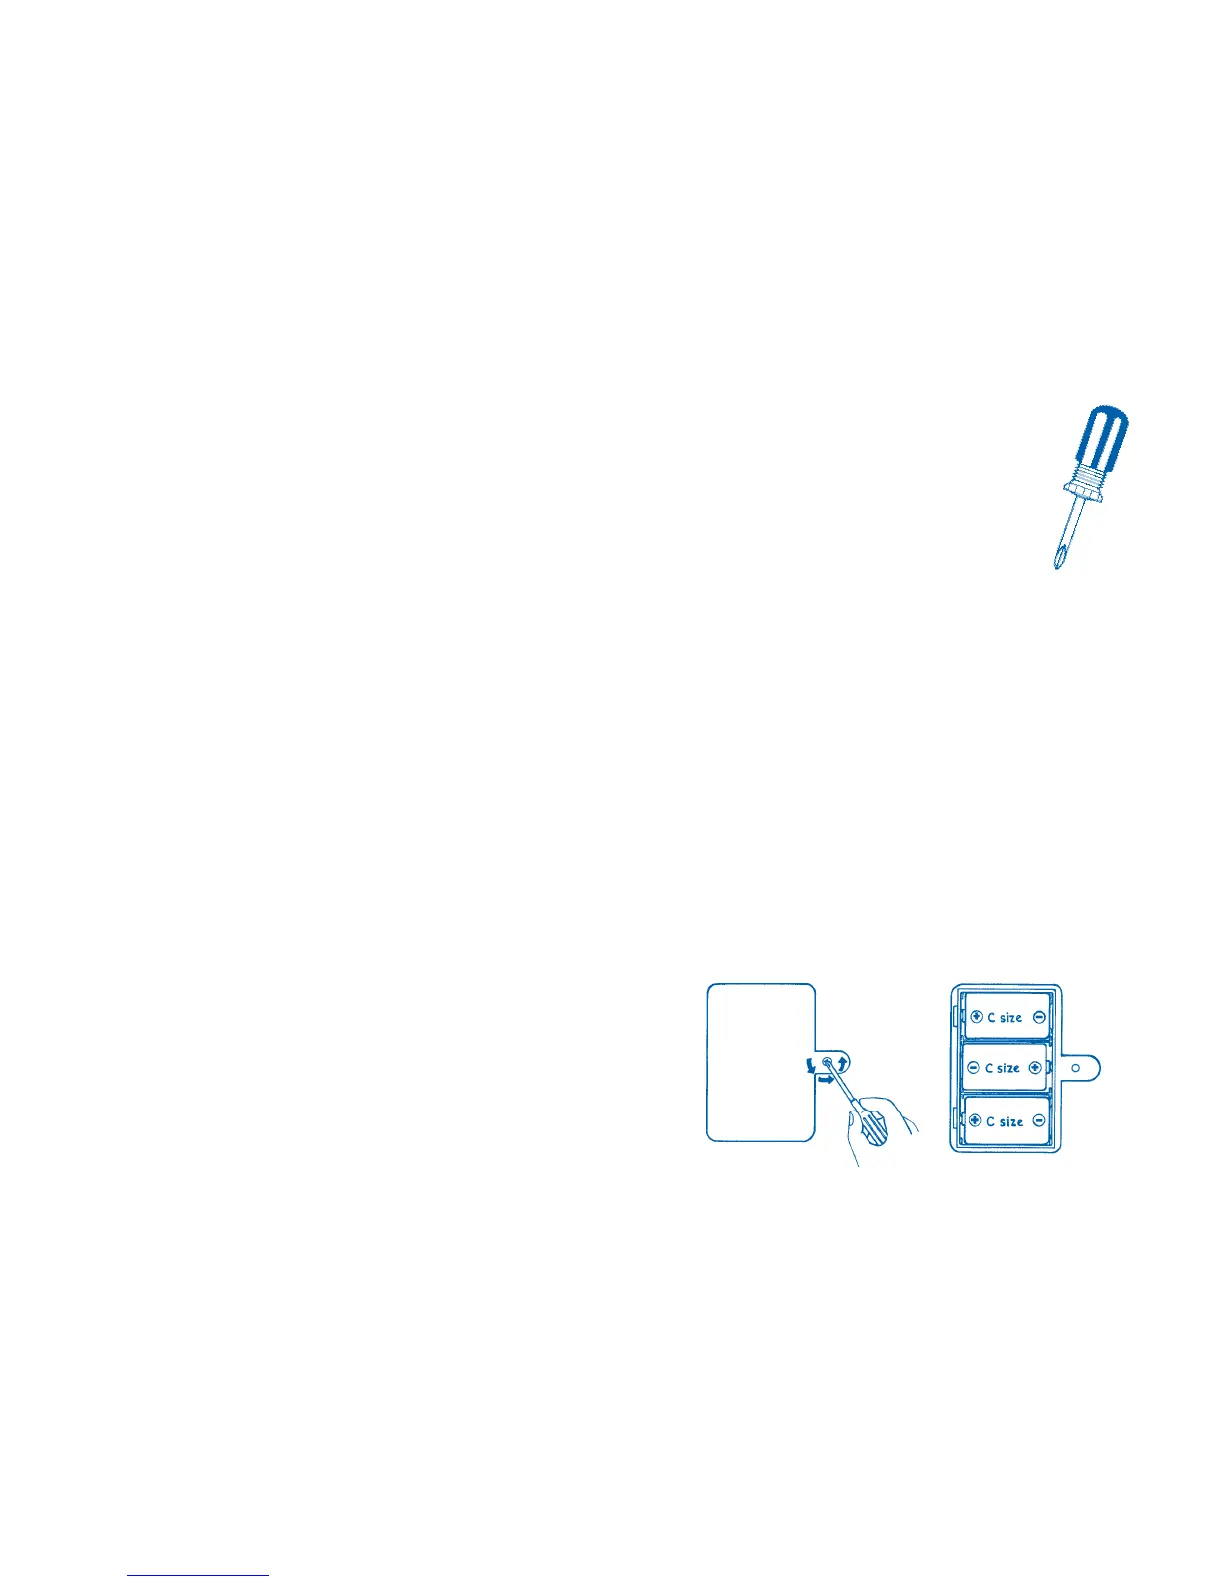
Phillips screwdriver
First, press the OPEN key on the cash register.
When the drawer pops open you will find the
Pretend & Play money as well as the COUPON and
CREDIT cards. Remove them from the drawer and
close the drawer.
Installing the batteries:
Turn the Teaching Cash Register upside down. Using the Phillips
screwdriver, turn the screw on the battery door in a counter-
clockwise direction to loosen the screw. Remove the screw and
open the door. Insert the three C batteries, being careful to match
the + and – ends of the batteries to the diagram inside the battery
compartment. Replace the battery compartment door and insert
the screw. Tighten the screw by using your Phillips screwdriver to
turn the screw in a clockwise direction until secure. Please read and
understand the other important battery usage instructions later in
this manual.
Calibrate the scale so that the indicator bar is lined up with the
zero on the scale graph. Find the calibration wheel on the back of
the unit. Turn the wheel until the bar is in the correct position.
Press the ON key to begin the learning activities. Now we are
ready for learning fun!
PHILLIPS
SCREWDRIVER
 Loading...