Page 2
Install Motorized Damper Assembly
LGH/LCH/KG/KC/KH Units
1- Disconnect all power to unit.
2- On LGH/LCH/KG/KC/KH units equipped with
factory-installed dampers, go to Outdoor Air Hood -
Motorized Damper section.
3- Remove and retain five screws securing end panel to
the unit. See figure 1. Remove and discard end panel.
4- Remove and retain two screws securing the hood top
to the damper assembly (provided in kit). Remove
hood top and retain. See figure 3.
5- Install damper assembly in unit; insert top of panel
first. Secure bottom of assembly with screws retained
from previous panel.
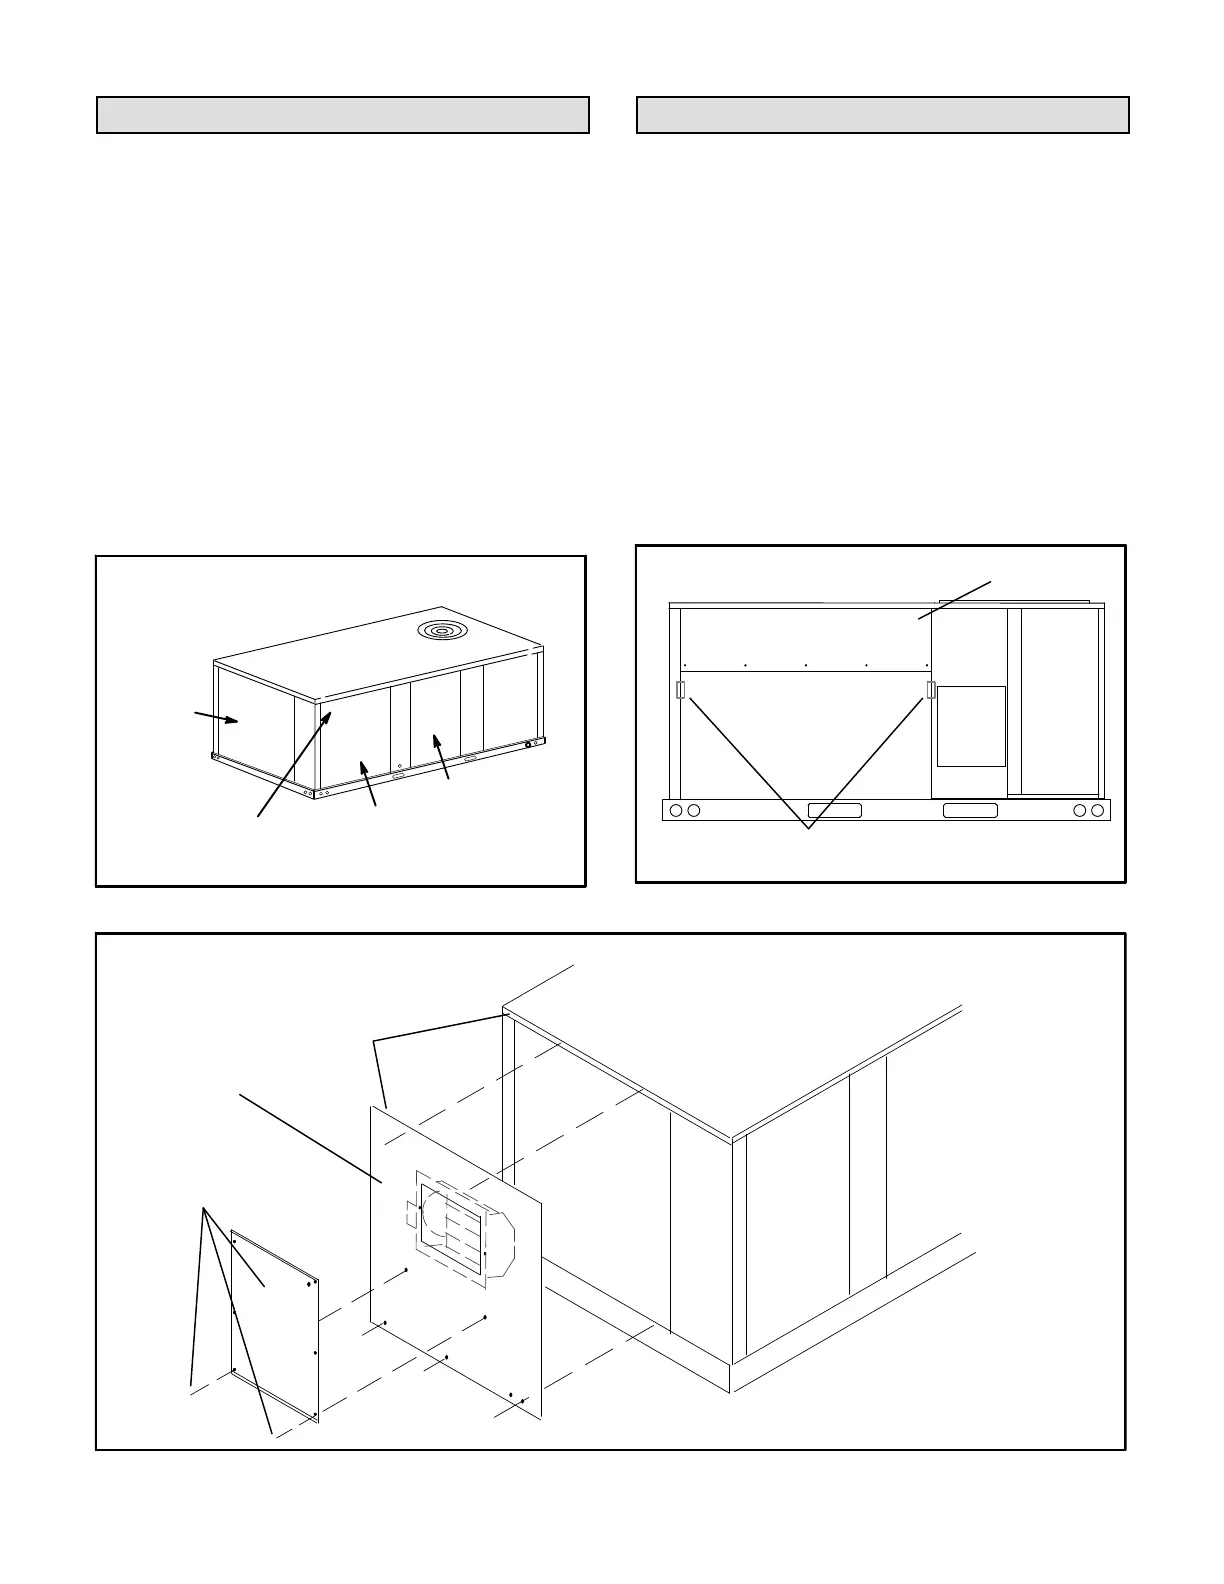
FIGURE 1
LGH/LCH/KG/KC/KH UNIT
FILTER
ACCESS PANEL
UNIT END
PANEL
BLOWER
ACCESS PANEL
J3/P3 BEHIND
THIS PANEL
Install Motorized Damper Assembly
ZG/ZC/ZH Units
1- Disconnect all power to unit.
2- Remove and discard unit back panel. Retain screws and
two door brackets which secure panel. See figure 2.
3- Remove filter access panel. Retain panel and
screws.
4- Install damper assembly (provided in kit) in unit. Hold
door brackets in place and secure damper assembly
and brackets to unit with retained screws.
5- Secure the bottom of the assembly with retained
screws.
FIGURE 2
ZG/ZC/ZH UNIT
UNIT BACK
PANEL
FILTER ACCESS PANEL
J3/P3 BEHIND
THIS PANEL
DOOR
BRACKETS
MOTORIZED OUTDOOR AIR DAMPER - LGH/LCH/KG/KC/KH
DAMPER
ASSEMBLY
UNIT
FILTER
ACCESS
PANEL
FIT TOP OF
PANEL UNDER
UNIT TOP FLANGE
FIGURE 3
REMOVE AND RE
TAIN TWO SCREWS
AND HOOD TOP
 Loading...