6
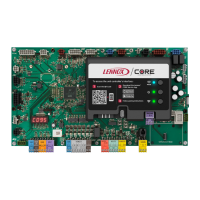
2. Select the cable exit route from the back of the
controller. See gure 8.
Figure 8. Select Cable Route
PCB
PCB
PCB
1
1
1
2
3
¹Use snips to notch the
controller casing to allow
the cable to pass through.
3. Include a drip loop in the cable. See gure 9.
4. Seal the cable entrance to the controller cas-
ing and any wall penetrations to prevent water
from entering the controller. See gure 9.
Figure 9. Prevent Water from Entering Con-
troller Casing
Sealant
Drip
Loop
Drip
Loop
Drip
Loop
Sealant
Sealant
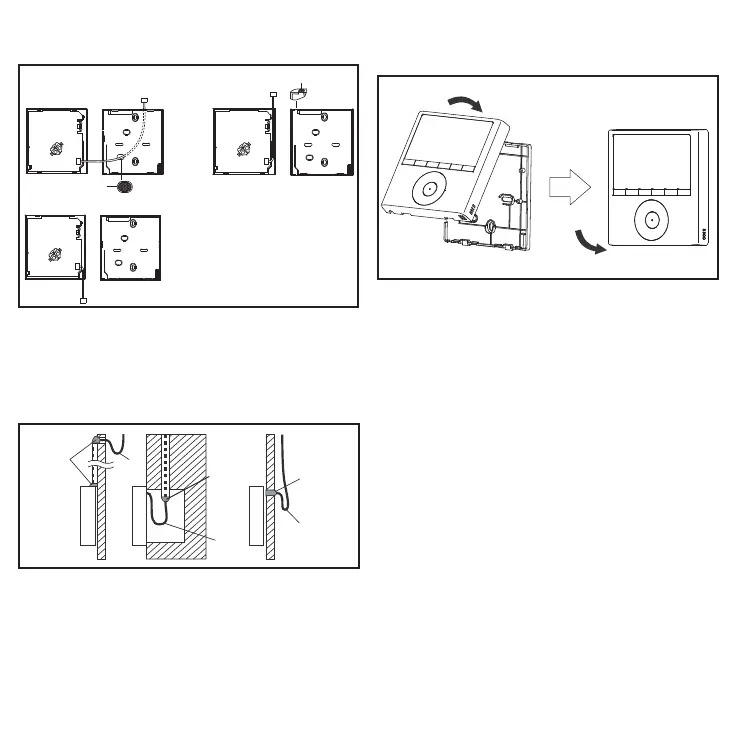
5. Reattach the controller to the back plate. Be
careful not to pinch or bind the wires. See g-
ure 10.
Figure 10. Reattach Controller to Back Plate

 Loading...