11
Installation of M33 Cassette Cover Panel
IMPORTANT
Do not place the cover panel with the diffusers face down
on the oor or other surface. Louvers will be damaged if
pressure is applied to them.
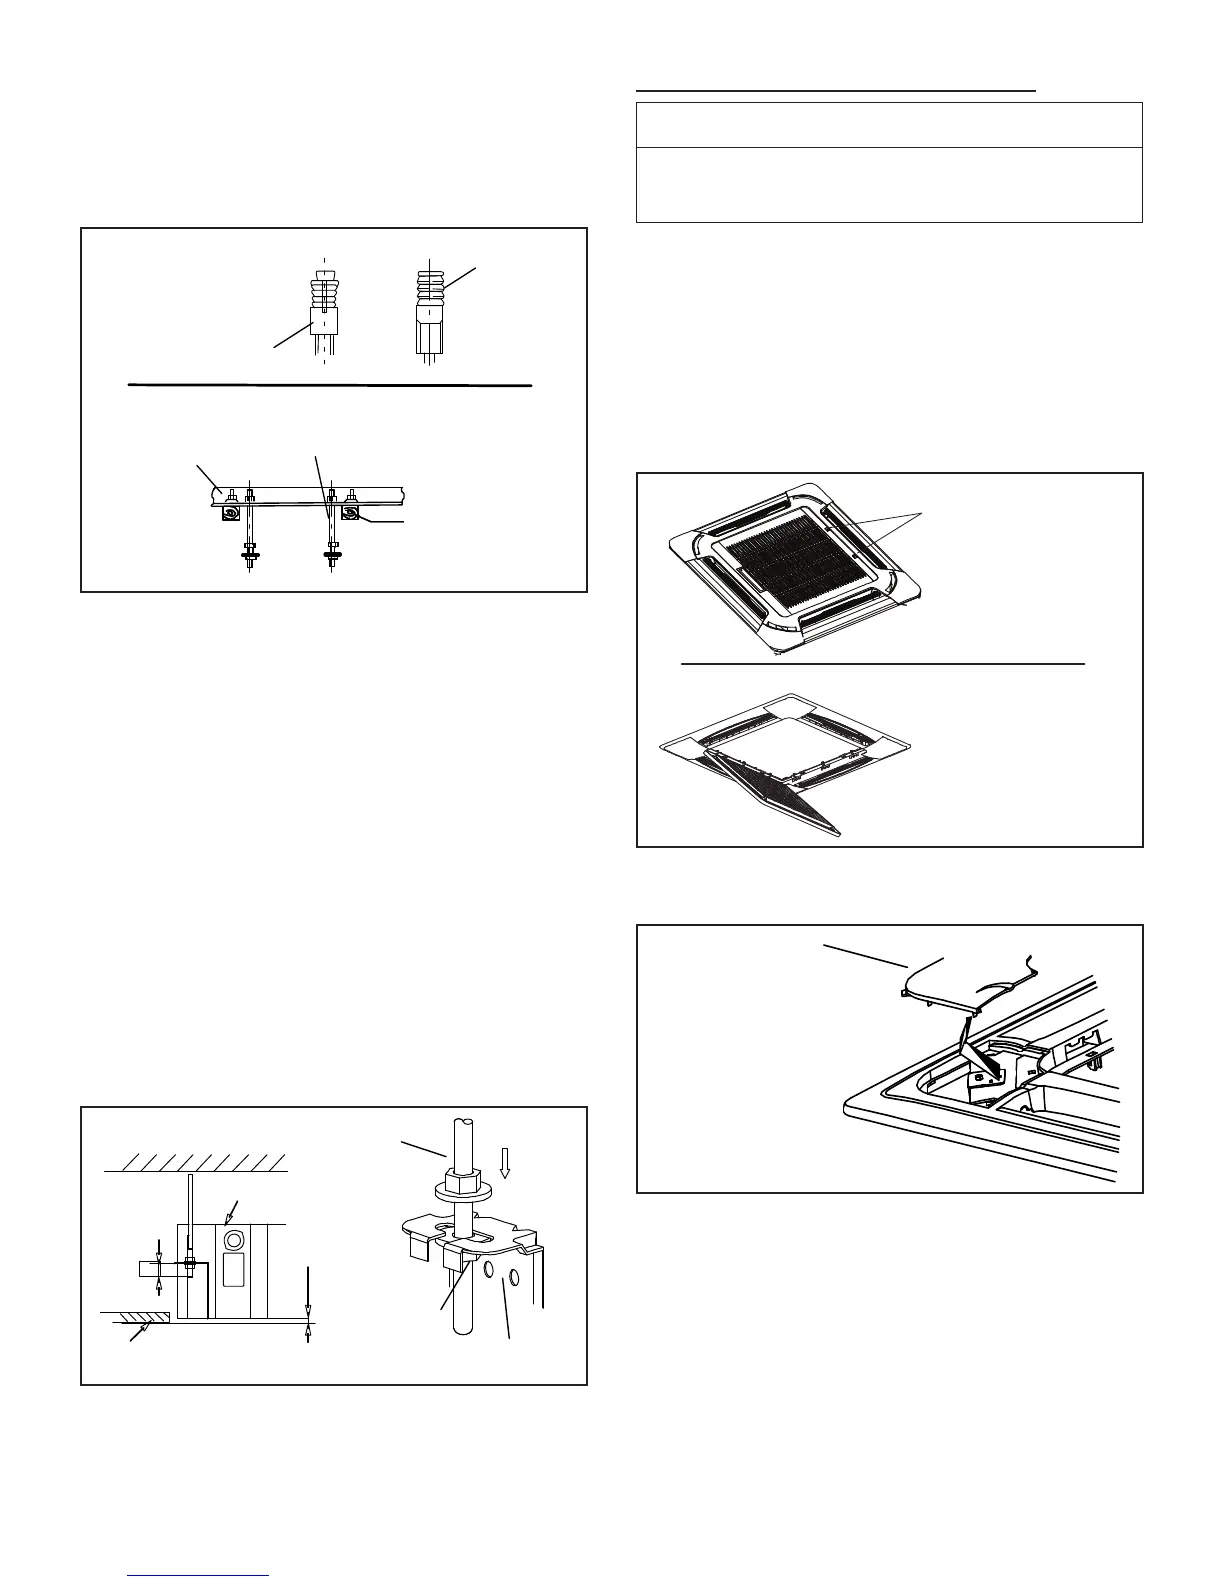
1. Carefully remove the cassette cover panel from its
protective packaging and place the panel diffuser-
side-out on a clean, level surface.
2. Press the two grille latch release buttons at the same
time to release the grille as illustrated in “Figure 8.
Remove Return Air Grille”. Tilt the return air grille
outward at a 45º angle and lift the grille away from
the panel. Carefully place the return air grille off to the
side.
LATCH RELEASE
BUTTONS
45º
Press latch release
buttons at the same
time to release latch.
Tilt return air grille outward,
then, lift to remove grille
from panel.
Figure 8. Remove Return Air Grille
3. Remove access covers from each corner of the panel.
CORNER ACCESS
COVER
Remove screws and loosen
straps to remove corner
covers from panel.
Figure 9. Remove Corner Covers
Unistrut channel xed securely in place to accept the
⅜” threaded rods.
5. Slide one nut and one washer onto each threaded rod.
Use electrical tape to keep the washer from failing off.
Position the nuts slightly above the nal resting place
of the four suspension brackets.
ANGLE IRON
BOLTED IN
PLACE ACROSS
WOODEN JOISTS
WOODEN JOIST
⅜” THREADED
ROD
ANGLE IRON
ACROSS
WOODEN JOISTS
ANCHOR
CONCRETE CEILING
USING ANCHORS
⅜” THREADED
ROD
Figure 6. Suspending Methods
6. Use either a mechanical lifting device or a minimum
of two people to raise the unit and insert the threaded
rods into the suspension brackets on the cassette
base. Slide a washer and then a nut onto each rod
below each suspension bracket. Use the leveling nut
(beneath suspension bracket) to adjust the cassette
base to the correct height. Remove the electrical
tape holding the upper washers and nuts in place
and tighten each of the four nuts above the brackets
down onto the brackets. This will ensure that the unit
remains level.
7. If the unit is being installed in an application that
includes a sheet rock (plasterboard) ceiling, it is
recommended to install an access panel in a suitable
location to allow nal connection of the refrigerant
piping, condensate line and electrical connections.
This will also allow access for future maintenance. If
this is not possible, make nal connections before
installing cassette cover panel.
L
⅜” to ½”
CASSETTE BASE
DROP CEILING
LEVELING NUT
⅜” THREADED
ROD
SUSPENSION
BRACKET
Figure 7. Suspending Hardware
 Loading...