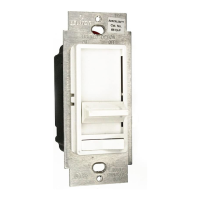
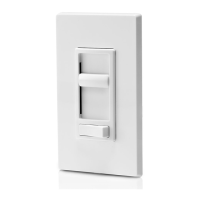
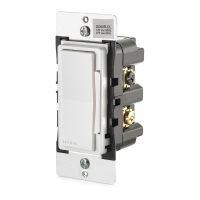
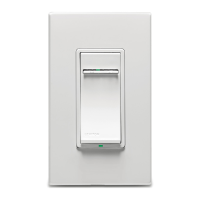
Single Pole (One location) or 3-Way (Multi-location)
Magnetic Low-Voltage Slide Dimmer
120VAC, 60Hz
Cat. No. 6613-PL, 600VA
INSTALLATION INSTRUCTIONS
DI-00X-06613-02A
Tools needed to install your Dimmer:
Slotted/Philips Screwdriver Electrical Tape
Pliers Pencil
Cutters Ruler
Installing Dimmer by itself or with other devices:
If installing Dimmer in a single device application, proceed with the
INSTALLING YOUR DIMMER section. If installing Dimmer in a multi-
device application, proceed as follows:
MULTI-DEVICE APPLICATION:
In multi-dimmer installations, the reduction of the dimmer’s capacity is
required. Refer to the chart for maximum load per dimmer.
MAXIMUM BULB WATTAGE:
Low-voltage dimmers are rated in Volt-Amps (VA). The maximum bulb
wattage is determined by the efficiency of the transformer in the low-
voltage lighting system. Transformer efficiencies will vary from different
manufacturers; consider 75% efficient as average. Use the chart to
determine maximum bulb wattage for typical transformer efficiency
ratings.
INSTALLING YOUR DIMMER
NOTE: Use check boxes when Steps are completed.
WARNING: To avoid fire, shock, or death; TURN OFF
POWER at circuit breaker or fuse and test that power is off
before wiring!
Removing existing switch: Remove existing wallplate
and switch mounting screws. Carefully pull switch from wall
box. DO NOT remove wires attached to the switch at this
time.
Identifying your wiring application (most
common):
NOTE: If the wiring in the wall box does not resemble any of
these configurations, consult a qualified electrician.
Step 2
Disconnecting switch wires and preparing wires:
Step 4
Step 1
Step 3
ONOFF
ONOFF
ONOFF
ONOFF
ONOFF
ONOFF
ONOFFONOFF
ONOFF
ONOFF
ONOFF
ONOFF
Single-Pole:
Look at the back of your switch.
If there are 2 wires connected to
two screw terminals (not
including a green or bare copper
wire used for grounding), you
have a Single-Pole switch.
3-Way:
Look at the back of your switch. If there
are 3 wires connected to three screw
terminals (not including a green or bare
copper wire used for grounding), you
have a 3-Way switch. Note that one of
the screw terminals will usually be a
different color (black) or labeled
Common. Tag that wire with electrical
tape to identify.
WARNINGS:
• To be installed and/or used in accordance with appropriate electrical codes and regulations.
• If you are unsure about any part of these instructions, consult a qualified electrician.
• To avoid overheating and possible damage to this device and other equipment, do not install to control a
receptacle, fluorescent lighting, a motor- or a transformer-operated appliance.
• Use with magnetic low-voltage transformers, incandescent, or 120V halogen fixtures only. Use a Leviton
electronic low-voltage dimmer to control electronic (solid state) low-voltage transformers.
CAUTIONS:
• When magnetic low-voltage circuits are operated at a dim level, with all lamps inoperative, excess current may
flow through the transformer. To avoid possible transformer failure due to overcurrent, use a transformer that
incorporates thermal protection or a fuse at the primary windings.
• Use only one (1) dimmer in a 3- or 4-way circuit. The switch(es) will turn the light on at the brightness level
selected at the dimmer.
• Disconnect power at circuit breaker or fuse when servicing fixture.
• Use this device only with copper or copper clad wire. With aluminum wire use only devices marked CO/ALR or CU/AL.
√
More than
Cat. No. Single Two Devices 2 Devices
6613-PL 600VA 500VA 400VA
MAXIMUM LOAD PER DIMMER FOR MULTI-DEVICE
Two More than
Rating Single Gang
2 Gang
600VA 450W 375W 300W
MAXIMUM BULB WATTAGE AT 75% EFFICIENCY
Tag Common
Screw Wire
Strip 5/8"
Cut
(if necessary)
Strip Gage
5/8"
• Disconnect wires from screw terminals or
Quickwire™ slots (shown).
• Pull off pre-cut insulation from Dimmer
leads.
• Make sure that the ends of the wires from
the wall box are
straight (cut if
necessary)
.
• Remove 5/8" (1.6 cm) of insulation from
each wire in the wall box (shown).
• For Single-Pole Application, go to Step
5A.
• For 3-Way Application, go to Step 5B.
Press in slot and
pull out wire