17INSTALLATION
ENGLISH
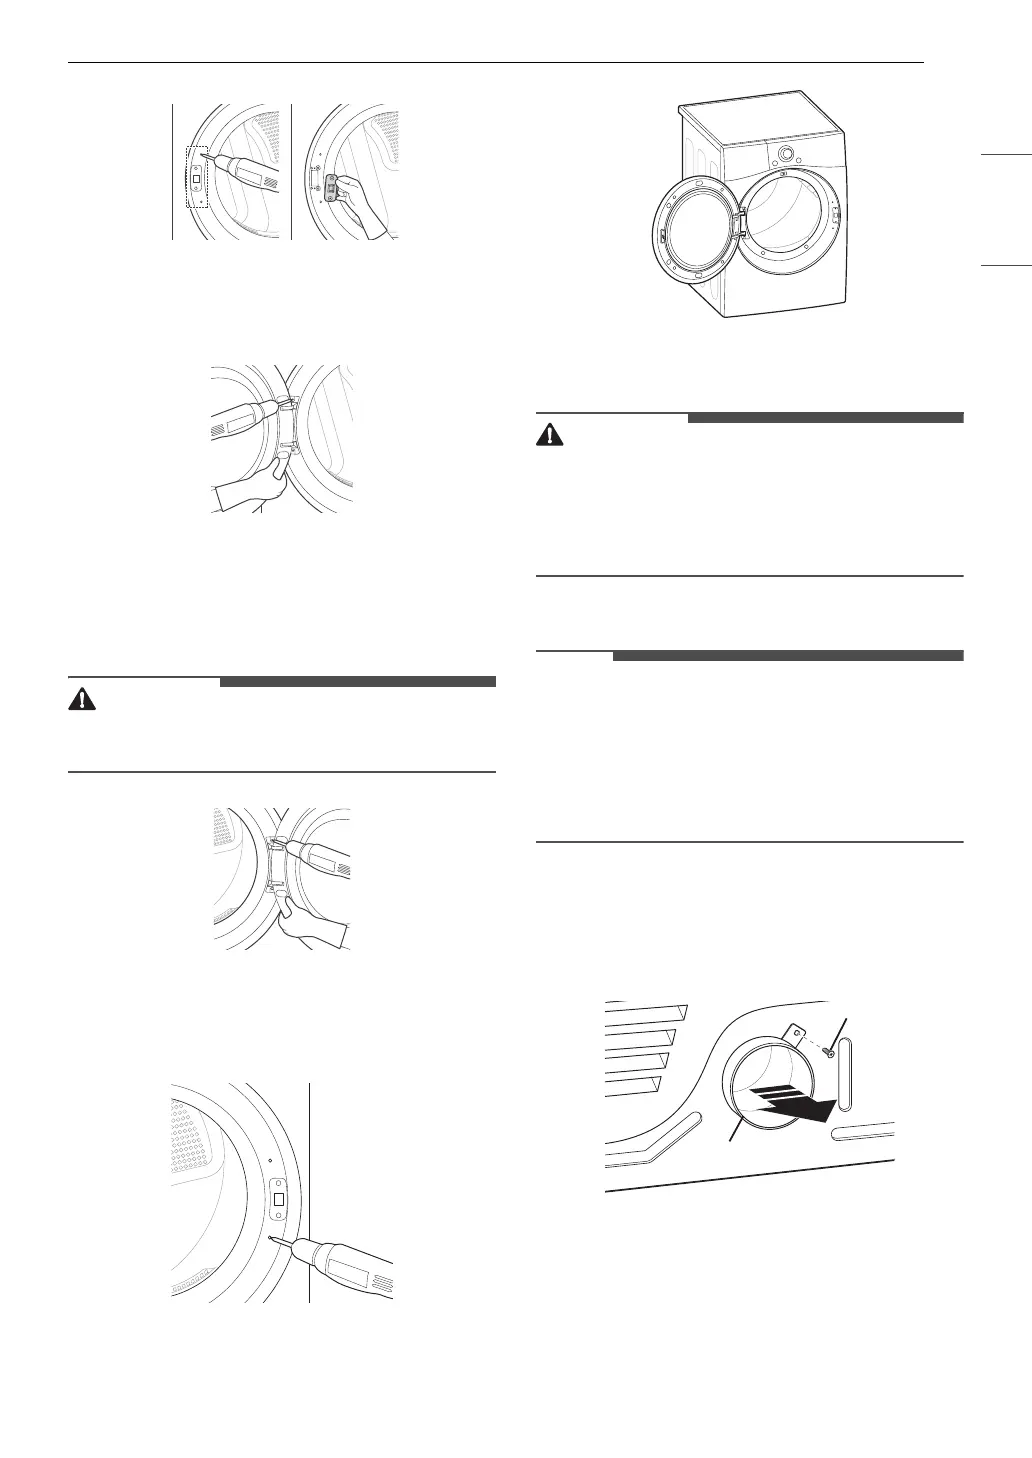
2 While supporting the door, remove the 2
screws on the door hinge. Remove the door.
3 Turn the door upside down and line up the
holes in the hinge with the holes on the
opposite side of the cabinet. Reinstall the
door with the screws removed in step 2.
• Be sure to support the weight of the door before
inserting the hinge screws.
4 Install the 2 decorative screws, the latch, and
2 latch screws removed in step 1 on the
opposite side from which they were removed.
5 Check that the door closes properly.
Installing the Vent Kit
• Use long-sleeved gloves and safety glasses.
• Use a heavy metal vent.
• Do not use plastic or thin foil ducts.
• Clean old ducts before installing the appliance.
The appliance is configured to vent to the rear. It
can also vent to the bottom or side.
• An adapter kit, part number 383EEL9001B, may
be purchased from your LG retailer. This kit
contains duct components necessary to change
the appliance vent location.
• Right-side venting is not available on gas
models.
Side Venting
1 Remove the rear exhaust duct retaining screw
a and pull out the exhaust duct b.
2 Press the tabs on the knockout c and
carefully remove the knockout for the desired
vent opening. (Right-side venting is not
available on gas models.) Press the adapter
duct
d onto the blower housing and secure
to the base of the dryer as shown.
 Loading...