21
ENGLISH
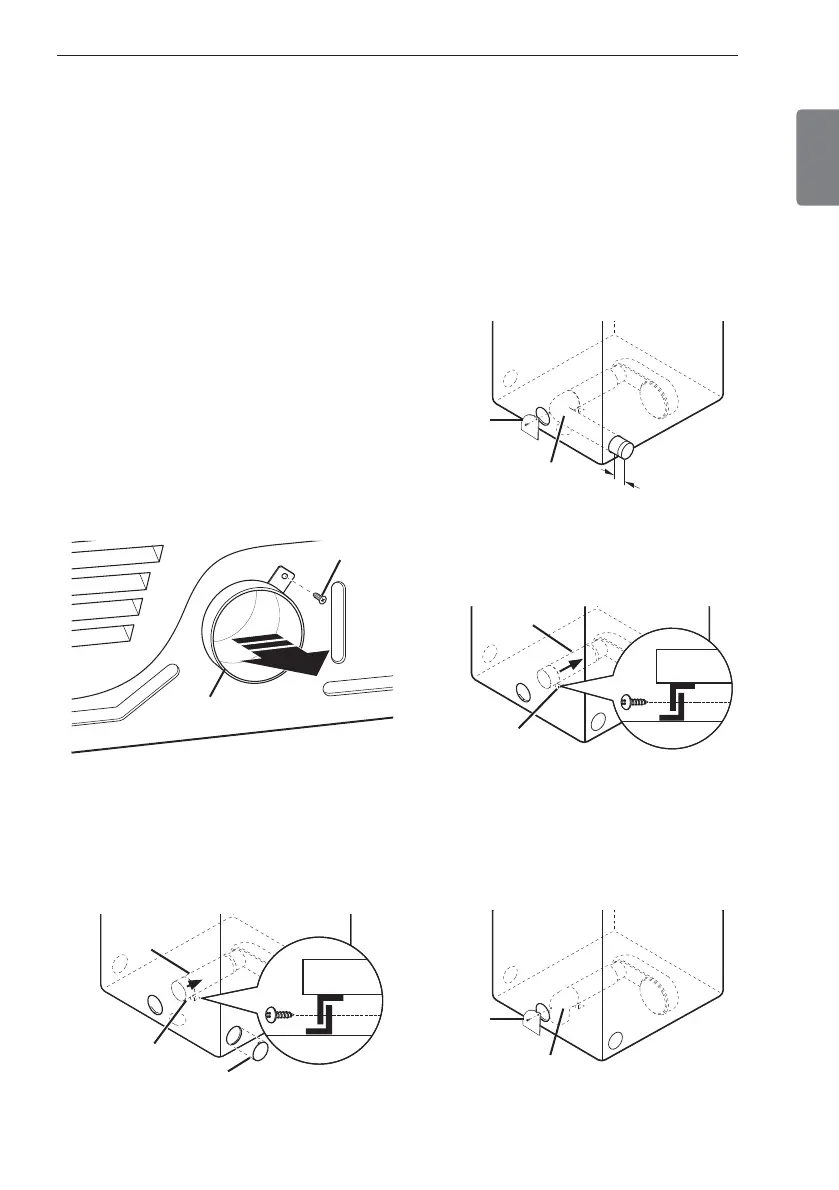
Installing the Side Vent Kit
W
WARNING
t6TFBIFBWZNFUBMWFOU
t%POPUVTFQMBTUJDPSUIJOGPJMEVDU
t$MFBOPMEEVDUTCFGPSFJOTUBMMJOHUIJTESZFS
t5PSFEVDFUIFSJTLPGJOKVSZUPQFSTPOTBEIFSFUPBMM
JOEVTUSZSFDPNNFOEFETBGFUZQSPDFEVSFTJODMVEJOH
UIFVTFPGMPOHTMFFWFEHMPWFTBOETBGFUZHMBTTFT
tFailure to follow all of the safety warnings in this
manual could result in property damage, injury to
persons, or death.
Your new dryer is shipped to vent to the rear. It can also
be configured to vent to the bottom or side (right-side
venting is not available on gas models).
"OBEBQUFSLJUQBSUOVNCFS&&-#NBZCF
purchased from your LG retailer. This kit contains the
necessary duct components to change the dryer vent
location.
3FNPWFUIFSFBSFYIBVTUEVDUSFUBJOJOHTDSFX1VMM
out the exhaust duct.
015*0/4*%&7&/5*/(
1SFTTUIFUBCTPOUIFLOPDLPVUBOEDBSFGVMMZSFNPWF
the knockout for the desired vent opening (right-
side venting is not available on gas models). Press the
adapter duct onto the blower housing and secure to
the base of the dryer as shown.
Rear
Exhaust Duct
Retaining
Screw
,OPDLPVU
#SBDLFU
Adapter
Duct
1SFBTTFNCMFBJODIDNFMCPXUPUIFOFYU
JODIDNEVDUTFDUJPOBOETFDVSFBMMKPJOUT
XJUIEVDUUBQF#FTVSFUIBUUIFNBMFFOEPGUIFFMCPX
faces AWAY from the dryer. Insert the elbow/duct
assembly through the side opening and press it onto
the adapter duct. Secure it in place with duct tape.
#FTVSFUIBUUIFNBMFFOEPGUIFEVDUQSPUSVEFT
⁄
JODIFTDNUPDPOOFDUUIFSFNBJOJOHEVDUXPSL
Attach the cover plate to the back of the dryer with
the included screw.
015*0/#0550.7&/5*/(
1SFTTUIFBEBQUFSEVDUPOUPUIFCMPXFSIPVTJOHBOE
secure to the base of the dryer as shown.
*OTFSUUIFJODIDNFMCPXUISPVHIUIFSFBS
PQFOJOHBOEQSFTTJUPOUPUIFBEBQUFSEVDU#FTVSF
that the male end of the elbow faces down through
the hole in the bottom of the dryer. Secure it in place
with duct tape. Attach the cover plate to the back of
the dryer with the included screw.
Elbow
Cover
Plate
#SBDLFU
Adapter
Duct
Elbow
Cover
Plate
⁄
”
DN
INSTALLATION INSTRUCTIONS
 Loading...