45
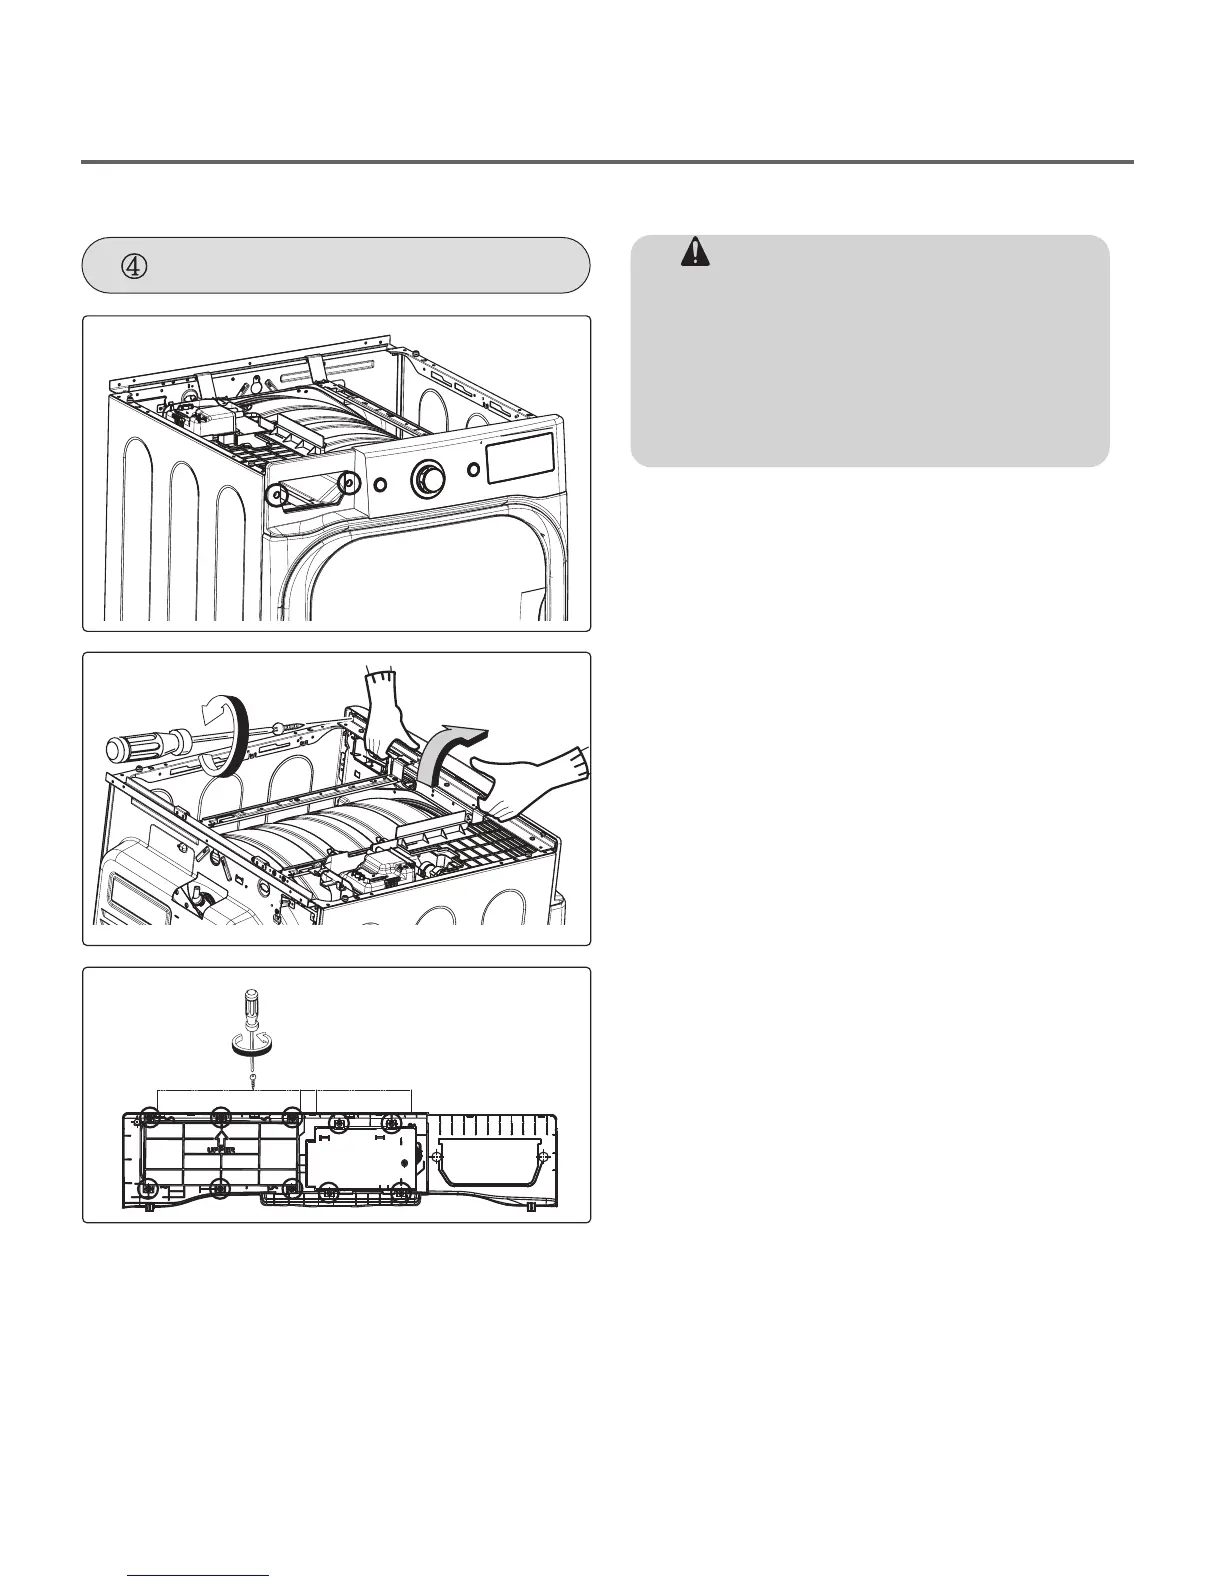
CONTROL PANEL ASSEMBLY
1. Remove 2 screws on the control panel.
2. Remove 1 screws on the panel frame.
3. Pull the control panel assembly upward
and then forward.
4. Remove 10 Screws on the PCB
assembly.
5. Disassemble the control panel
assembly.
WARNING !
When you disassemble the control panel,
be sure to disconnect the dryer from its
electrical supply. Protect your hands and
arms from sharp edges when working. To
reduce the risk of Injury to persons adhere to
all industry recommended safety procedures
including the use of long sleeved gloves and
safety glasses.
 Loading...