14
7. TROUBLESHOOTING
7-1. BEFORE PERFORMING SERVICE
■ Be careful of electric shock when disconnecting parts while troubleshooting.
■ The voltage of each terminal is 120 V AC and DC when the unit is plugged in.
7-2. QC TEST MODE.
The washer must be empty and the controls must be in the off state.
1. Press the WASH/RINSE and SPIN SPEED buttons simultaneously.
2. Press the Power button, while the above condition. Then buzzer will sound twice.
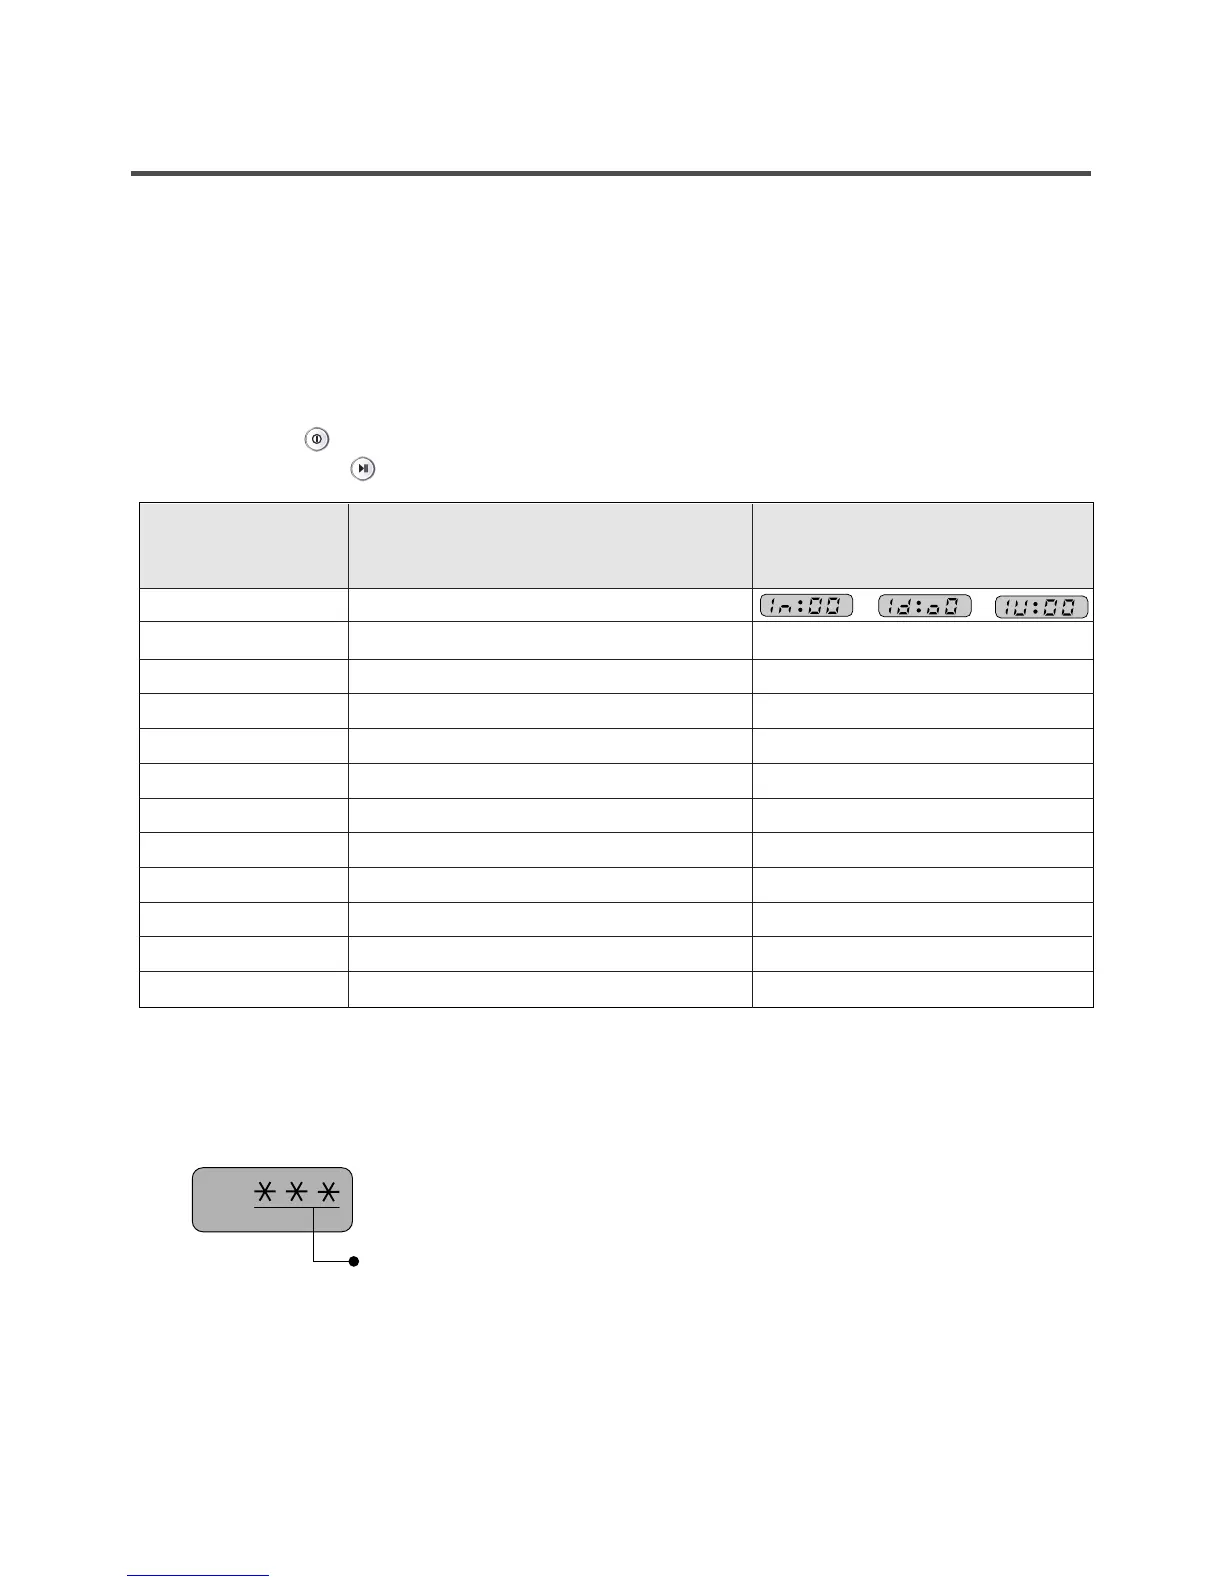
3. Press the Start/Pause button repeatedly to cycle through the test modes.
7-3. HOW TO CHECK THE WATER LEVEL FREQUENCY
Number of times the
Start/Pause button
is pressed
Check Point Display Status
None
1 time
2 times
3 times
4 times
5 times
6 times
7 times
8 times
9 times
10 times
11 times
Turns on all lamps and locks the door.
Tumble clockwise.
Low speed Spin.
High speed Spin.
Inlet valve for prewash turns on.
Inlet valve for main wash turns on.
Inlet valve for hot water turns on.
Inlet valve for bleach turns on.
Tumble counterclockwise.
Water Temperature (Thermistor)
Drain pump turns on.
Off
rpm (42~50)
rpm (55~65)
rpm (105~115)
Water level frequency (225~265)
Water level frequency (225~265)
Water level frequency (225~265)
Water level frequency(225~265)
rpm (42~50)
Water Temperature [°C]
Water level frequency (225~265)
❋ Press the CUSTOM PROGRAM and PRE-WASH buttons simultaneously.
A display indicating 41 means a water level frequency of 24.1 kHz.
The digits indicate the water level frequency.
➔
➔
 Loading...