6
FUNCTIONAL
DESCRIPTION
CAUTION:
• Always be sure that the tool is switched off and the
battery cartridge is removed before adjusting or
checking function on the tool.
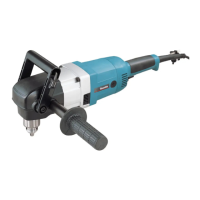
Installing or removing battery cartridge
• Always switch off the tool before insertion or removal of
the battery cartridge.
• To remove the battery cartridge, pull out the set plate on
the tool and grasp both sides of the cartridge while
withdrawing it from the tool.
• To insert the battery cartridge, align the tongue on the
battery cartridge with the groove in the housing and slip
it into place. Snap the set plate back into place. Be sure
to close the set plate fully before using the tool to prevent
the battery cartridge from accidentally falling out of the
tool.
• Do not use force when inserting the battery cartridge. If
the cartridge does not slide in easily, it is not being
inserted correctly.
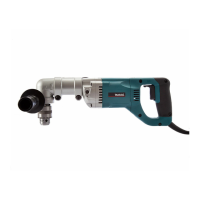
Switch action
CAUTION:
• Before inserting the battery cartridge into the tool,
always check to see that the switch trigger actuates
properly and returns to the “OFF” position when
released.
To start the tool, simply pull the switch trigger. Tool speed is
increased by increasing pressure on the switch trigger.
Release the switch trigger to stop.
Electric brake
This tool is equipped with an electric brake. If the tool consis-
tently fails to quickly stop after switch trigger release, have
tool serviced at a Makita service center.
1. Set plate
2. Battery cartridge
1
2
002055
1. Switch trigger
1
002870
 Loading...