15 ENGLISH
1 1
2
2
3
4
5
6
3
►1. Upper guard 2. Lower guard 3. Base 4. Stopper
5. Open 6. Close
Ifthelowerguardisnotfunctioningproperly,checkif
saw dust is accumulated inside of the upper and lower
guards.Ifthelowerguardisnotfunctioningproperly
evenafterremovingdust,haveyourtoolservicedata
Makita service center.
Cutting operation
CAUTION: Wear dust mask when performing
cutting operation.
CAUTION: Be sure to move the tool forward
in a straight line gently. Forcing or twisting the tool
will result in overheating the motor and dangerous
kickback,possiblycausingsevereinjury.
NOTE:Whenthebatterycartridgetemperatureis
low,thetoolmaynotworktoitsfullcapacity.Atthis
time,forexample,usethetoolforalight-dutycutfor
awhileuntilthebatterycartridgewarmsupashigh
as room temperature. Then, the tool can work to its
fullcapacity.
Holdthetoolrmly.Thetoolisprovidedwithbothafront
grip and rear handle. Use both to best grasp the tool.
Ifbothhandsareholdingsaw,theycannotbecutby
the circular saw blade. Set the base on the workpiece
tobecutwithoutthecircularsawblademakingany
contact. Then turn the tool on and wait until the circular
sawbladeattainsfullspeed.Nowsimplymovethetool
forwardovertheworkpiecesurface,keepingitatand
advancingsmoothlyuntilthesawingiscompleted.
Togetcleancuts,keepyoursawinglinestraightandyour
speedofadvanceuniform.Ifthecutfailstoproperlyfollowyour
intended cut line, do not attempt to turn or force the tool back
tothecutline.Doingsomaybindthecircularsawbladeand
leadtodangerouskickbackandpossibleseriousinjury.Release
switch, wait for circular saw blade to stop and then withdraw tool.
Realign tool on new cut line, and start cut again. Attempt to avoid
positioning which exposes operator to chips and wood dust being
ejectedfromsaw.Useeyeprotectiontohelpavoidinjury.
Rip fence (Guide rule)
CAUTION: Make sure that the rip fence is
securely installed in the correct position before
use.Improperattachmentmaycausedangerous
kickback.
2
►1.Ripfence(Guiderule)2. Clamping screw
Thehandyripfenceallowsyoutodoextra-accuratestraightcuts.
Simplyslidetheripfenceupsnuglyagainstthesideofthework-
piece and secure it in position with the clamping screw on the front
of the base. It also makes repeated cuts of uniform width possible.
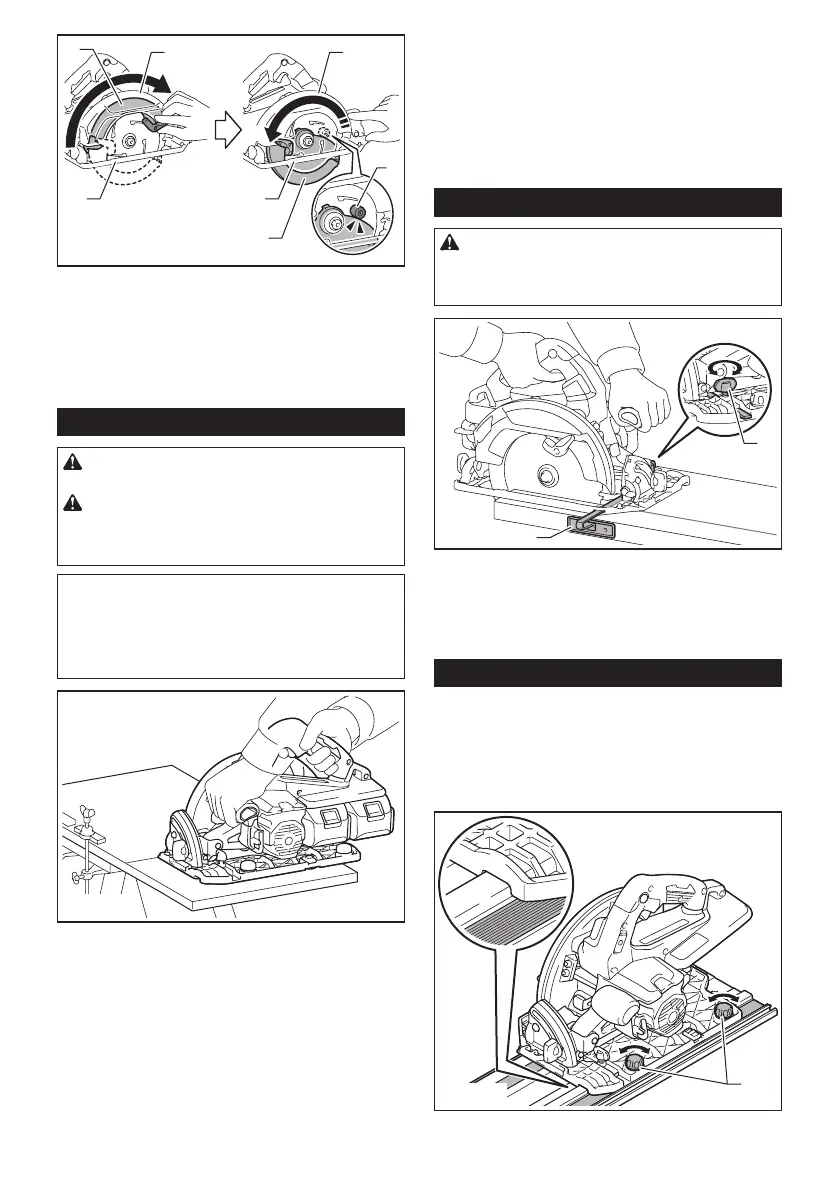
Guide rail
Optional accessory
Placethetoolontherearendofguiderail.Turntwoadjustingscrews
onthetoolbasesothatthetoolslidessmoothlywithoutaclatter.
Holdboththefrontgripandrearhandleofthetoolrmly.Turnonthe
tool and cut the splinter-guard along the full length with a stroke. Now
the edge of the splinter-guard corresponds to the cutting edge.
1
►1.Adjustingscrews
 Loading...