14 ENGLISH
NOTE:
cartridge.
To install the battery cartridge;
1.
cover.
Fig.16: 1.2. Locking lever
2.
slot on the mower then slide the cartridge until it locks in
place with a little click.
Fig.17: 1.
3.
as far as it will go.
Fig.18: 1.
4.
latched with the locking lever.
To remove the battery cartridge from the mower;
1.
2.
sliding the button on the front of the cartridge.
3.
4.
-
-
placed under one of the following conditions:
Overload protection
-
that caused the tool to become overloaded. Then turn
the tool on to restart.
Overheat protection
the tool on again.
Overdischarge protection
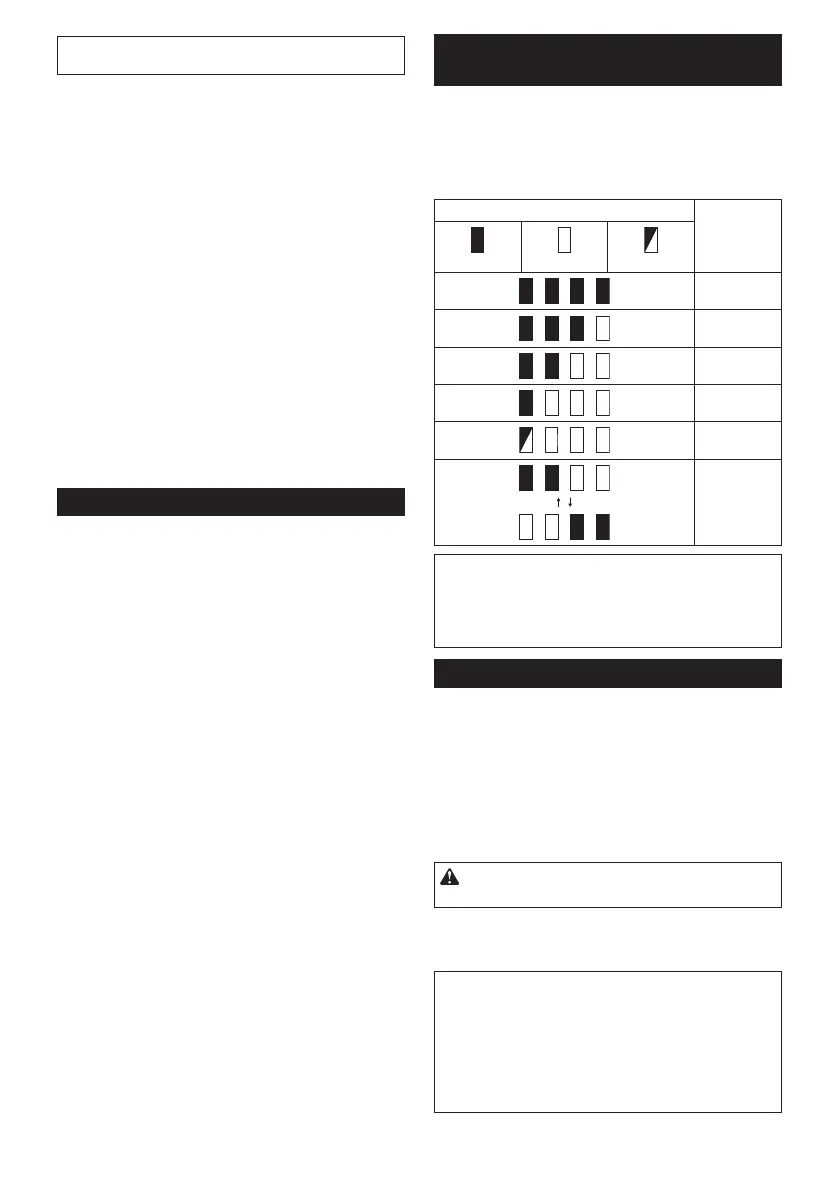
Indicating the remaining battery
capacity
Only for battery cartridges with the indicator
-
light up for a few seconds.
Fig.19: 1. Indicator lamps 2. Check button
Indicator lamps Remaining
capacity
Lighted Blinking
75% to 100%
50% to 75%
25% to 50%
0% to 25%
Charge the
malfunctioned.
NOTE: Depending on the conditions of use and the
NOTE:
Control panel
The control panel has the main power switch, the mode
Fig.20: 1.2. Mode switching
lamp 3. Main power lamp 4. Check button
5. Mode switching button 6. Main power
switch
Main power switch
WARNING:
switch when not in use.
To turn on the machine, press the main power switch.
machine, press the main power switch again.
NOTE: If the main power lamp lights up in red or
blinks in red or green, refer to the instructions for tool/
NOTE:
function. To avoid unintentional start up, the main
switch lever is not pulled for a certain period after the
main power switch is turned on.
 Loading...