1
c
!
I
i
Swing the protective hood up and guide the adjusting screw
(F/6) through the hoodand theguidetrack(F/9), and hold in
position.
Position the spacer ring (F/lO) as shown in Fig. F and hold.
Swing the protective hood
so
that the adjusting screw is
facing the hole in the bracket (F/11).
Push in the adjusting screw (the threads press against the
guide track), put on the spring washer, and screw on the
knob.
Mount the cutting disc (see "Mounting the Cutting Disc").
Repositioning the cutting
tachment
(Model
9500,9501)
-
Remove the cutting disc and pull the adapter ring and second
pressure disc off the shaft (see also "Cleaning the Protective
Hood").
Dismountthe cutting attachment (see"Changing
the V-belt").
-
13
17
16
15
12
-
Loosen the tightening toggle (G/12) and turn the protective
hood
so
that the large hole is facing the adjusting screw
(G/13).
Unscrew the toggle and remove the spring housing (G/14)
along with both washers (G/15). Pull the adjusting screw out
through the hole and take off the spacer ring (G/16) and the
lock bushing (G/17).
-
IHi
-
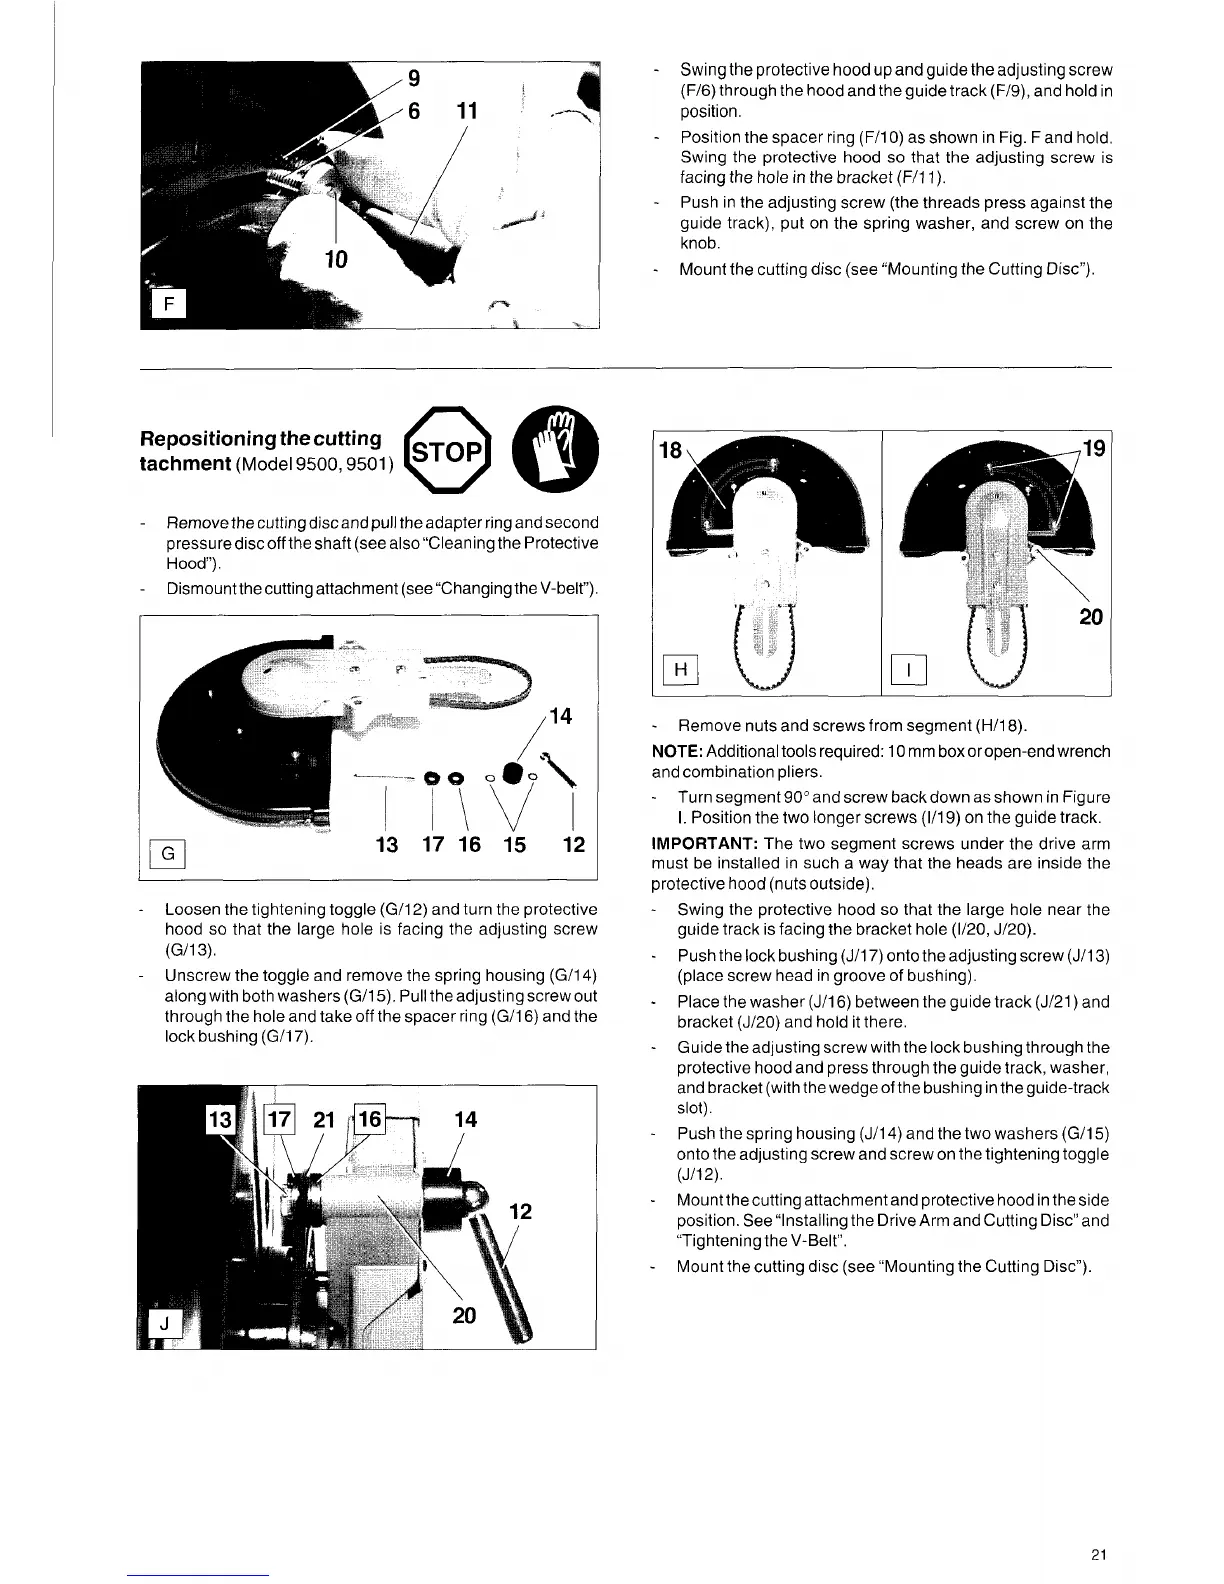
NOTE:
Additional
tools
required: 10 mm box oropen-end wrench
and combination pliers.
-
Turn segment 90" and screw back down as shown in Figure
I.
Position the two longer screws (1/19) on the guide track.
IMPORTANT:
The two segment screws under the drive arm
must
be installed in such a way that the heads are inside the
protective hood (nuts outside).
Remove nuts and screwsfrom segment (H/18).
Swing the protective hood
so
that the large hole near the
guide track is facing the bracket hole (V20, J/20).
Push the lock bushing (J/17) onto the adjusting screw (J/13)
(place screw head in groove
of
bushing).
Place the washer (J/16) between the guide track (J/21) and
bracket (J/20) and hold it there.
Guide the adjusting screw with the lock bushing through the
protective hood and press through the guide track, washer,
and bracket (with the wedge of the bushing in the guide-track
Push the spring housing (J/14) and the two washers (G/15)
onto the adjusting screw and screw on the tightening toggle
(J/12).
Mount the cutting attachment and protective hood in the side
position. See "Installing the Drive Arm and Cutting Disc" and
"Tightening the V-Belt".
Mount the cutting disc (see "Mounting the Cutting Disc").
slot).
21
 Loading...