10 ENGLISH
2
1
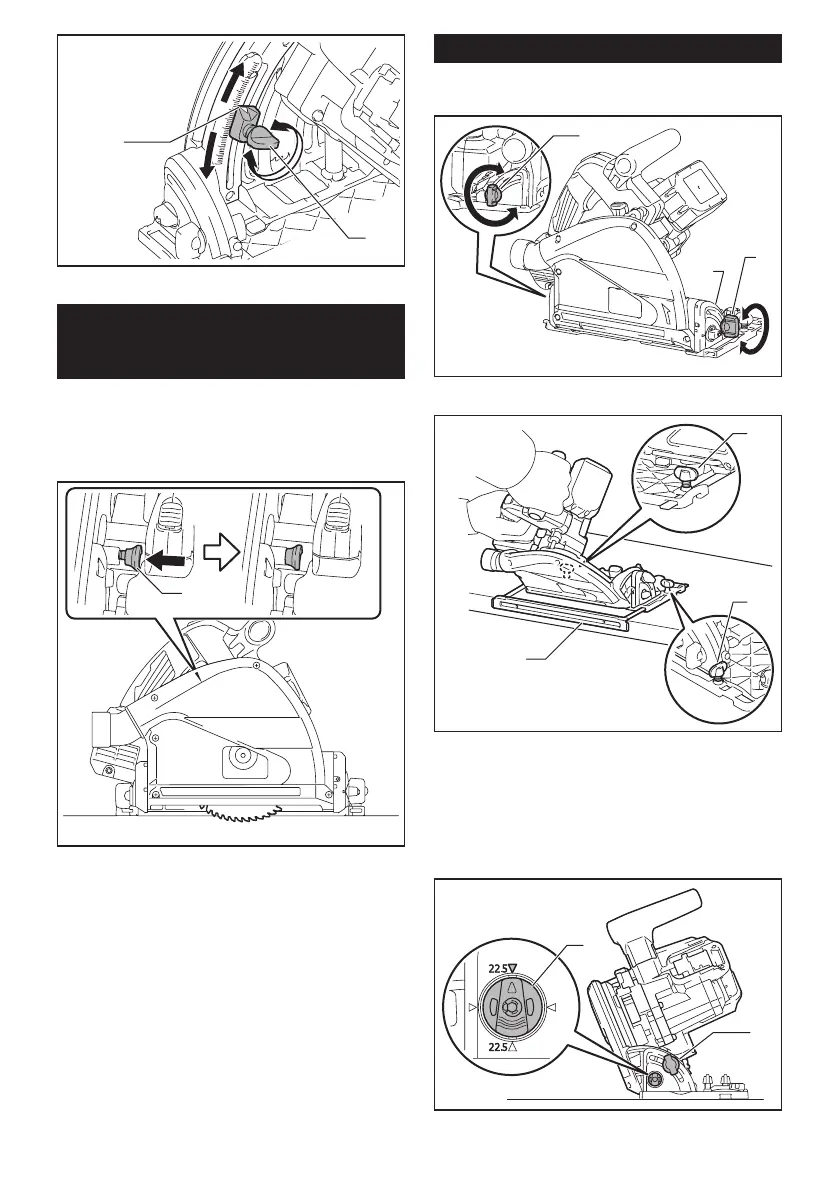
►1. Blade lower limit stopper 2. Clamping screw
Quick stop button for 2 to 3 mm
depth of cut when using guide rail
(optional accessory)
Thistoolhasthequickstopbuttonfor2to3mmdepth
of cut on the gear housing aside the rear handle when
usingguiderail.Thisisusedwhenavoidingsplinteron
the workpiece in the cut. Make a pass of the 2 to 3 mm
rstcutandthenmakeanotherpassofusualcut.
1
►1. Quick stop button
Toobtainthe2to3mmdepthofcut,pushinthequick
stopbuttontowardthesawblade.Thisisconvenientfor
avoiding splinter on the workpiece.
Toreleasethedepthofcutfromthispositionforfree
depthofcut,justpullthebuttonback.
Bevel cutting
Loosen the clamping screws. Set for the desired angle by
tilting accordingly, then tighten the clamping screws securely.
1
1
2
►1. Clamping screw 2. Bevel scale plate
2
1
2
►
1.Subbase(Optionalaccessory)2. Clamping screw
Positive stopper
Thepositivestopperisusefulforsettingthedesignatedangle
quickly.Turnthepositivestoppersothatthearrowonitpoints
22.5°.Loosentheclampingscrewsinfrontandback.Thentiltthe
blade until it stops and secure the base with the clamping screws.
1
2
►1. Positive stopper 2. Clamping screw
 Loading...