9
1
3
2
4
012190
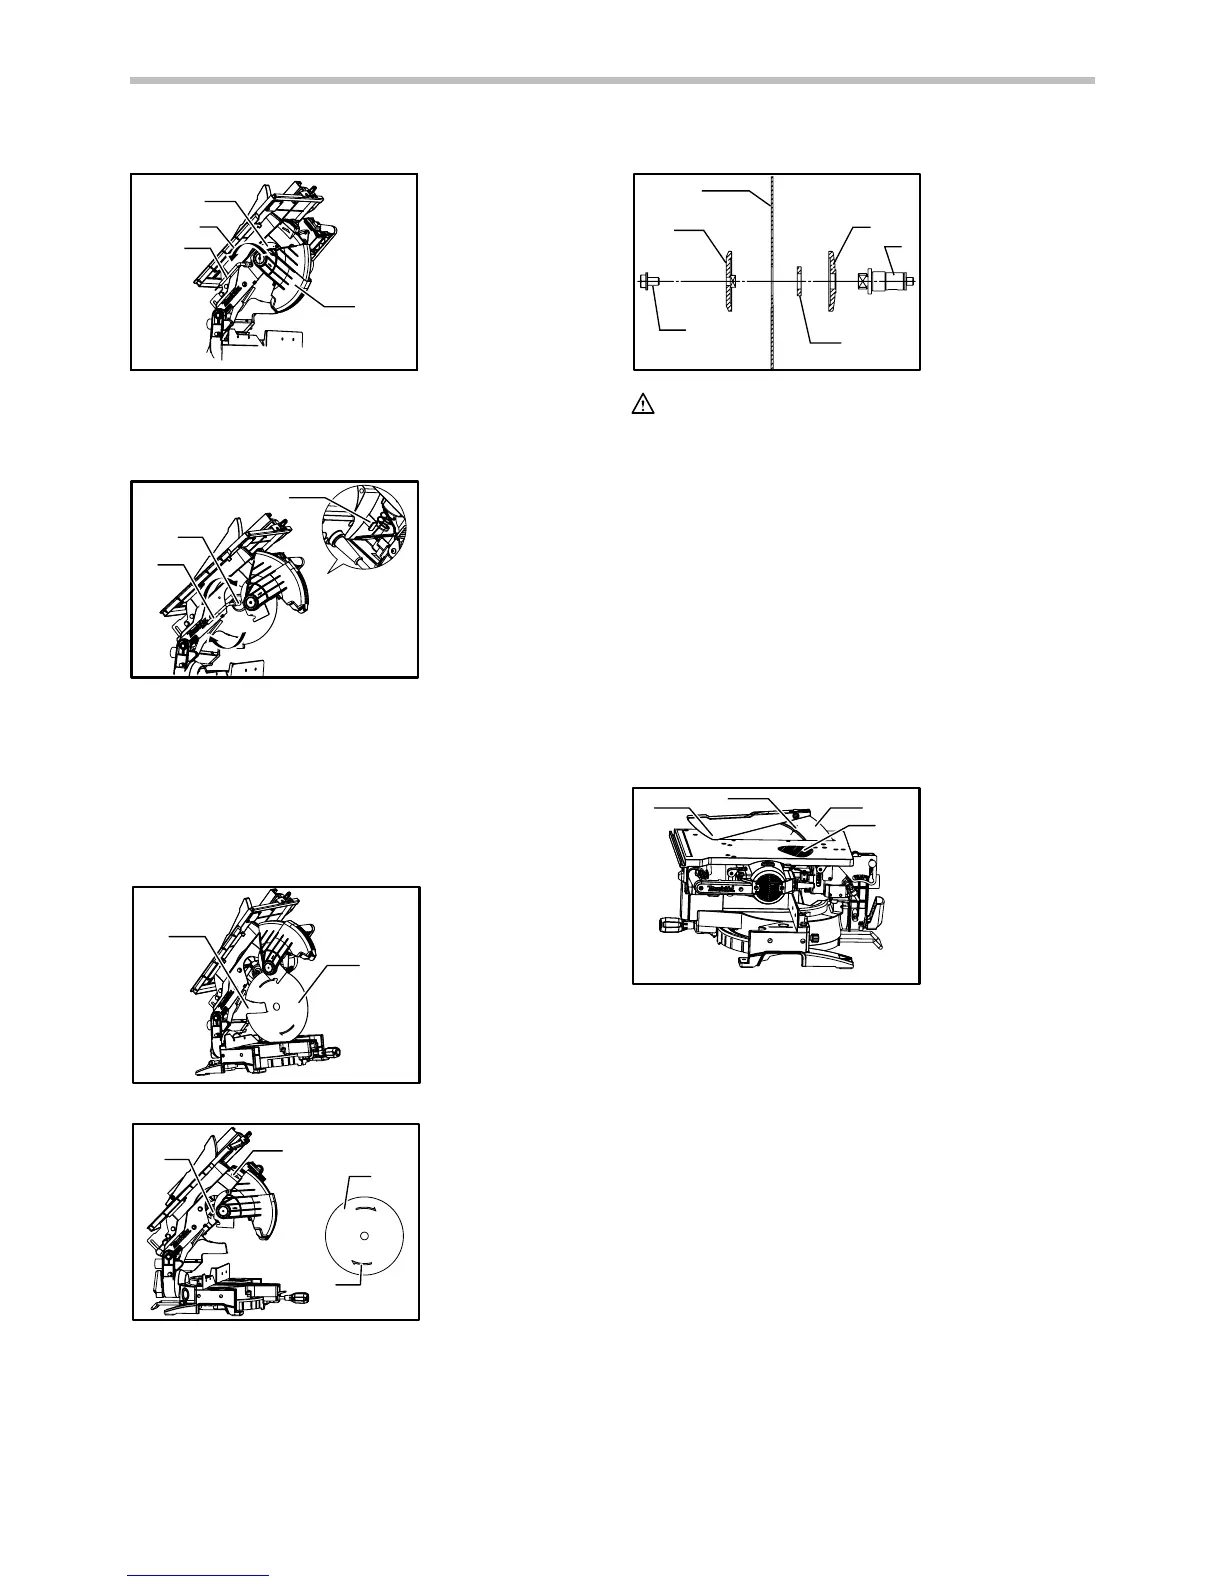
Press the shaft lock to lock the spindle, use the socket
wrench to loosen the hex bolt clockwise. Then remove
the hex bolt, outer flange and blade.
2
3
1
012191
To install the blade, mount it carefully onto the spindle,
making sure that the direction of the arrow on the
surface of the blade matches the direction of the arrow
on the blade case. Install the outer flange and hex bolt,
and then use the socket wrench to tighten the hex bolt
(left-handed) securely counterclockwise while pressing
the shaft lock.
1
2
012192
1
2
3
4
012193
1
2
3
6
4
5
012194
CAUTION:
• The ring 25.4 mm or 30 mm in outer diameter is
factory-installed onto the spindle. Before mounting
the blade onto the spindle, always be sure that the
correct ring for the arbor hole of the blade you
intend to use is installed onto the spindle.
Return the lower blade guard A and center cover to its
original position. Then tighten the hex bolt clockwise to
secure the center cover. Raise the blade guard B as far
as it will go and tighten the clamping screw firmly while
holding it in the raised position. Lower the handle to
make sure that the lower blade guards move properly.
Make sure shaft lock has released spindle before
making cut.
Adjusting riving knife
1
4-5mm
2
3
012195
Before adjusting the riving knife, loosen the two levers
by turning counterclockwise and press the top table on
the right side nearby the riving knife to its lowered
position. Then secure the top table by firmly
re-tightening the two levers as shown in the figure.
There must be a clearance of about 4 - 5 mm between
the riving knife and the blade teeth. Adjust the riving
knife accordingly by loosening two hex bolts
counterclockwise with the hex socket wrench and
measuring the distance. Tighten the hex bolts securely,
and then check to see that the top blade guard works
smoothly before cutting.
1. Hex bolt
2. Outer flange
3. Saw blade
4. Inner flange
5. Spindle
6. Ring
1. Top blade guard
2. Riving knife
3. Area to press in
1. Blade case
2. Arrow
3. Saw blade
4. Arrow
1. Blade guard B
2. Saw blade
1. Socket wrench
2. Shaft lock
3. Hex bolt
1. Center cover
2. Socket wrench
3. Hex bolt
4. Lower blade
guard A
 Loading...