NEVER LEAVE A FAN UNATTENDED WHILE OPERATING
OR WHILE CONNECTED TO A POWER SOURCE
© 2018, Pinnacle Climate Technologies, Inc. High Velocity Fan User’s Manual
24" & 30" PEDESTAL FANS: MAC-24P / MAC-24POSC / MAC-30POSC / MAC-30P
Installation and Assembly
Tools Needed:
Pliers
Phillips head screwdriver
Flat head screwdriver
10 mm / adjustable wrench
Parts Included In Box:
(1) Base
(1) Front Guard
(1) Rear Guard
(1) Motor Assembly
(1) Fan Blade Assembly
(1) Locking Collar
(1) Upper Support Pole
(1) Support Pole Plug
(1) Support Pole Spring
Bag of Hardware
1. Remove the base from rear guard. Keep the (2)
screws holding the base to the rear guard. They
will be used to connect the base and lower
support pole.
2. Place the base on level ground.
3. Loosen the locking collar on support pole by using
the provided Allen wrench (hex wrench). Extract
the upper support pole slowly to adjust the height
of the fan. The support pole will need to be fully
extended before spring is placed inside.
Place spring into bottom of the upper support pole.
4. Place the support pole plug into the bottom of the
upper support pole to secure spring in the upper
support pole.
5. Mount entire support pole to base. Align holes and
use (3) screws from hardware bag and the (2)
screws from step 1 to secure entire support pole
to the base.
6. Push down the base cover over the base
support bolts.
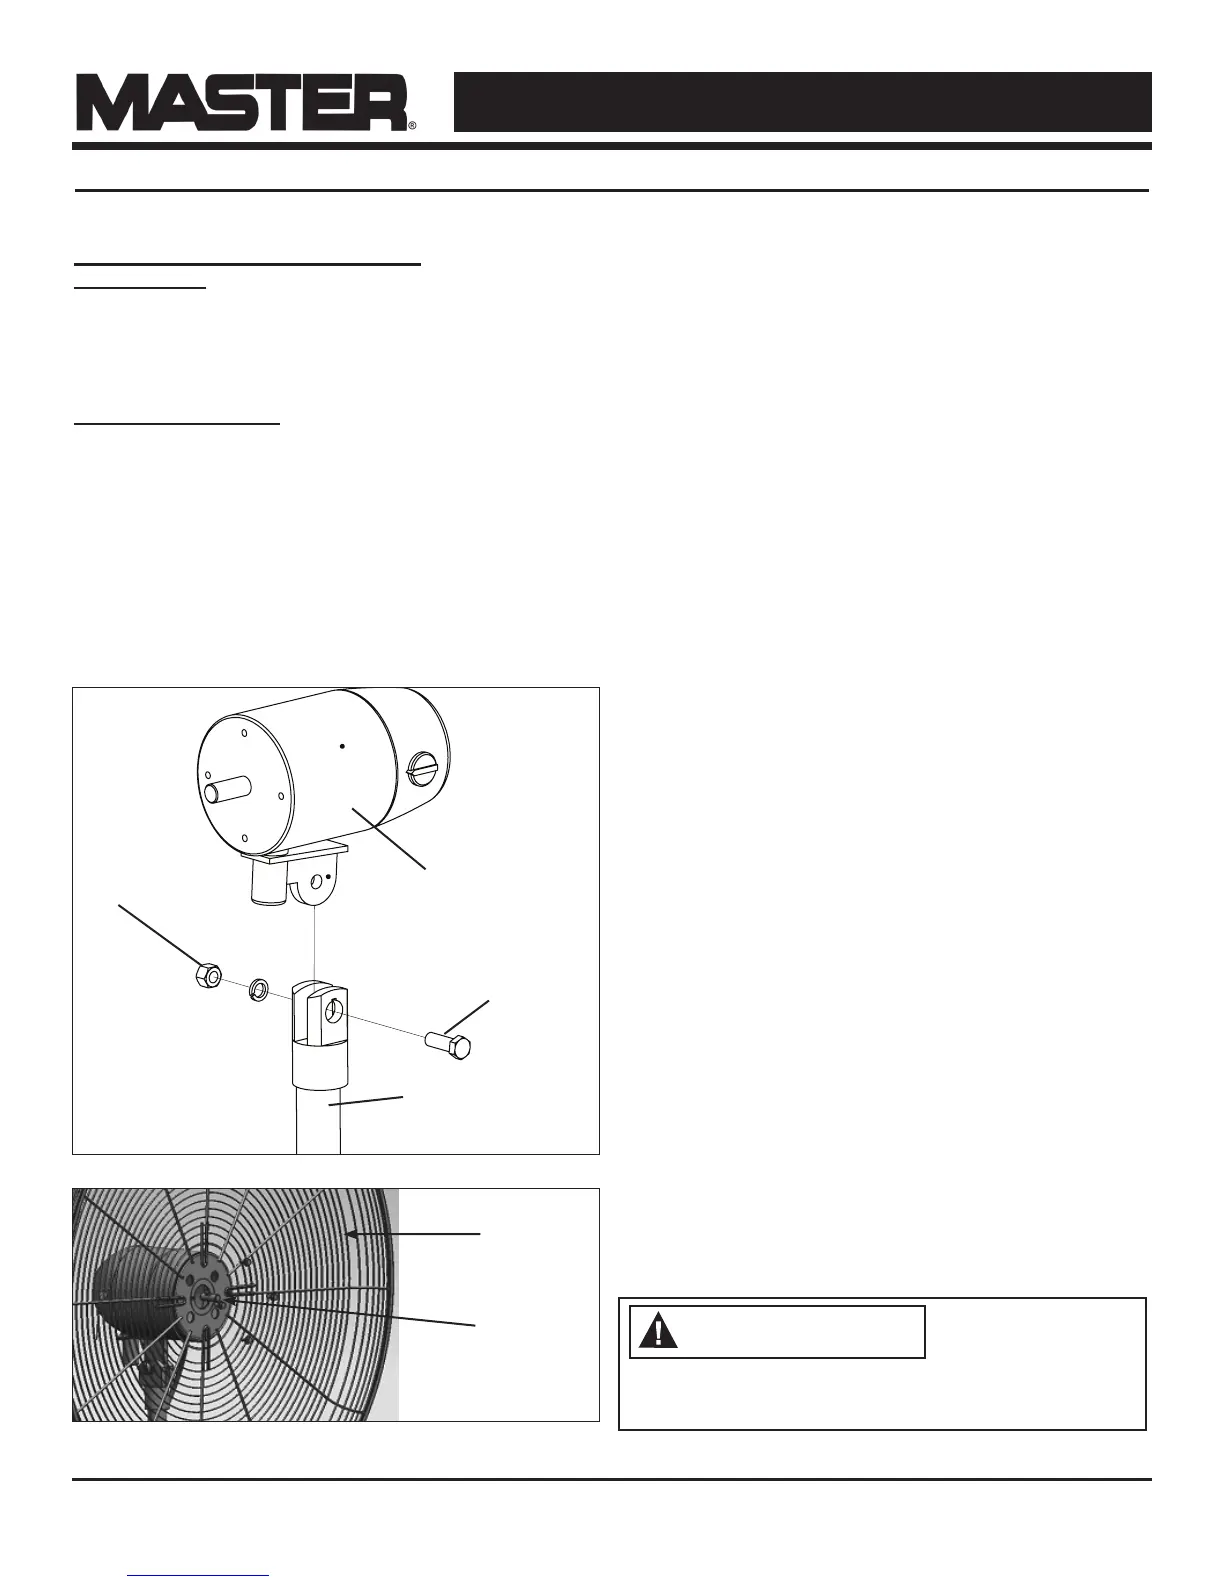
7. Mount the motor assembly to the connector on the
upper support pole. Make sure the holes line up
8. Secure motor assembly with Bolt (M12*40) and
Nut (M12). Tighten the bolt firmly using the
wrench.
9. Slide the rear guard onto the motor assembly
and secure it with the (4) flange screws (screws
from the motor). Tighten the screws firmly using
an adjustable wrench.
10. Loosen the screw on the back of the fan blade
assembly using the Allen wrench provided (Hex
Wrench). Slide the fan blade assembly onto the
motor shaft.
11. Tighten the screw on the back of the fan blade
assembly using the Allen wrench provided onto
the flat part of the fan shaft.
12. Attach the front guard to the back guard and
secure with the clips on the front guard
NOTE: This model CAN NOT be wall mounted
Figure 2: Attaching Rear Guard to Motor
Rear Guard
Motor
Motor Assembly
Pivot Bolt
Nut
Upper Support Pole
Figure 1: Attaching Motor to Motor Support Assembly
Do NOT slide fan
blade screw beyond
the groove on the
shaft! This will cause the fan blade to not spin prop-
erly and can cause damage to your fan! Be sure that
fan shaft is flush with front of fan blade assembly.
5
 Loading...