headline bars
continuation tabs
notes
warnings
headline bars
continuation tabs
notes
warnings
headline bars
continuation tabs
notes
warnings
headline bars
continuation tabs
notes
warnings
headline bars
continuation tabs
notes
warnings
headline bars
continuation tabs
notes
warnings
model no. 054-2437-2 | contact us 1-800-689-9928
10
OPERATING INSTRUCTIONS
INSTALL THE SANDING BELT
(fig 1)
1. Place sander on its side and pull the quick release
tension lever out, as shown in fig 1.
2. Insert the new belt around both rollers. Ensure
the arrow on the inside of belt is pointing in the
direction of rotation as indicated on housing.
3. Once the belt is centred over the rollers and bottom
plate, place quick release tension lever back in its
original position to restore belt tension.
REMOVE THE SANDING BELT
(fig 1)
1. Place the sander on its side and rotate the quick release lever away from the sander, as shown in fig 1.
2. With the sander on its side and the open side facing you, you can easily remove the belt.
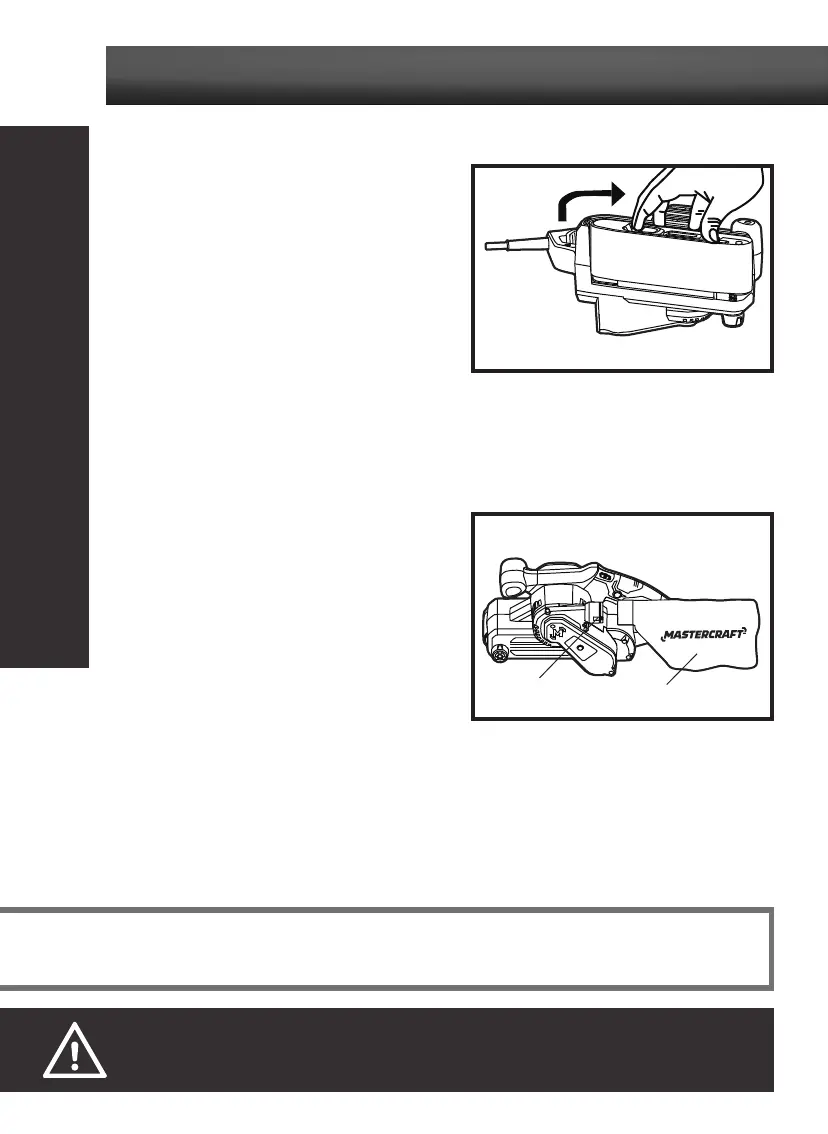
INSTALL THE DUST BAG
(fig 2)
1. Unplug the sander from the power source.
2. Align the slot on the dust bag with the rib on the
tool, and then push the dust bag onto the tool until it
locks into place.
REMOVE THE DUST BAG
(fig 2)
1. Unplug the sander from the power source.
2. Simply pull the dust bag away from the tool.
OPERATING INSTRUCTIONS
fig 1
fig 2
Rib
NOTICE: Close the zipper on the dust bag before operating the tool. The dust port on the tool can also accept a standard
1 1/4” (3.2 cm) vacuum tube for dust collection.
WARNING!
• Always disconnect the sander from its power supply before attaching or removing sanding belt.
Dust bag

 Loading...