R211M02 Rev A. Page 2 of 3
2. MAXVENTURI PREVENTATIVE MAINTENANCE PROCEDURE
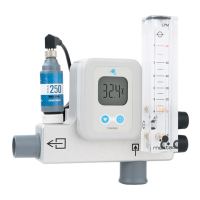
2.1 Check the following for wear, damage, or loosening:
□ Outlet conic □ Inlet conic □ Orifice □ Pole Clamp
2.2 Flow Meter Check:
1. Tilt the MaxVenturi back and forth and observe that flow meter ball rolls freely
within the flow meter.
2. Verify that the o-rings are intact. The o-rings should not have any cracks or voids.
3. Replace the o-rings if necessary, replacement part numbers can be found in the
MaxVenturi service manual.
2.3 Valve Wear Check:
1. Open the oxygen valve all the way. The knob should turn approximately
9 complete rotations from fully closed to fully open. Also check for any “stickiness” or
non-uniformity in the turn.
2. Open the flow valve all the way. The knob should turn approximately 9 complete
rotations from fully closed to fully open. Also check for any “stickiness” or non-
uniformity in the turn.
3. Check for straightness of the valve stem while rotating the knob.
4. Replace the control valves if necessary. See the Maxtec Service Manual for
repair/replacement procedures.
2.4 MaxVenturi Leak Test Procedures (see section 3.5 for Leak Test Kit)
1. Attach an oxygen supply line to the oxygen inlet fitting on the back of the
MaxVenturi being tested.
2. Close the O
2
and flow valves. Plug the sensor port and the outlet port with plugs
or caps such as those included with the device when new. Insert the 22mm to 6 mm
adapter into the air inlet. Place the silicone tube on the 22mm to 6 mm adapter.
Place the opposite end of the tube into a container of water.
3. Open the oxygen supply line at the back of the MaxVenturi. Watch for bubbles in
the container of water. The maximum number of allowable bubbles is 1 bubble
per minute.
4. If the unit leaks air into the container of water, loosen the oxygen valve from the
unit using a ½” open end wrench, then retighten (slowly) and watch for bubbles. If
the unit still leaks loosen the flow valve from the unit using a ½” open end wrench,
then retighten (slowly) and watch for bubbles. If the valves continue to leak, remove
the valves and replace the o-rings (RP56P02-901) on the small end of the valve
opposite the knob ends.
5. If the unit continues to leak, the interior of the valves have worn and may need
replacement. See the Maxtec Service Manual for repair/replacement procedure.
Note: Maxtec has upgraded the valve in 2011 and upgrade kits are available for
purchase.

 Loading...