16
17
1
2
3
McQuay Training and Development
Now that you have made an investment in modern, efficient McQuay equipment, its care should be a high priority.
For training information on all McQuay HVAC products, please visit us at www.mcquay.com and click on training, or
call 540-248-9646 and ask for the Training Department.
Warranty
All McQuay equipment is sold pursuant to its standard terms and conditions of sale, including Limited Product
Warranty. Consult your local McQuay Representative for warranty details. Refer to Form 933-43285Y. To find your
local McQuay Representative, go to www.mcquay.com.
This document contains the most current product information as of this printing. For the most up-to-date product
information, please go to www.mcquay.com.
LIAF015 / Version A: 03-23-09
Installation, Operation & Application Guide
LIAF015
Group: WSHP
Supercedes: N/A
Date: 03-23-09
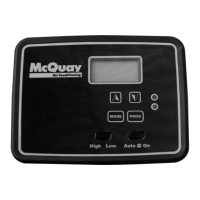
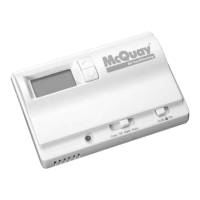
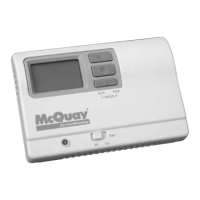
Programmable Electronic Thermostat
7-Day Programmable, Auto Changeover, Fan Speed Control, Hardwire
Part No.668811101
Specifications
Electrical Rating: •24VAC(18to30VAC)
•3ampmaximumtotalload
•1ampmaximumperterminal
Temperature control ranges: 45°F to 90°F Accuracy: ± 1°F
System configurations: 1-stage heat, 1-stage cool, heat pump, gas, oil, electric
Timing: Anti-short Cycle: 5 minutes
Backlight Operation: 10 seconds
Terminations: C, RH, RC, W, Y, B, O, G1, G2, S1, S2
Important Safety Information
Table of Contents
Specifications ........................................................................................................................................ 1
Important Safety Information ................................................................................................................. 1
Package Contents/Tools Required ........................................................................................................ 1
ToRemoveExistingThermostat ............................................................................................................ 2
To Install Thermostat ............................................................................................................................. 2
RemoteSensorInstallation(Optional) ................................................................................................... 3
Wiring Diagram ...................................................................................................................................... 4
Configuration Mode ............................................................................................................................... 5
Starting the Thermostat ......................................................................................................................... 7
Testing the Thermostat .......................................................................................................................... 8
Mode of Operation ................................................................................................................................. 9
Operating Modes ................................................................................................................................. 10
Setting the Time and Day of the Week ................................................................................................ 11
Programming ....................................................................................................................................... 12
Simpleset
®
Programming ..................................................................................................................... 14
Lockout Function ................................................................................................................................. 14
Factory Preprogramming ..................................................................................................................... 15
Personal Program Schedule ................................................................................................................ 15
Troubleshooting ................................................................................................................................... 17
MORN DAY EVE NITE
HEAT HEAT HEAT HEAT
COOL COOL COOL COOL
THURSDAY
4
MORN DAY EVE NITE
HEAT HEAT HEAT HEAT
COOL COOL COOL COOL
FRIDAY
5
MORN DAY EVE NITE
HEAT HEAT HEAT HEAT
COOL COOL COOL COOL
SATURDAY
6
MORN DAY EVE NITE
HEAT HEAT HEAT HEAT
COOL COOL COOL COOL
SUNDAY
7
Troubleshooting
Symptom Remedy
No display Check for 24 VAC at thermostat; display is blank when 24 VAC is not
present
System fan does not come on properly Verify wiring is correct
All thermostat buttons are inoperative Verify 24 VAC is present; unit locks out when 24 VAC is not present
No response with first button press First button press activates backlight only
Program schedule activates at the wrong time Checktime(AM/PM)setonthermostat(see“SettingtheTime,”Page
11)
Thermostat turns on and off too frequently Adjusttemperaturedifferential(see“CongurationModeSetting2,”
Page5)
Thermostat does not follow program
Verifyitisoperatinginprogrammode(PROGdisplays);checktime
(AM/PM);checkifin2hourprogramoverride
Fan runs continuously
Check Fan On/Auto switch, fan runs continuously in On position
Status indicator light not on during call Turn status indicator function on
(see“CongurationModeSetting10,”Page7)
Room temperature is not correct Calibrate thermostat (see“CongurationModeSetting8,”Page7).
If remote sensor is used, check S1 and S2 terminal connections
LOC displays when any button is pressed Thermostathasthebuttonlockoutfunctionactivated(see“Lockout
Function,”Page14)
– – on display instead of room temperature Check for a bad connection at S1 and S2 terminals, if used
Problem not listed above Press Reset button once*
* Reset Button Function:
Time,dayandmodechangedtolastsavedsettings(savedafterpowerlossorwhenexiting
programsetup),congurationandprogramsettingsareunchanged.
•7-DayProgrammable
•Single Stage Heat Pump/Non-Heat Pump Systems
•BacklitDisplay
•SingleStageHeat/CoolSystems
•TwoSpeedFanControl
•FieldCalibration
•AutoChangeover
•ButtonLockoutFunction
•SimpleSet™Programming
•RemoteTemperatureSensorCapability
•Title24Compliant/NoBatteriesRequired
•RelayOutputs(minimumvoltagedropinthermostat)
•IdeallySuitedfor:
–Residential(NewConstruction/Replacement)
– Light Commercial
For replacement parts call 1-800-377-2787
©2008McQuayInternational•www.mcquay.com•800-432-1342
For replacement parts call 1-800-377-2787
©2008McQuayInternational•www.mcquay.com•800-432-1342
1. Turn off power to the heating and cooling system by removing the fuse or switching the appropriate circuit breaker
off.
2. Removeoldthermostat.Thisshouldexposethewires.
3. Labeltheexistingwiresbeforeremovingwires.
4. After labeling wires, remove wires from wire terminals.
5. Refer to the following section for instructions on how to install this thermostat.
To Remove Existing Thermostat
To Install Thermostat
IMPORTANT: Thermostat installation must conform to local and national building and electrical codes and
ordinances.
1. Turn off power to the heating and cooling system by removing the fuse or switching the appropriate circuit breaker
off.
2. Insertstripped,labeledwiresinmatchingwireterminals.See“WiringDiagrams”sectionofthismanual.
WARNING
Besureexposedportionofwiresdoesnottouchotherwires.
WARNING
ELECTRICAL SHOCK HAZARD – Turn off power at the main service panel by removing the fuse or
switching the appropriate circuit breaker to the OFF position before removing the existing thermostat.
WARNING
ELECTRICAL SHOCK HAZARD – Turn off power at the main service panel by removing the fuse or
switching the appropriate circuit breaker to the OFF position before removing the existing thermostat.
3. Tighten screws on terminal block. Gently tug wire to be sure of proper connection. Double check that each wire is
connected to the proper terminal.
4. Remove unused Gas/Electric jumper. Keep gas for oil or gas systems. Keep electric for heat pumps or electric
heat systems.
5. Replace thermostat by snapping it in place.
6. Turn on power to the system at the main service panel.
7. Testthermostatoperationasdescribedin“TestingtheThermostat”.
Remote Sensor Installation (Optional)
1. Remove cover from remote sensor housing.
2. Select an appropriate location for mounting the remote sensor.
3. Mount remote sensor unit using hardware provided.
4. Install two strand shielded wire between remote sensor and thermostat. Shielded wire must be used. Do not run
remote sensor wire in conduit with other wires.
•Wire 1 should run between the S1 terminal on the thermostat and the S1 terminal on the remote sensor
•Wire 2 should run between the S2 terminal on the thermostat and the S2 terminal on the remote sensor
•ConnecttheshieldingofthewiretotheS2terminalonthethermostat
5. Disablethemainsensor(R12)onthethermostatbycuttingitfromthecircuitboard.
WARNING
Always turn off power at the main power supply before installing, cleaning, or removing thermostat.
• Thisthermostatisfor24VACapplicationsonly;donotuseonvoltagesover30VAC
• Donotshortacrossterminalsofgasvalveorsystemcontroltotestoperation;thiswilldamageyourthermostat
and void your warranty
• Allwiringmustconformtolocalandnationalelectricalandbuildingcodes
• Donotuseairconditioningwhentheoutdoortemperatureisbelow50degrees;thiscandamageyourA/Csystem
and cause personal injuries
• Usethisthermostatonlyasdescribedinthismanual
Package Contents/Tools Required
Package includes: McQuay 668811101 programmable thermostat and Operation and Application Guide.