RECOMMENDED SETTING: Your choice-try 5.
LEAD MASTER This control regulates the loudness and is active in the Lead Mode only. Because it works at the same time as the
regular Master, whichever one is set lower will determine the maximum Lead Mode loudness. Its built-in Pull-Bright is only active for the
Lead Mode and is intended to add brightness when playing at softer volumes. As the amplifier is turned up louder and the power stage
begins to clip, the added brightness from the Lead preamp may cause premature squealing without adding any benefit to the tone--so
push it in when playing loud. This is especially true when Rhythm 2 and Lead are on at the same time.
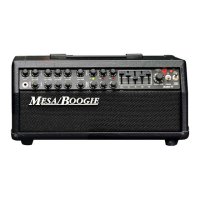
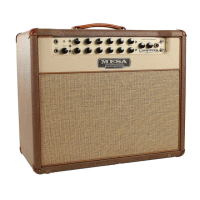
GRAPHIC EQUALIZER
This optional feature is lots of fun to use and it certainly does expand the Boogie's tonal flexibility. (But for those of you who prefer the
fewest possible knobs and controls - don't worry! All the R & D of the Mark III's tone performance is religiously made without using the
optional EQ. This prevents it from becoming a necessity.) Although there are a thousand different ways to set the Graphic, I want to
point out the single most useful: we call it "the classic V" because that's what it looks like. Move the first and last sliders about
three-forths of the way up. Move the second and forth sliders two-thirds of the way up. Move the center slider about three quarters of
the way down...then fine tune your sound using just this center slider.
You'll hear how a slight adjustment at the 750 hz position makes a dramatic difference in the sound, whether you're playing with
moderate distortion, heavy distortion or perfectly clean. This setting makes the amp seem even bigger, bolder, stronger and fatter. If
you have a friend with a Marshall stack, you can easily drive him to total despair by sounding bigger, stronger, louder, better, etc. with
just your 1x12 Boogie! Try it, it's great fun to watch his ego short-out when his monster sounds puny next to your little Boogie!
EQ SWITCHING
The Boogie also offers great flexibility for switching-in the Graphic Equalizer. The front panel toggle switch offers three choices: EQ
OUT, EQ IN (all the time), and EQ AUTO. In the AUTO mode, your Equalizer is programmed to switch-on automatically when you go
into the Lead Mode. A final switching choice is to use the optional EQ Footswitch which plugs into the back of the chassis. With it, you
can click on the EQ at any time, regardless of how the toggle switch is set.
STANDBY SWITCH
The Standby toggle switch turns off the high voltages inside your Boogie. You can use this switch to let your amp "cool off" during
breaks while keeping the tube filaments warm. This is actually less strain on the tubes and electronics than turning your Power Off
during breaks.
POWER SWITCH
This is the AC On/Off switch for the whole amplifier ... only the AC convenience outlet on the back remains energized when the Power
is Off. Recommended turn-on procedure: Have the amp in the Standby position when switching up the Power toggle. Wait 30 seconds
or so for the tube filaments to warm up, then turn the Standby to On. This prevents a high voltage surge from hitting the cold tubes and
also helps reduce the strain on capacitors and other internal parts.
REAR PANEL FEATURES
FUSE
Should your Boogie blow a fuse, be sure to replace with Slo-Blo, same amperage. By far the most likely cause of a blown fuse is a bad
power tube. For further information, see the Service & Maintenance Guide.

 Loading...