18
ENGLISH
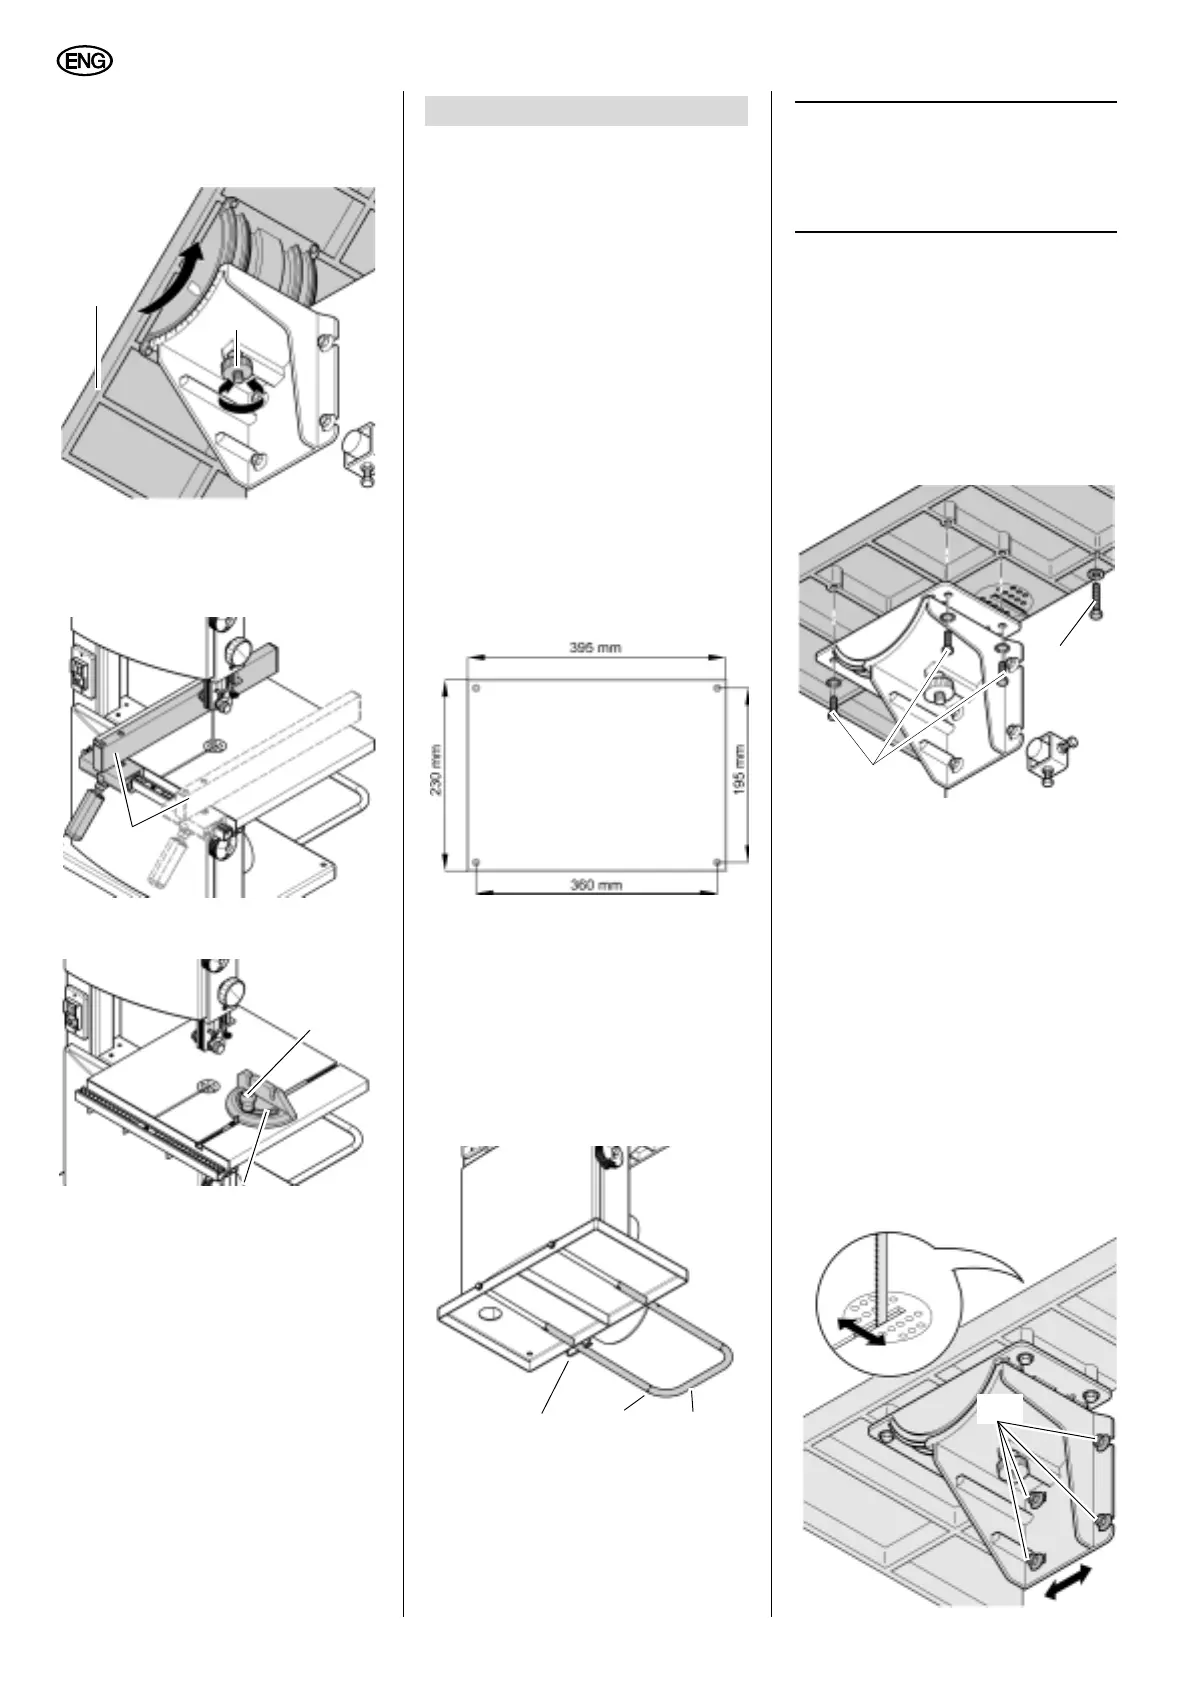
Saw table tilt
After loosening the locking screw (41)
the saw table (42) tilts steplessly through
45° against the blade.
Rip fence
The rip fence (43) is clamped to the
front. The rip fence can be used on both
sides of the blade.
Mitre fence
The mitre fence (45) is inserted into the
table slot from the table’s front edge.
For mitre cuts the mitre fence turns to
60° in both directions.
To set a mitre angle: loosen lock handle
(44) by turning it counter-clockwise.
A
Risk of injury!
When cutting with the mitre
fence the lock handle must be firmly
tightened.
A
Danger!
Start the saw only after the fol-
lowing preparations have been com-
pleted:
− the saw is securely mounted;
− the saw table is installed and
aligned;
− a dust collector is hooked up;
− the safety devices checked.
Connect the saw to the mains supply
only after all of the above prepara-
tions are completed! Otherwise there
is a risk of an unintentional starting of
the saw, which may cause serious
personal injury.
7.1 Mounting
For a firm stand the saw must be
mounted on a stable supporting surface:
1. Drill four holes in the supporting sur-
face.
2. Put fixing bolts through the base
plate and secure with nuts.
Installing the stay for a safe stand
A
Risk of tipping over!
For safe operation of the saw
the stay must be pulled out and
secured with the W-clip
1. Pull W-clip (48), then pull the stay
(46) out.
2. With the stay pulled out for saw
operation, insert the W-clip
(48) into
the hole provided in the stay.
3
Note:
For transport the stay can be
pushed back into the base. With the stay
in its transport position, insert W-clip into
the hole (47).
7.2 Installing the Saw Table
1. Fit limit stop screw (49) to the under-
side of the saw table.
2. Guide saw table over the band saw
blade and place it on the table trun
-
nion.
3. Attach the saw table with four each
screws
(50) and washers to the
table trunnion.
7.3 Aligning the Saw Table
The saw table needs to be aligned in two
planes
− laterally, in order for the blade to run
dead centre through the table insert;
− at right angles to the band saw
blade.
Saw table lateral alignment
1. Loosen the four fastening screws
(51) that hold the lower table trun-
nion.
2. Align saw table so that the blade
runs through the centre of the table
insert's slot.
3. Tighten the four fastening screws
(51) again.
41
42
43
44
45
7. Initial Operation
47
46
48
49
50
51
 Loading...