ELECTRICAL
POLARITY
The electrical installation on this car is
NEGATIVE
(-)
earth return and the
correct polarity must be maintained at all times. Reversed polarity will per-
manently damage semi-conductor devices in the alternator and tachometer, and
the radio transistors (when fitted).
Before fitting a radio or any other electrical equipment, make certain that it has
the correct polarity for installation in this vehicle.
BATTERIES
Access
Fig.
1
Checking
t,opping-up
Fig.
2
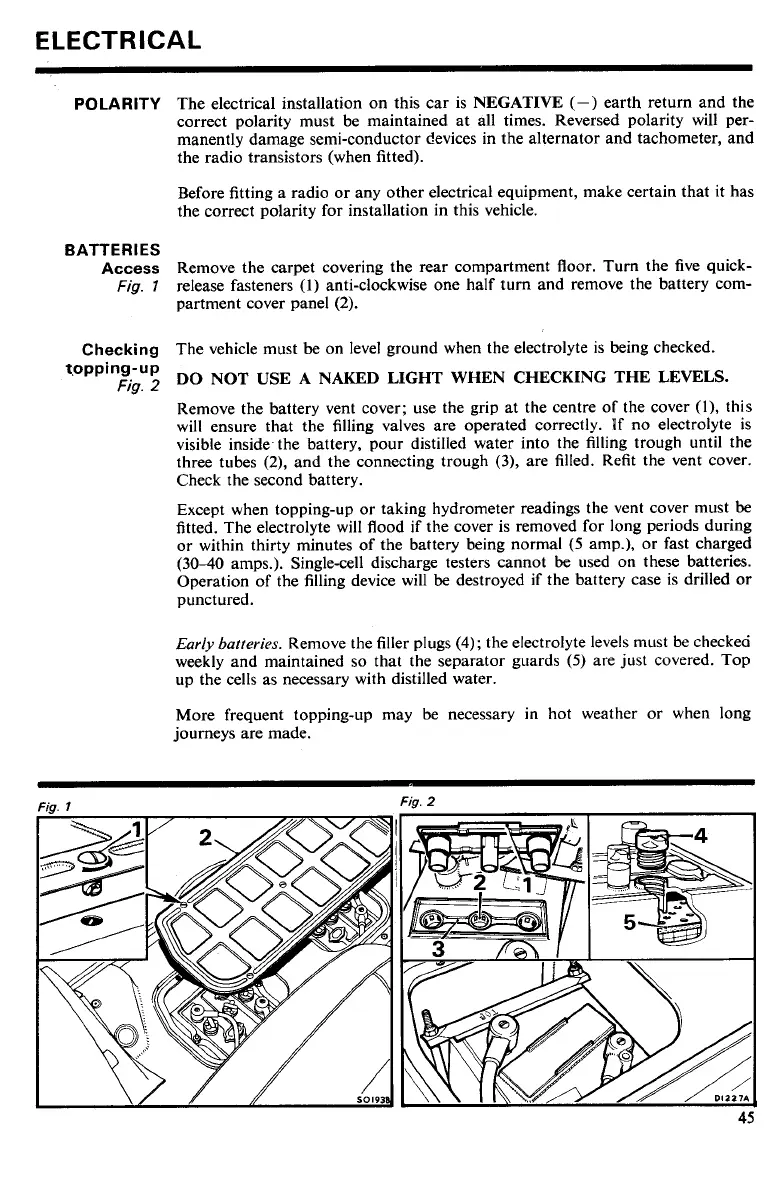
Remove the carpet covering the rear compartment floor. Turn the five quick-
release fasteners
(1)
anti-clockwise one half turn and remove the battery com-
partment cover panel (2).
The vehicle must
be
on level ground when the electrolyte is being checked.
DO NOT USE A NAKED LIGHT WHEN CHECKING THE LEVELS.
Remove the battery vent cover; use the grip at the centre of the cover
(l),
this
will ensure that the filling valves are operated correctly. If no electrolyte is
visible inside the battery, pour distilled water into the filling trough until the
three tubes (2), and the connecting trough
(3),
are filled. Refit the vent cover.
Check the second battery.
Except when topping-up or taking hydrometer readings the vent cover must
be
fitted. The electrolyte will flood if the cover is removed for long periods during
or within thirty minutes of the battery being normal (5 amp.), or fast charged
(30-40
amps.). Single-cell discharge testers cannot
be
used on these batteries.
Operation of the filling device will
be
destroyed if the battery case is drilled or
punctured.
Early
batteries.
Remove the filler plugs
(4);
the electrolyte levels must be checked
weekly and maintained so that the separator g~~ards (5) are just covered. Top
up the cells as necessary with distilled water.
More frequent topping-up may be necessary in hot weather or when long
journeys are made.
 Loading...