INDOOR UNIT INSTALLATION
5
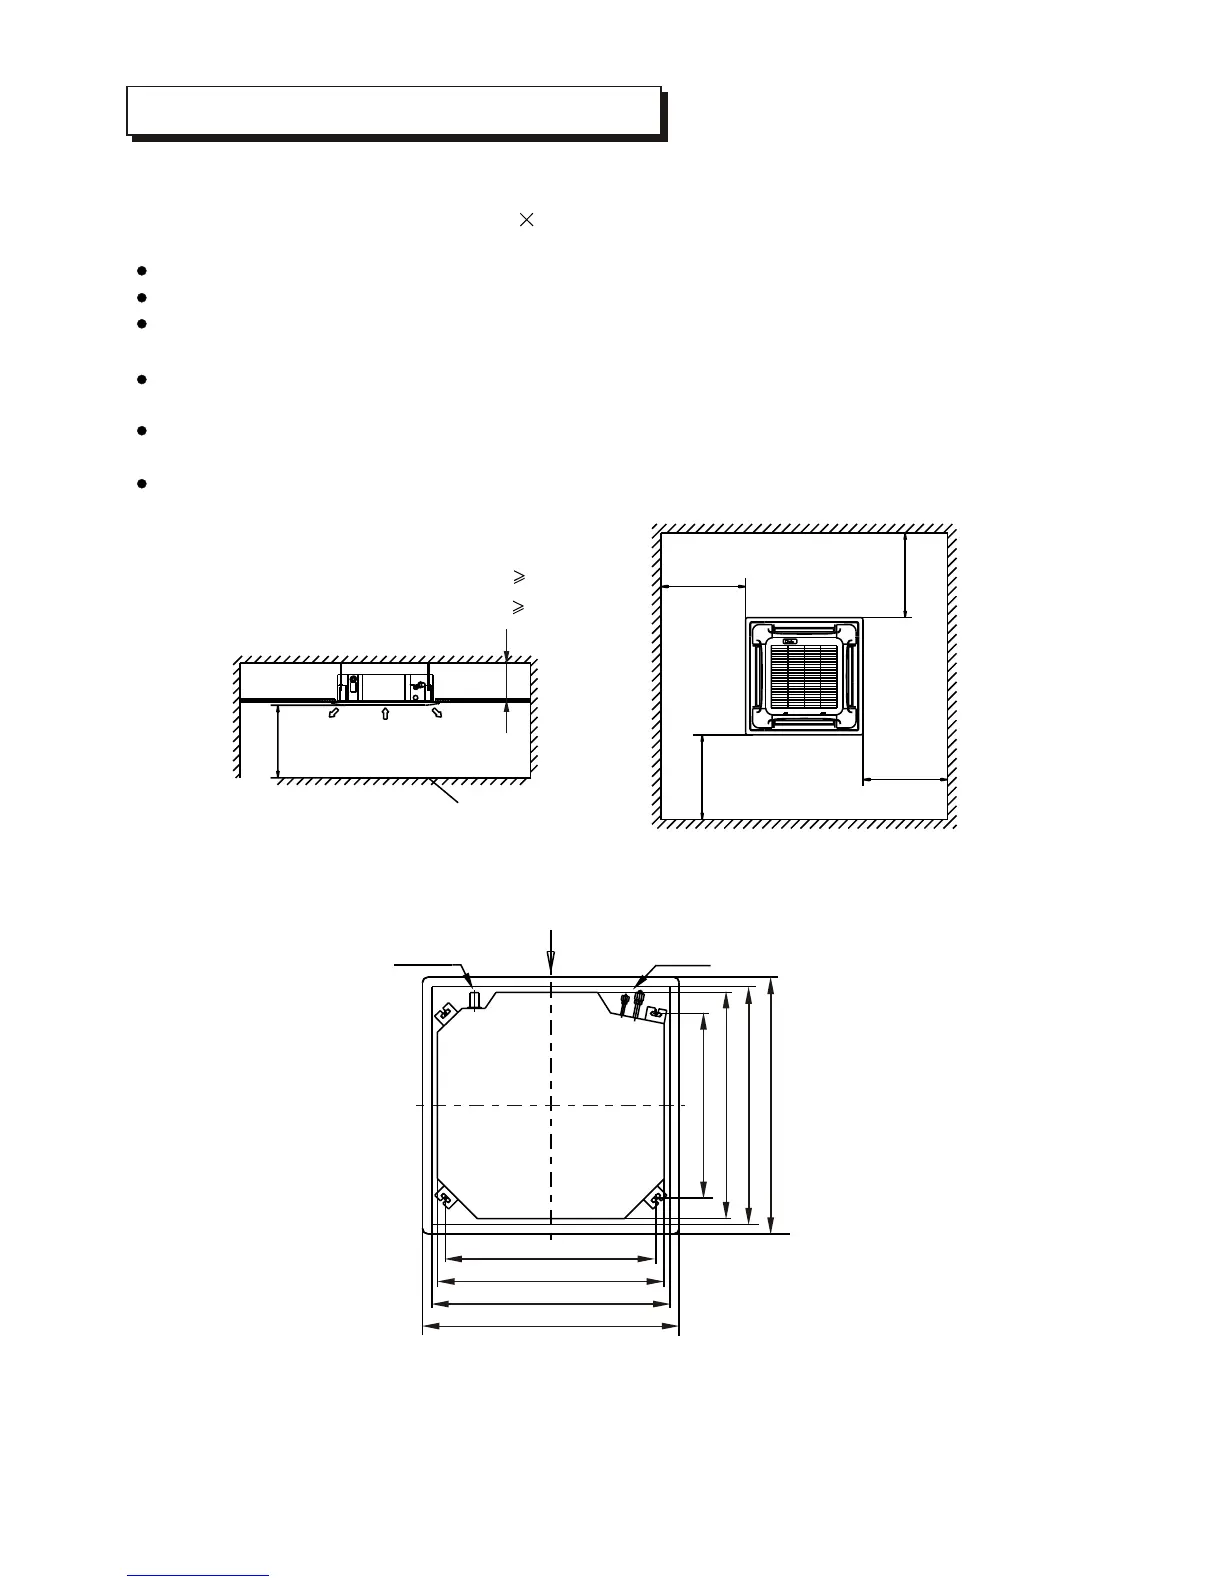
>1000mm
>1000mm
>1000mm
>1000mm
Chart 2
A
Drain side
Tubing side
(Unit: mm)
680(Hook-location)
780(Hook-location)
840(Body)
840(Body)
880(Ceiling hole)
880(Ceiling hole)
950(Panel)
950(Panel)
1. Install the main body
A. The existing ceiling (to be horizontal)
a. Please cut a quadrangular hole of 880 880mm in the ceiling according to the shape of the installation
paper board. (Refer to Chart3, 4)
The center of the hole should be at the same position of that of the air conditioner body.
Determine the lengths and outlets of the connecting pipe, drainpipe and cables.
To balance the ceiling and to avoid vibration, please enforce the ceiling when necessary.
b. Please select the position of installation hooks according to the hook holes on the installation board.
Drill four holes of f12mm, 45~50mm deep at the selected positions on the ceiling. Then embed the
expansible hooks (fittings).
Face the concave side of the installation hooks toward the expansible hooks. Determine the length
of the installation hooks from the height of ceiling, then cut off the unnecessary part.
If the ceiling is extremely high, please determine the length of the installation hook according to facts.
Necessary room
>2500mm
outlet intlet outlet
ground
A
Chart 1
Note:
MCA-24CRN2 MCA-24HRN2
MCA-42(36,48)CRN2
MCA-42(36,48)HRN2
Chart 3
A 330mm
Series A 260mm
Series
 Loading...