1.
1.1 Installation accessories: (Optional)
1.2
1.
Features
1.1 Installation accessories: (Optional)
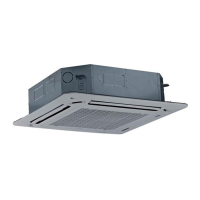
Front Board, Canvas Air Passage, Filter, Panel, for easy installation
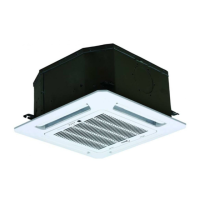
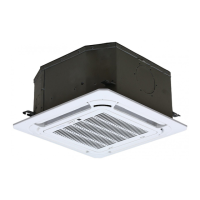
1.2 Easy Installation: Two air inlet styles (Bottom side or Rear side)
Air inlet from rear is standard for all capacity; air inlet from bottom is optional.
The size of air inlet frame from rear and bottom is same, it’s very easy to move the
rear side, or from rear to the bottom, in order to matching the installation condition.
1.
3
Clean the filter (Optional, standard product
It is easy to draw out the filter from the indoor unit for cleaning, even the filter is installed in rear side or
bottom side.
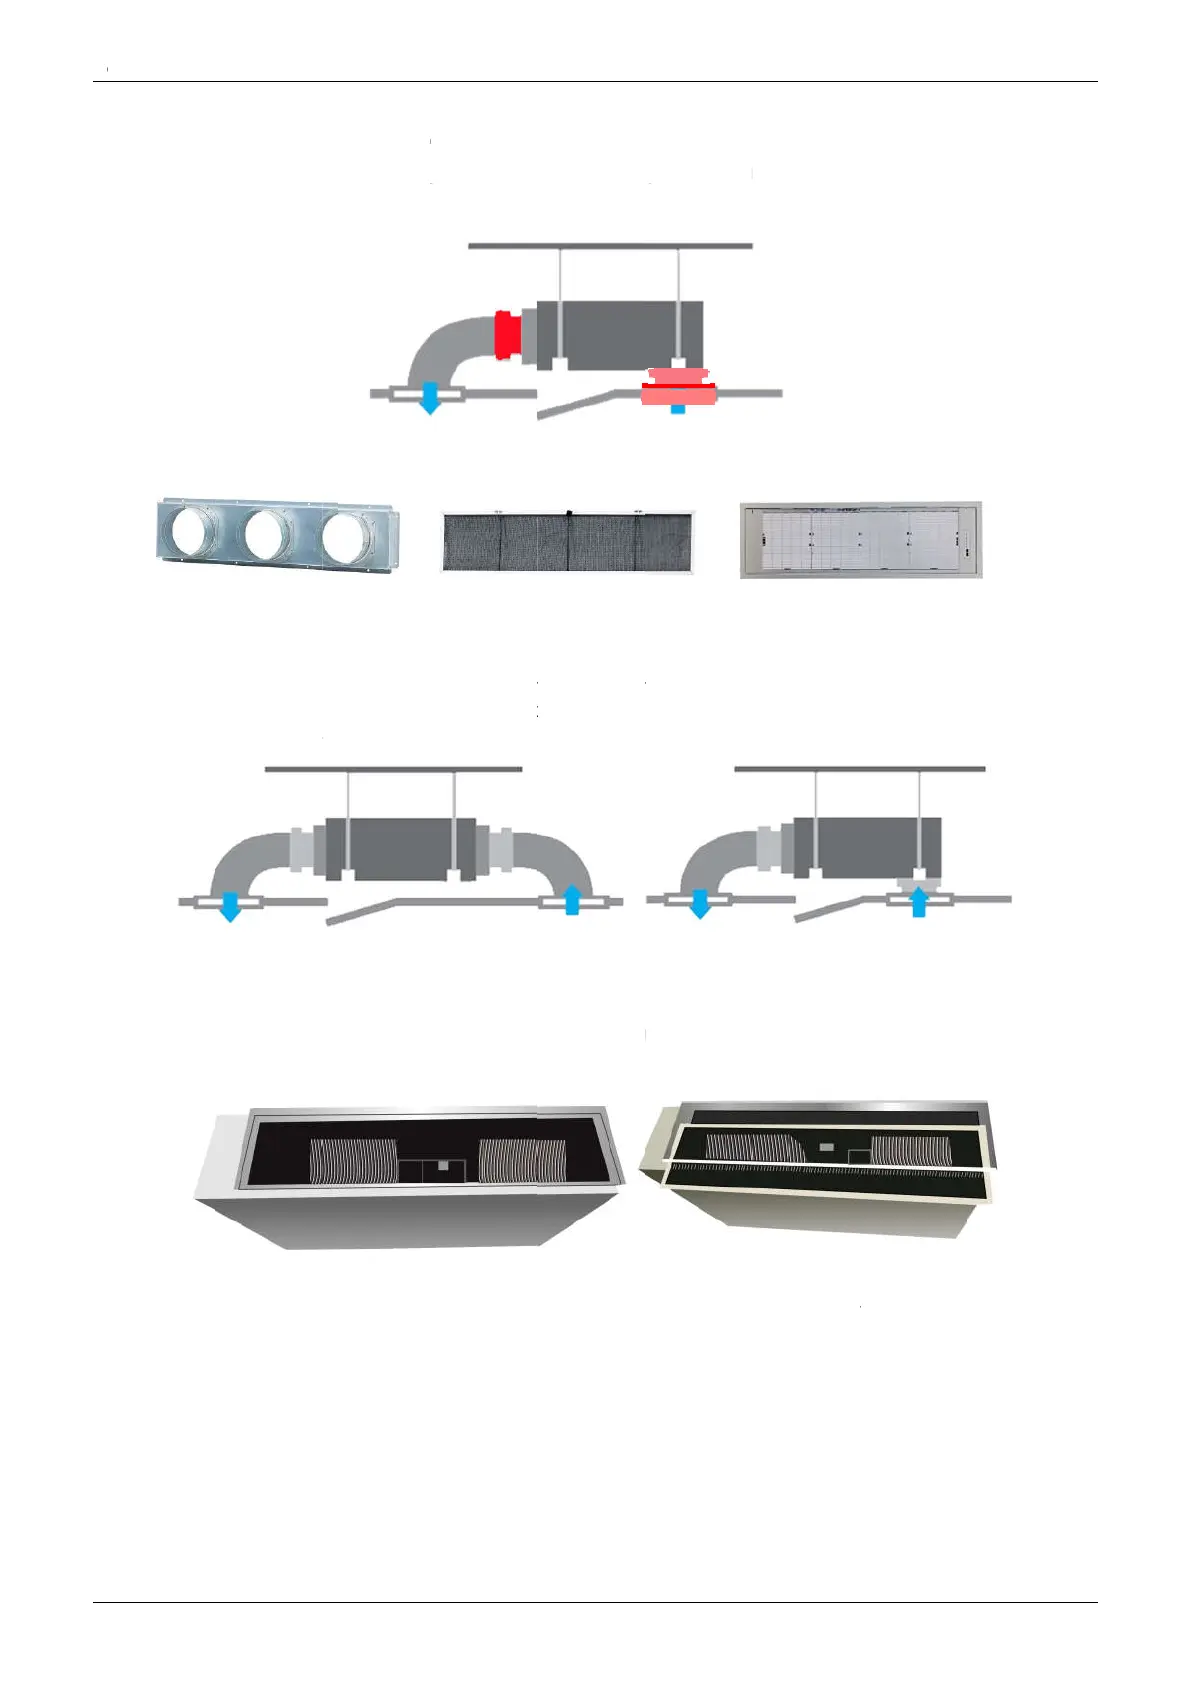
Replace the motor or centrifugal fan
Remove the ventilated panel firstly. Remove a half of blower housing and
centrifugal fan. Directly remove two bolts, and then replace the motor or centrifugal fan easily.
1.1 Installation accessories: (Optional)
Front Board, Canvas Air Passage, Filter, Panel, for easy installation
Easy Installation: Two air inlet styles (Bottom side or Rear side)
Air inlet from rear is standard for all capacity; air inlet from bottom is optional.
The size of air inlet frame from rear and bottom is same, it’s very easy to move the
rear side, or from rear to the bottom, in order to matching the installation condition.
Easy maintenance
Clean the filter (Optional, standard product
It is easy to draw out the filter from the indoor unit for cleaning, even the filter is installed in rear side or
bottom side.
Replace the motor or centrifugal fan
Remove the ventilated panel firstly. Remove a half of blower housing and
centrifugal fan. Directly remove two bolts, and then replace the motor or centrifugal fan easily.
Air intake from rear (Standard)
1.1 Installation accessories: (Optional)
Front Board, Canvas Air Passage, Filter, Panel, for easy installation
Easy Installation: Two air inlet styles (Bottom side or Rear side)
Air inlet from rear is standard for all capacity; air inlet from bottom is optional.
The size of air inlet frame from rear and bottom is same, it’s very easy to move the
rear side, or from rear to the bottom, in order to matching the installation condition.
Easy maintenance
Clean the filter (Optional, standard product
It is easy to draw out the filter from the indoor unit for cleaning, even the filter is installed in rear side or
Replace the motor or centrifugal fan
Remove the ventilated panel firstly. Remove a half of blower housing and
centrifugal fan. Directly remove two bolts, and then replace the motor or centrifugal fan easily.
Air intake from rear (Standard)
1.1 Installation accessories: (Optional)
Front Board, Canvas Air Passage, Filter, Panel, for easy installation
Easy Installation: Two air inlet styles (Bottom side or Rear side)
Air inlet from rear is standard for all capacity; air inlet from bottom is optional.
The size of air inlet frame from rear and bottom is same, it’s very easy to move the
rear side, or from rear to the bottom, in order to matching the installation condition.
Clean the filter (Optional, standard product
It is easy to draw out the filter from the indoor unit for cleaning, even the filter is installed in rear side or
Replace the motor or centrifugal fan
Remove the ventilated panel firstly. Remove a half of blower housing and
centrifugal fan. Directly remove two bolts, and then replace the motor or centrifugal fan easily.
Air intake from rear (Standard)
Front Board, Canvas Air Passage, Filter, Panel, for easy installation
Easy Installation: Two air inlet styles (Bottom side or Rear side)
Air inlet from rear is standard for all capacity; air inlet from bottom is optional.
The size of air inlet frame from rear and bottom is same, it’s very easy to move the
rear side, or from rear to the bottom, in order to matching the installation condition.
Clean the filter (Optional, standard product without filter)
It is easy to draw out the filter from the indoor unit for cleaning, even the filter is installed in rear side or
Remove the ventilated panel firstly. Remove a half of blower housing and
centrifugal fan. Directly remove two bolts, and then replace the motor or centrifugal fan easily.
Filter
Air intake from rear (Standard)
Front Board, Canvas Air Passage, Filter, Panel, for easy installation
Easy Installation: Two air inlet styles (Bottom side or Rear side)
Air inlet from rear is standard for all capacity; air inlet from bottom is optional.
The size of air inlet frame from rear and bottom is same, it’s very easy to move the
rear side, or from rear to the bottom, in order to matching the installation condition.
without filter)
It is easy to draw out the filter from the indoor unit for cleaning, even the filter is installed in rear side or
Remove the ventilated panel firstly. Remove a half of blower housing and
centrifugal fan. Directly remove two bolts, and then replace the motor or centrifugal fan easily.
Front Board, Canvas Air Passage, Filter, Panel, for easy installation
Easy Installation: Two air inlet styles (Bottom side or Rear side)
Air inlet from rear is standard for all capacity; air inlet from bottom is optional.
The size of air inlet frame from rear and bottom is same, it’s very easy to move the
rear side, or from rear to the bottom, in order to matching the installation condition.
It is easy to draw out the filter from the indoor unit for cleaning, even the filter is installed in rear side or
Remove the ventilated panel firstly. Remove a half of blower housing and
centrifugal fan. Directly remove two bolts, and then replace the motor or centrifugal fan easily.
Air inlet from rear is standard for all capacity; air inlet from bottom is optional.
The size of air inlet frame from rear and bottom is same, it’s very easy to move the cover from bottom to
rear side, or from rear to the bottom, in order to matching the installation condition.
It is easy to draw out the filter from the indoor unit for cleaning, even the filter is installed in rear side or
take out the motor with
centrifugal fan. Directly remove two bolts, and then replace the motor or centrifugal fan easily.
It is easy to draw out the filter from the indoor unit for cleaning, even the filter is installed in rear side or
take out the motor with
centrifugal fan. Directly remove two bolts, and then replace the motor or centrifugal fan easily.
cover from bottom to
It is easy to draw out the filter from the indoor unit for cleaning, even the filter is installed in rear side or
take out the motor with
 Loading...