This device can supply PoE powering to external devices from its Ethernet ports. The output voltage will be selected automatically, depending on what kind
of adapter is connected, and what kind of voltage the connected device requires. The device can power 802.3af/at devices, but a 48 V PSU must be
acquired separately. By default the PoE mode is set to auto, it will not damage non-PoE devices and will auto-detect devices with PoE support and the
needed voltage. Once a PoE device is detected, it will be powered and the PoE LEDs will turn on. With the included 28 V PSU the max power output of
each Ethernet port in this mode is 1 A, the total maximum for all ports is 2.8 A. At 802.3af/at high power mode the max power output is 450 mA per port,
total max 1.4 A.
Configuration
The device is set up as a switch, with 192.168.88.1 as the management IP of the bridge interface. RouterOS includes many configuration options in
addition to what is described in this document. We suggest starting here to get yourself accustomed to the possibilities: . https://mt.lv/help
In case the IP connection is not available, the Winbox tool ( ) can be used to connect to the MAC address of the device.https://mt.lv/winbox
The device is equipped with an RJ45 serial port, set by default to 115200 bit/s, 8 data bits, 1 stop bit, no parity. Standard RJ45 to COM cable can be used,
pinout can found in the documentation (see link above).
For recovery purposes, it is possible to boot the device from the network, see the next section.
Buttons and Jumpers
The reset button has these functions:
Hold this button during boot time until LED light starts flashing, release the button to reset RouterOS configuration.
Keep holding the button for 5 more seconds or until the user LED turns off, then release it to make the RouterBOARD look for Netinstall servers.
The first Ethernet port is used for the Netinstall process. See RouterOS documentation about using the Netinstall recovery utility.
Regardless of the above option used, the system will load the backup RouterBOOT loader if the button is pressed before power is applied to the device.
This is useful for RouterBOOT debugging and recovery.
LED indicators
The Power LED is lit when the router is powered from the DC jack.
The user LED can be configured from RouterOS.
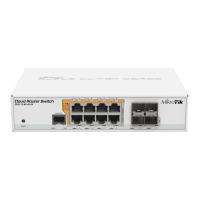
The square port LEDs indicate the individual Ethernet and SFP port activity.
Triangle LEDs indicate PoE out status. Green LED indicates that the respective port uses low voltage, a red LED indicates high voltage. Flashing
a single green LED: problem to start a low voltage device. Flashing single red LED: problem with high voltage device. All PoE LEDs flashing:
wrong voltage PSU plugged into one of the ports.
Mounting
The device is designed to be used indoors and placed on a flat surface with all needed cables connecting to the front of the unit. If the desired mounting
location is a rackmount enclosure, please attach the rackmount mounting brackets to both sides of the device and secure with screws firmly.
Grounding screw is located on the backside of the device case, please connect it accordingly to efficient ground.
When mounting on the wall, please ensure that cable feed is pointing downwards.
The IPX rating scale of this device is IPX0. We recommend using Cat6 shielded cables.
Grounding
The device has a grounding wing nut attached to the back of its case. You can attach a grounding wire to this wingnut and connect it to a grounding bus
bar that is typically available in a server room and which is then connected to earth ground.
Operating System Support
 Loading...