8-2
Chapter 8 PERIODIC INSPECTION AND MAINTENANCE PROCEDURES
Belt and belt tension - Inspect and Adjust
Belt - Inspect
1. Inspect the belt visually for separation or damage. If any abnormality is found, replace the belt with a new one.
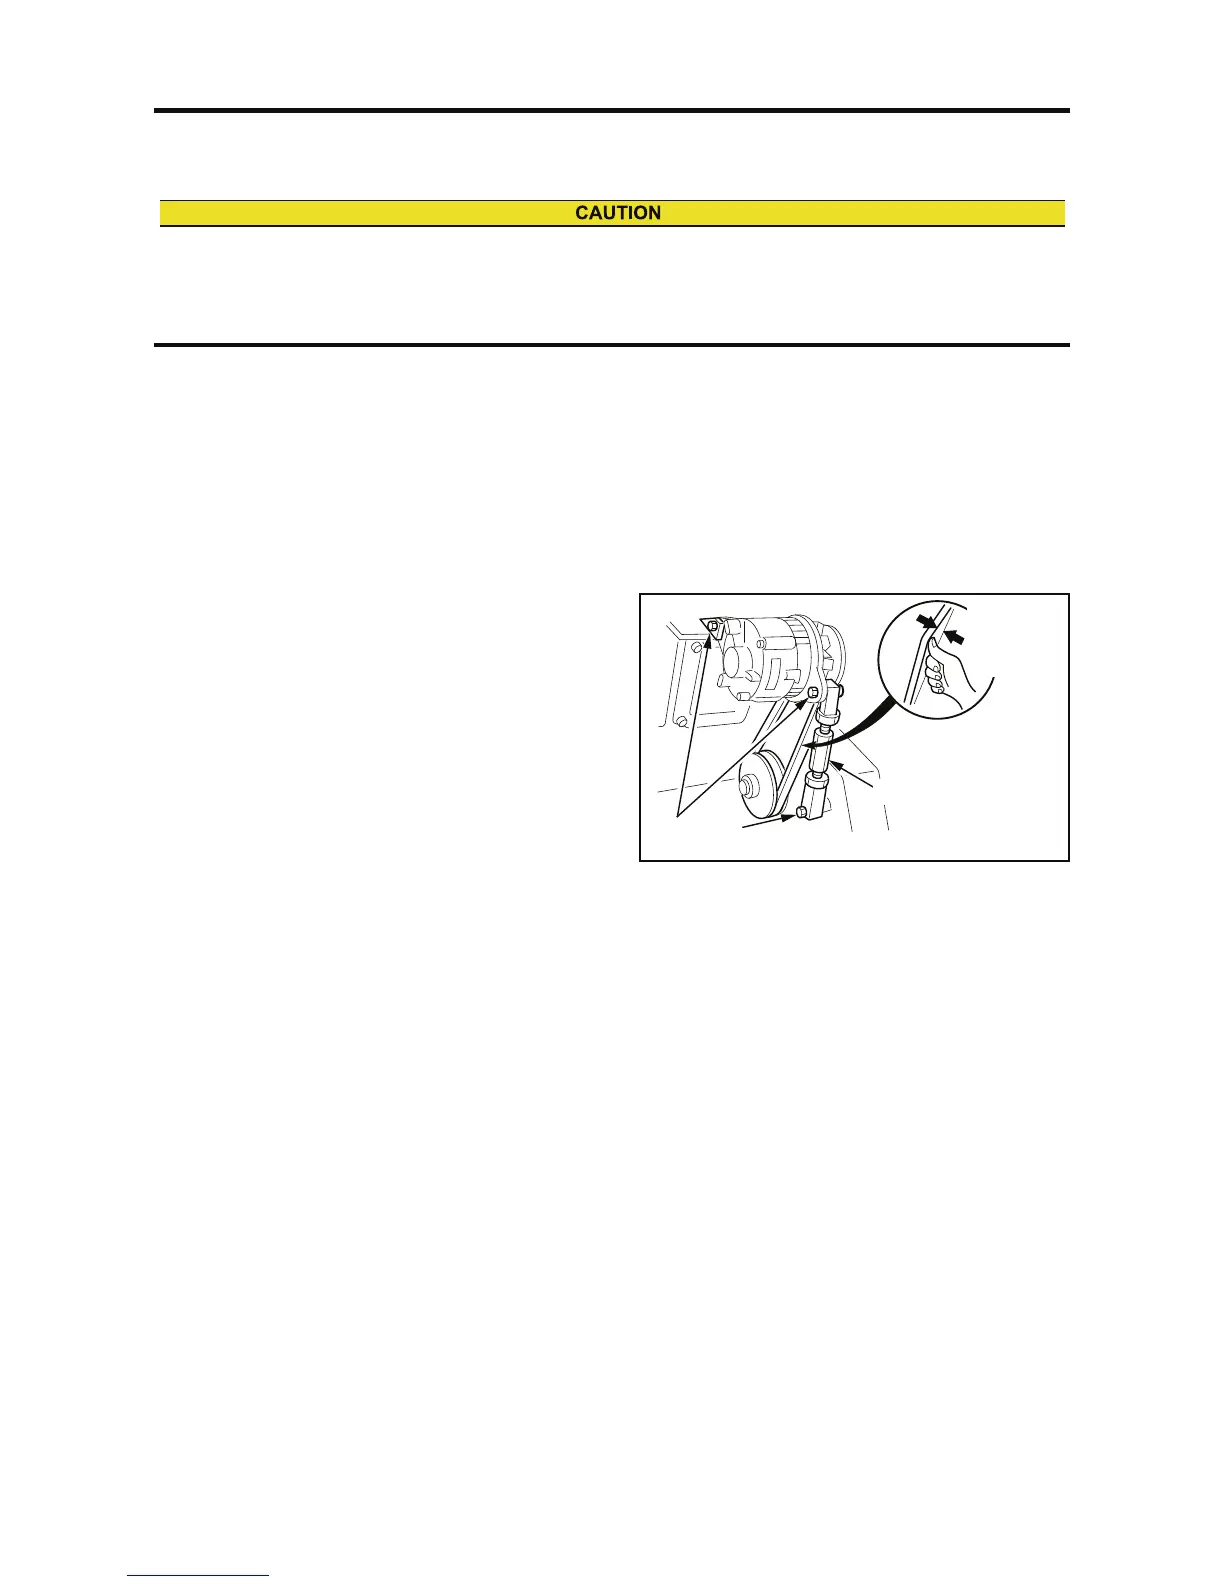
2. Inspect belt tension (deflection).
Push the belt downward at the midway between pulleys. If the deflection is 10 to 15 mm [0.39 to 0.59 in.], the
tension is correct.
Belt pushing force: Approx. 98 to 147 N {10 to 15 kgf} [22.05 to 33.07 lbf]
If the deflection of belt is not within the standard, adjust the belt tension.
Belt tension (Alternator side) - Adjust
1. Remove the belt cover.
2. Loosen all retaining bolts of the alternator and ad-
justing rod.
3. Loosen the upper and lower lock nuts on the ad-
justing rod.
Note: That the lower nut on the adjusting rod has left-
hand threads.
4. Turn the adjusting rod to adjust the belt tension.
5. After adjusting deflection, fix the upper and lower
lock nuts.
6. Tighten all retaining bolts of the alternator and ad-
justing plate.
7. Reinstall the belt cover and front cover.
Fig. 8-1 Belt and belt tension - Inspect and Adjust
If defects such as cuts or surface separations are found during inspection, replace the belt.
Keep oil and grease away from the belt. They may cause the belt to slip and shorten the service life.
Excessive belt tension can cause rapid wear of the alternator bearing and shorten the service life of the belt.
Adjust the belt tension accurately by following the procedures below.
Approx.
10 to 15 mm
[0.39 to
0.59 in.]
Mounting
bolts
Adjusting rod
 Loading...