User Manual
Mounting and Installation Notes
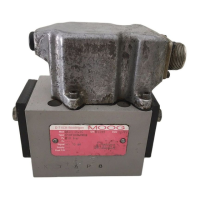
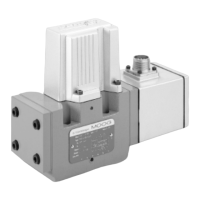
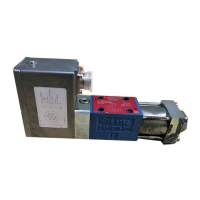
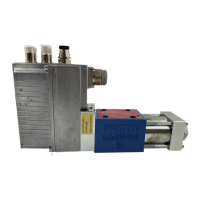
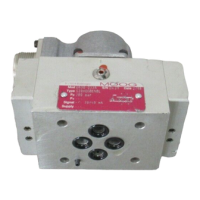
Servo Pressure Valves
D816 Series
1 Hydraulic Fluid
Mineral oil based hydraulic fluid according to DIN 51524,
parts 1 to 3, (ISO 11158).
Other hydraulic fluids on request.
Viscosity: 5…400 mm²/s, recommended 15…100 mm²/s.
Temperature range: Ambient T
A
–20…60 °C, fluid
T
F
–20…80 °C.
Class of cleanliness: According to ISO 4406:1999 at
least class 18/15/12; for longer life, class 17/14/11 rec-
ommended.
The cleanliness of the hydraulic fluid greatly influences
the functional safety and the wear and tear. In order to
avoid malfunctions and increased wear and tear, we rec-
ommend filtrating the hydraulic fluid accordingly.
Flushing instruction: Use of flushing plates or flushing
valves according to the machine manufacturer’s instruc-
tions.
2 Installation
Compare model number and type with that specified on
hydraulic schematic. The valve can be mounted in any
position, fixed or movable. The venting screw has to
point upwards.
Mounting surface: Check for flatness (< 0.01 mm over
100 mm) and finish (R
a
< 0.8 µm). Care must be taken to
ensure that contamination does not enter the hydraulic
system, all work areas must be clean of surface or air-
borne contamination.
Mounting: Socket head screws according to
DIN EN ISO 4762, grade 10.9, torque diagonally alter-
nating.
3 Operating Pressure
Maximum operating pressure p
P
: See nameplate.
4 Electrical Connection
CAUTION: Connectors, mating connectors (plugs) and
connection cables must not be misused, e.g., as a tread
or transport fixture.
Electrical safety: The insulation materials employed are
designed for use in the safety extra-low voltage range.
To comply with safety regulations requires isolation from
the mains according to EN 61558-1 and EN 61558-2-6
and limiting all voltages according to EN 60204-1.
We recommend using SELV/PELV power supplies.
Rated signal: See nameplate.
Valve phasing: A positive signal (D–E) causes valve
opening PtA.
Connector wiring: See wiring schematic tag attached to
electronics housing, or refer to the catalog or the installa-
tion drawing.
Connection: Signal lines shielded, shielding connected
at both ends and additionally connected to reference po-
tential (0 V) at the control side (to improve EMC). Con-
nect the protective conductor.
Observe technical note TN 353.
5 Hydraulic System Start Up
Follow the operation instructions given by the machine
manufacturer.
Pay attention to the pressure setting, the venting instruc-
tions and the alarm messages!
6 Null Adjustment (Pressure)
Remove the locking screw with sealing ring from the
cover of the electronics housing to access the null ad-
justment potentiometer. Turning the potentiometer shaft
results in a spool position or pressure change. Turning
clockwise will increase valve opening PtA or pressure.
After adjustment refit the sealing ring and the locking
screw.
CAUTION: Observe the machine manufacturer’s instruc-
tions.
7 Returning for Repair
When returning a defective valve to the factory it is im-
portant to ensure that contamination does not enter the
valve ports. Ideally, re-use the original shipping plate
supplied with the valve or apply adhesive tape over the
valve ports.
Package the valve carefully to prevent further damage
during transportation.
8 Replacing O rings
The mounting surface O rings may be replaced by the
customer. Pay attention to cleanliness of the valve and of
the surroundings.
Series
Pattern to
ISO 4401
Socket
head screw Pcs.
Torque
[Nm]
D816 03-03-0-05 M5 x 30 4 6.8
Benutzerinformation
Montage- und Inbetriebnahme-Hinweise
Druck-Servoventile
Baureihe D816
1 Hydraulikflüssigkeit
Hydrauliköl auf Mineralölbasis gemäß DIN 51524, Teil 1
bis 3, (ISO 11158).
Andere Hydraulikflüssigkeiten auf Anfrage.
Viskosität: 5…400 mm²/s, empfohlen 15…100 mm²/s.
Temperaturbereich: Umgebung T
U
–20…60 °C, Flüssig-
keit T
F
–20…80 °C.
Sauberkeitsklasse: Gemäß ISO 4406:1999 mindestens
Klasse 18/15/12, für erhöhte Standzeit Klasse 17/14/11.
Die Sauberkeit der Hydraulikflüssigkeit hat großen Ein-
fluss auf Funktionssicherheit und Verschleiß. Um Stö-
rungen und erhöhten Verschleiß zu vermeiden, empfeh-
len wir die Hydraulikflüssigkeit entsprechend zu filtern.
Spülanweisung: Verwendung von Spülplatten oder
Spülventilen gemäß Hinweisen des Maschinen-/
Anla-
genherstellers.
2Einbau
Modell-Nr. und Typ mit Angaben im Hydraulikschaltplan
vergleichen. Das Ventil kann in jeder Lage, fest oder be-
weglich eingebaut werden. Die Entlüftungsschraube
muss nach oben zeigen.
Montagefläche: Auf Ebenheit (< 0,01 mm auf 100 mm)
und Rauhtiefe (R
a
< 0,8 µm) prüfen. Beim Einbau des
Ventils auf Sauberkeit des Ventils und der Umgebung
achten.
Befestigung: Innensechskant-Schrauben gemäß
DIN EN ISO 4762, Güteklasse 10.9, diagonal wechselnd
anziehen.
3 Betriebsdruck
Max. zulässiger Betriebsdruck p
P
: Siehe Typenschild.
4 Elektrischer Anschluss
ACHTUNG: Stecker, Steckverbinder und Anschlusslei-
tungen dürfen nicht zweckentfremdet werden, wie z. B.
als Tritthilfe oder Transporthalterung.
Elektrische Sicherheit: Die verwendeten Isolierungen
sind für den Schutzkleinspannungsbereich ausgelegt.
Die Einhaltung der Sicherheitsvorschriften erfordert eine
Isolierung vom Netz gemäß EN 61558-1 und
EN 61558-2-6 und eine Begrenzung aller Spannungen
gemäß EN 60204-1. Wir empfehlen die Verwendung von
SELV-/PELV-Netzteilen.
Nennsignal: Siehe Typenschild.
Wirkrichtung: Bei positivem Signal (D–E) ergibt sich
Ventilöffnung PtA.
Steckerbelegung: Siehe Anschlussplan am Elektronik-
gehäuse, im Katalog oder auf der Einbauzeichnung.
Anschluss: Signalleitungen geschirmt, Schirm beidsei-
tig auflegen und zusätzlich steuerungsseitig mit Be-
zugspotenzial (0 V) verbinden (wegen EMV). Schutzlei-
ter anschließen.
Technische Notiz TN 353 beachten.
5 Hydraulikanlage in Betrieb setzen
Inbetriebnahme-Anleitung des Maschinen-/
Anlagenher-
stellers befolgen.
Druckwerteinstellung, Entlüftungsvorschrift und Störmel-
dungen beachten!
6 Nulleinstellung (Druck)
Nach Entfernen der Verschlussschraube samt Dichtring
am Deckel des Elektronikgehäuses wird ein Mehrgang-
Potentiometer zugänglich. Durch Drehen der Potentio-
meterwelle wird die Steuerkolbenposition bzw. der Druck
verändert. Drehen im Uhrzeigersinn vergrößert die Ven-
tilöffnung PtA bzw. den Druck. Nach Abschluss der Ein-
stellarbeiten Dichtring und Verschlussschraube wieder
anbringen.
ACHTUNG: Hinweise des Maschinen-/
Anlagenherstel-
lers beachten.
7 Rücksendung zur Reparatur
Zur Rücksendung eines defekten Ventils ist es erforder-
lich, eine saubere Staubschutzplatte an der Ventilgrund-
fläche zu befestigen oder diese abzukleben.
Ventil sorgfältig verpacken, damit es während des Trans-
ports zu keinen weiteren Beschädigungen kommt.
8 Tausch der O-Ringe
O-Ringe der Montageflächen dürfen vom Kunden ge-
tauscht werden. Es ist dabei auf Sauberkeit des Ventils
und der Umgebung zu achten.
Baureihe
Lochbild
gemäß
ISO 4401
Innen-
sechskant-
Schraube Stück
Anzugs-
moment
[Nm]
D816 03-03-0-05 M5 x 30 4 6,8
© 2003, 2008 Moog GmbH, Hanns-Klemm-Str. 28, 71034 Böblingen, Germany
www.moog.com/industrial, our locations: www.moog.com/worldwide
B97072-816; Ver. 3.0, 04/08
All rights reserved.
Subject to Changes.
© 2003, 2008 Moog GmbH, Hanns-Klemm-Str. 28, 71034 Böblingen, Deutschland
www.moog.com/industrial, unsere Standorte: www.moog.com/worldwide
B97072-816; Ver. 3.0, 04/08
Alle Rechte vorbehalten.
Änderungen vorbehalten.