UPDATE INSTRUCTIONS FOR WINDOWS (continued)
8. When the transmission is complete, the Sub 37 will restart itself with the new rmware.
NOTE: If the display was blank in the preceding steps, it will remain blank until the update process is completed.
Keep going…
9. Refresh the Sub 37 USB connection to SendSX again: click the MIDI Out menu and make sure the Sub 37 is still
selected as the MIDI Out device.
10. Click File, Open and open the le named sub37_1_2_0_step3.syx. Click the Send button or press F4. The Sub 37
will briey show a message, and then go blank. Then the ARP RATE LED will blink rapidly.
NOTE: If the rmware update process failed on a previous attempt, the ARP RATE LED will still blink, but the display
may remain blank, and all the lights may be lit.
11. Click File, Open and open the le named sub37_1_2_0_step4.syx. Click the Send button or press F4. You should
see the MIDI LED ashing red on the Sub 37. The le sending process may take more than 15 minutes to complete.
When the transmission is complete, your Sub 37 will restart itself using the new rmware. The rmware update is now
complete, but it’s a good idea to turn the Sub 37 power off and on again after a rmware update and before using the
Sub 37 for performance or music production work.
You can check the rmware version number by powering on your Sub 37 while holding CURSOR, or by going to the
last page of the GLOBALS menu.
FINISH UPDATE INSTRUCTIONS FOR WINDOWS
UPDATE INSTRUCTIONS FOR MAC OSX
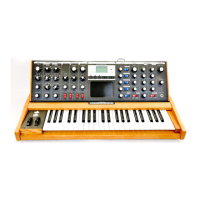
1. Connect a USB cable from the Sub 37 directly to your computer.
NOTE: (Avoid using a USB hub if possible, as many USB hubs do not work reliably and can cause the update to fail.)
2. Turn on your Sub 37.
3. Launch the SysEx Librarian application. Click the “Destination” pull-down menu at the top of the SysEx Librarian
window, and select Moog Sub 37.
4. Click the SysEx Librarian menu and choose Preferences. On the Preferences page, click the Transmit Speed tab. Set
the Speed for Moog Sub 37 to 50%. Close out of the Preferences window.
NOTE: If you have any problems sending the update les, try setting the Speed to 25% and repeating the update
process from the beginning. Turn the power to the Sub 37 off and back on again before repeating the update process.
5. At the bottom of the SysEx Librarian window, click the Add button. This will open a le chooser window. Navigate to
the folder “Sub 37 Firmware v1.2.0/Manual Install”. Select all four sysex les (sub37_1_2_0_step1, step2, step3, step4.
syx) by holding Shift + clicking each le name, then click Open. This will add all four les to the SysEx Librarian Playlist.
6. In the Playlist (main area of the SysEx Librarian window), click on the le named sub37_1_2_0_step1.syx, and then
click the Play button in the upper left. This will send the Step 1 le to the Sub 37. After a pause, the red MIDI LED on
the Sub 37 will blink slowly three times. Then it will stop blinking, and the ARP RATE LED will begin blinking about
once per second. The display may also read: “FIRMWARE UPDATE: Flash Erased - Ready for Code.”
NOTE: If the display is blank due to a previous failed update, but the ARP RATE LED is blinking, you may still proceed.
The display will remain blank, but the rmware update will still work.
CONTINUED ON THE NEXT PAGE

 Loading...