Do you have a question about the Motomaster ELIMINATOR 011-1969-4 and is the answer not in the manual?
Covers general safety, electrical hazards, and handling of battery acid.
Highlights dangers of explosive gases near lead-acid batteries and essential precautions.
Advises on personal protection, handling battery acid, and avoiding sparks near batteries.
Steps for connecting the charger to a battery while it is installed in a vehicle.
Steps for connecting the charger to a battery that has been removed from the vehicle.
Important precautions to take when connecting and disconnecting DC output clips.
Troubleshooting no power or amber fault LED indicating power status or poor connection.
Troubleshooting reverse polarity connection errors indicated by a solid red LED.
Addressing battery voltage issues or defective batteries indicated by a flashing red LED.
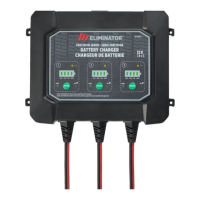
Explains the 4-LED indicator for battery charge status (25%, 50%, 75%, 100%).
Details the amber and red LEDs indicating power status, faults, or reverse polarity.
Describes the 6 charging modes (1A Norm, 1A Cold/AGM, 7A Norm, 7A Cold/AGM, Reconditioning, Power Supply).
Steps for connecting the charger, plugging in, and selecting a charging program.
Explanation of the charger automatically entering Maintain mode upon full charge.
How battery discharge level, size, age, and condition impact charging duration.
Effect of battery chemistry, charge rate, and ambient temperature on charging speed.
Explains the initial stages for recovering sulphated batteries and gentle charging.
Details the main charging phases for reaching 80% and then 100% capacity.
Describes battery testing and the final stage for maintaining full charge.
Covers general safety, electrical hazards, and handling of battery acid.
Highlights dangers of explosive gases near lead-acid batteries and essential precautions.
Advises on personal protection, handling battery acid, and avoiding sparks near batteries.
Steps for connecting the charger to a battery while it is installed in a vehicle.
Steps for connecting the charger to a battery that has been removed from the vehicle.
Important precautions to take when connecting and disconnecting DC output clips.
Troubleshooting no power or amber fault LED indicating power status or poor connection.
Troubleshooting reverse polarity connection errors indicated by a solid red LED.
Addressing battery voltage issues or defective batteries indicated by a flashing red LED.
Explains the 4-LED indicator for battery charge status (25%, 50%, 75%, 100%).
Details the amber and red LEDs indicating power status, faults, or reverse polarity.
Describes the 6 charging modes (1A Norm, 1A Cold/AGM, 7A Norm, 7A Cold/AGM, Reconditioning, Power Supply).
Steps for connecting the charger, plugging in, and selecting a charging program.
Explanation of the charger automatically entering Maintain mode upon full charge.
How battery discharge level, size, age, and condition impact charging duration.
Effect of battery chemistry, charge rate, and ambient temperature on charging speed.
Explains the initial stages for recovering sulphated batteries and gentle charging.
Details the main charging phases for reaching 80% and then 100% capacity.
Describes battery testing and the final stage for maintaining full charge.
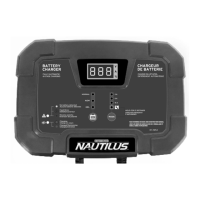
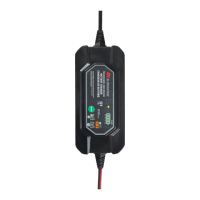
The MotoMaster Eliminator® Precision Series Battery Charger is an advanced device designed for charging and maintaining 12-volt lead-acid batteries. It aims to make battery charging faster, easier, and safer, while also maximizing the performance and life of your batteries.
This battery charger is engineered to work with all types of 12-volt lead-acid batteries, including Wet (flooded), Maintenance-free (MF), Calcium (Ca), Enhanced Flooded (EFB), Absorbed Glass Mat (AGM), and Gel batteries. It is suitable for charging batteries with capacities ranging from 5 to 140 Amp-hours and for maintaining batteries from 5 to 500 Amp-hours. The charger utilizes a multi-stage charging process to ensure optimal battery health and longevity.
The charger incorporates a user-friendly interface with a 4-LED charge status indicator (25%, 50%, 75%, 100%) that provides an estimate of the battery's state of charge as charging progresses. During charging, the corresponding state of charge LED will flash. Once the 100% LED lights solid (stops flashing), the battery is fully charged, and the charger enters the Maintain stage.
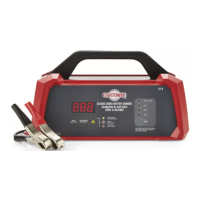
The device offers six distinct charging modes, accessible by repeatedly pressing the MODE button for the four regular modes. To select the two special modes (RECONDITIONING or POWER SUPPLY), the MODE button must be held for 3 seconds. Charging automatically begins approximately 5 seconds after a mode is selected. A convenient feature is that the battery charger retains the last selected mode in memory, and if AC power is disrupted, it will restart in the last chosen mode once power is restored.
The charging process involves connecting the charger clamps to the battery terminals, ensuring proper polarity, and then plugging the charger's AC plug into an electrical outlet. The MODE button is then used to select the desired charging program. If no selection is made within 5 seconds, the charger defaults to the last selected mode and begins charging automatically. Once the battery reaches full charge, the charger transitions into Maintain mode to safely keep the battery topped up without the risk of overcharging.
The charger also features a fault/error indicator that continuously monitors charge progress and collects feedback from the battery. If an abnormal condition is detected, charging will stop, and the indicator will illuminate to signal one of three error conditions:
The manual emphasizes several safety instructions, including reading all warnings and cautions, avoiding exposure to rain or snow, and using only attachments recommended by the manufacturer. It advises against operating the charger with damaged cords or plugs, or if it has been dropped or otherwise damaged. Disassembly of the charger should only be performed by a qualified service professional. Unplugging the charger from the outlet before maintenance or cleaning is also recommended.
Working near lead-acid batteries carries a risk of explosive gases. Users are advised to have someone nearby for assistance, keep fresh water and soap handy for acid contact, and wear complete eye and clothing protection. Smoking, sparks, or flames should be avoided near the battery or engine. Removing personal metal items like rings and watches is also important to prevent short circuits and severe burns. The charger should only be used for charging lead-acid batteries and not for dry-cell batteries. Charging a frozen battery is strictly prohibited.
When connecting the charger, users should ensure the area is well-ventilated, clean battery terminals, and add distilled water to cells if necessary. The charger should be located as far away from the battery as DC cables permit, never placed directly above the battery, and battery acid should not drip on the charger. Operation in closed-in areas or restricted ventilation is not advised.
To ensure the longevity and proper functioning of the charger, it is recommended to wipe clean the cords and clamps after each use. The power and output cables should be stored neatly to prevent damage. The charger housing can be cleaned with a damp cloth and a mild cleaning agent. Always unplug the charger when not in use, and store it in a cool, dry place.
| Model Number | 011-1969-4 |
|---|---|
| Battery Voltage | 12V |
| Boost Amperage | 50A |
| Type | Automatic Battery Charger |
| Input Voltage | 120V AC |
| Charging Amperage | 2A |
| Output Voltage | 12V DC |
| Battery Type | AGM, Gel |
| Charging Modes | Trickle, Boost |
| Output Current | 2A/10A |